

.svg)
.svg)
.png)

Enter Child Details

Add Profile Photo


Videos you might be interested in


Videos you might be interested in
Videos you might be interested in
Suggested for you
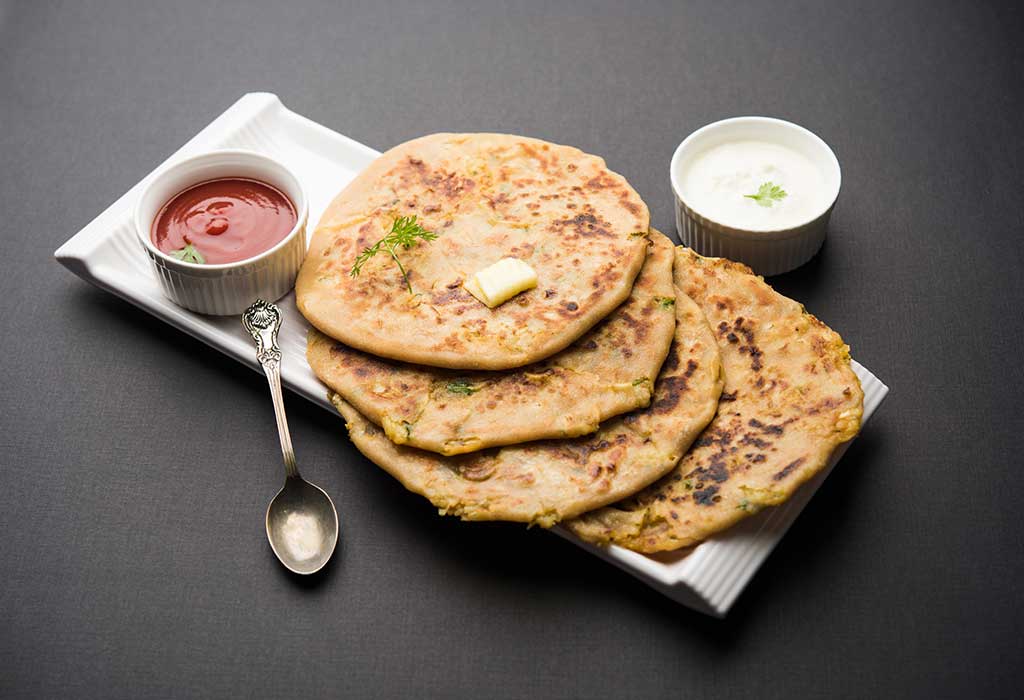
Start Your Mornings with These Simple North Indian Breakfast Recipes
A healthy breakfast kick-starts our day and gives us the energy to perform different activities. Having breakfast daily also improves our focus. Breakfast is the most important meal of the day, and you must never skip your breakfast. If you are bored of eating the same old eggs or cereals in your breakfast, explore different options. We bring you the recipes of breakfast items that are popular in north India. Start your day with these.
North Indian Breakfast Recipes
Listed below are ten north Indian breakfast dishes for you to try from.
1. Ajwain Puri
This simple, delectable breakfast item can be eaten with a vegetable curry, curd, or tea.
Ingredients
Wheat flour – 2 cups
Ajwain (Carom seeds) – 1 tbsp
Chilli powder – 1 tsp
Vegetable oil – 250 ml
Salt to taste
How to Make
Take the wheat flour in a large plate and add the carom seeds, chilli powder, a few drops of vegetable oil and salt to it.
Use water to knead the dough.
Divide the dough into small balls.
Take one ball on the rolling board and roll it to form a small circle.
Heat the oil in a kadhai and fry the puri until it turns slightly golden.
Repeat the process to make more puris.
2. Aloo Paratha
It is the quintessential breakfast item in most north Indian households. You can have it with curd and pickle.
Ingredients
Potatoes - 2
Roasted cumin-coriander (ground) – 2 tsp
Chilli powder – ½ tsp
Coriander (finely chopped) – 2-3 tbsp
Ghee or vegetable oil – 4-5 tbsp
Wheat flour – 2 cups
Salt to taste
How to Make
Pressure cook the potatoes for 3 whistles.
Once the potatoes are cooked, allow them to cool for some time. Once they are cool, peel them and grate them.
Add all the spices, chopped coriander, and salt to the grated potatoes and mix well.
Take the wheat flour in a plate and add some water and start kneading the dough.
Once the dough is kneaded properly, take small balls from it.
Take one ball, and roll it into a 3-4-inch circle using a rolling pin.
Place the potato filling in the centre of the circle and press it gently.
Bring together the edge of the circle and seal it.
Now roll it again to form a bigger circle.
Heat a pan and cook the paratha from both the sides using little ghee or oil.
Repeat the process with the remaining dough.
3. Cheela
This simple and nutritious dish is perfect for breakfast. Cheela tastes best with garlic chutney or a tomato-chilli dip.
Ingredients
Moong dal – ½ cup
Onion (finely chopped) - 1
Green chilli (chopped) – 1
Tomato (chopped) – 1
Coriander (chopped) – 2 tbsp
Oil – 50 ml
Salt to taste
How to Make
Soak the moong dal overnight and grind it the next day to form a fine paste.
Add the chopped onions, tomatoes, green chilli, coriander, and salt.
Heat a non-stick pan, add very little oil to it, and pour one ladle of the batter on it. Spread the batter quickly to form a small circle.
Cook the cheela from both the sides.
Once done, serve with green chutney.
4. Poha
Poha is a light and healthy breakfast and it tastes delicious too. It is a popular breakfast in north India as well as central India.
Ingredients
Beaten rice (poha) – 250 gms
Mustard seeds – 1 tsp
Green peas – 100 gms
Potato(diced) – ½ cup
Onion (finely chopped) – ½ cup
Green chilli (chopped) – 1
Turmeric powder - ½ tsp
Red chilli powder – ½ tsp
Coriander leaves (finely chopped) – 1 tbsp
Vegetable oil – 4-5 tbsp
Sugar – A pinch
Salt to taste
How to Make
Wash the poha 3-4 times and strain out the water. Keep aside.
Heat the oil in a kadhai. Add the mustard seeds to it and let them splutter.
Add the onions and green chilli and sauté till the onions turn translucent.
Add the peas and diced potato and sauté well. Cover the kadhai with its lid for a 3-4 minutes to cook the potatoes.
Once the potatoes are cooked, add the turmeric powder, chilli powder, and salt.
Now add the poha and mix well.
Let the poha cook for some time, then turn off the flame. Garnish it with coriander leaves.
5. Egg Bhurji
Eggs make a perfect breakfast and we all love to eat it. Egg bhurji is a popular breakfast in North India. It can be eaten with roti, paratha, and bread.
Ingredients
Eggs – 4
Onion (chopped) – 3-4 tbsp
Green chilli (chopped) – 2-3 tbsp
Coriander leaves (chopped) – 2-3 tbsp
Tomato (chopped) – 3-4 tbsp
Oil – 4-5 tbsp.
Salt – to taste
How to Make
Beat the eggs in a big bowl and whisk them well.
Heat some oil in a non-stick pan. Add the onions, chilli to it and sauté till the onions turn golden brown.
Then add the tomatoes and all stir again.
Lastly, pour the mixture of whisked eggs into the pan and let it cook. Once it is cooked, scramble it.
Add the salt as per your taste and mix well.
Serve with roti or paratha.
6. Bread Upma
This breakfast can be made with leftover bread. You may also serve it with tea in the evening.
Ingredients
Bread – 4-5 slices
Mustard seeds – ½ tsp.
Curry leaves – 3-4
Onion (chopped) – 1
Small tomato (chopped) – 1
Green Peas – 1/4 cup
Peanuts – 1-2 tbsp
Turmeric – 1 tbsp.
Chilli powder – ½ tsp.
Green chilli (chopped) – 1 tbsp.
Coriander leaves (chopped) – 1/4th cup
Salt – to taste
Vegetable oil – 2-3 tbsp.
Water – as required
How to Make
In a pan, fry the peanuts well.
Chop the bread slices into cubes.
Heat oil in a kadhai and add mustard seeds to it and let it splutter.
Add the hing, curry leaves and onions and fry till the onions turn golden brown.
Add the tomatoes, green peas, turmeric, and salt.
Once the tomatoes become soft, add chilli powder.
Sprinkle some water and cook for some time.
Then add the bread cubes and peanuts and stir the mixture.
Cook it for a few minutes to make the bread cubes crisp.
Garnish with the chopped coriander and serve warm.
7. Paneer Paratha
Paneer paratha is a very popular breakfast dish in north India. Paneer paratha can be eaten with pickle, curd, or with a cup of tea.
Ingredients
Paneer (grated) – 100 gms.
Wheat flour – 1 cup
Onion (diced) – 1
Green chilli (chopped) – 1
Ginger (minced) – 1-2 tsp
Red chilli powder – 2 tsp
Coriander leaves (chopped) – 3-4 tbsp
Salt to taste
Vegetable oil - 4-5 tbsp
How to Make
Knead smooth and fine dough.
In a bowl mix the grated paneer, onion, coriander leaves, green chilli, salt, red chilli powder, and ginger.
Take the wheat flour in a large bowl, add some water to it to and knead the dough.
Keep the dough aside for 20 minutes.
Take a ball from the dough, and roll it to form a 4-inch circle.
Place the paneer filling in the centre of the rolled out mixture.
Take the edges of the rolled dough together and seal it.
Roll it again and make a bigger circle.
Heat a tawa, pour some oil on it, and place the rolled mixture on it. Cook the paratha from one side. Apply oil on it.
Then flip it, apply some oil and cook from the other side.
Cook over low flame till both sides are golden brown.
8. Koraishuti (Green peas) Kachori
Koraishuti kachauri a Bengali breakfast dish. Serve it with aloo dam (cooked in the Bengali way) and pickle.
Ingredients
Peas – 250 grams grams
All purpose flour (maida) – 2 cups
Asafoetida – 1/4th tsp
Cumin seeds – 1 tsp
Ginger (grated) – 1 tbsp
Fennel seeds – 1 tbsp
Coriander seeds – ½ tbsp
Red chilli powder - 1 tbsp
Garam masala powder – ½ tbsp
Green chilli (finely chopped) – 1 tbsp
Sugar – ½ tsp
Besan – 2 tbsp
Salt to taste
Vegetable oil
How to Make
In a bowl take the all-purpose flour, some salt, 2 tbsp oil and give it a good mix.
Add water to knead the dough.
Cover the dough with a damp muslin cloth and let it sit for half an hour.
Meanwhile, roast the fennel seeds and coriander seeds together and grind it with a mortar and pestle.
Grind the matar in a blender to make a coarse paste.
Heat 2-3 tbsp of oil in a kadhai and add cumin seeds and hing.
Then add the grated ginger and sauté for 10 seconds.
Then add the matar paste, roasted fennel and coriander powder, red chilli powder, green chilli, salt, sugar, and garam masala powder, and mix well.
Then add the besan and fry it for another 2-3 minutes.
Turn off the flame and let the filling cool down.
Now take the dough and divide it into small balls.
Take a ball, roll it out a little, place the filling in the centre, and seal the ball.
Then roll it out again.
Heat the oil in a deep kadhai.
When the oil becomes very hot, lower the flame and place a kachori into the oil and fry till golden brown.
9. Paneer Sandwich
It is a delicious dish which can be eaten as breakfast or during tea time or can be packed in the lunch box.
Ingredients
Bread – 8 slices
Paneer (grated) – 1 cup
Onion (chopped) – ¼ cup
Cumin seeds – 1 tsp
Tomato (chopped) – ¼ cup
Green chillies (finely chopped) – 2 tbsp
Green peas – 1/4 cup
Capsicum – 1/4 cup
Turmeric powder – ½ tsp
Red Chilli powder – 1 tsp
Butter – 2-3 tbsp
Salt to taste
How to Make
In a non-stick pan, add 1 tbsp butter.
Add cumin seeds and once their colour changes, add the onions and chillies.
When the onion turns golden brown, add the tomato, capsicum, green peas, red chilli powder and turmeric powder and sauté it for a minute.
Then add the grated paneer and add salt. Cook it well for 2-3 minutes on medium-low flame.
Once done, leave it to cool.
Then spread the butter on a slice of bread and put a thick layer of the paneer filling on top of it.
Cover the bread slice with another one and grill it in a sandwich maker.
Serve it hot with tomato ketchup.
Follow the same procedure to make more sandwiches.
10. Rawa Dhokla
Rawa dhoklas are healthy and taste delicious too. Rawa dhoklas can be eaten for breakfast or even as a snack during tea time.
Ingredients
Semolina – 3-4 cups
Curd – 1 ½ cups
Green chilli (paste) - 3-4 tbsp
Vegetable oil – 5-6 tbsp
Baking soda – 1/4 tsp
Mustard seeds – 2 tsp
Sesame seeds – 2-3 tsp
Hing (Asafoetida) – 2-3 tsp
Coriander leaves (chopped) – 2-3 tbsp
Green chillies (slit) – 3-4
Curry leaves - a handful
Salt to taste
How to Make
Mix semolina, curd, green chilli paste, 1 tbsp. oil, salt and water (enough to make a thick paste) well in a bowl.
Let it sit for half an hour.
Meanwhile, heat 3-4 cups of water in a steamer.
Add the baking soda to the batter and give it a good whisk.
Grease a plate with oil and pour the batter and spread it evenly by shaking the plate few times.
Put the plate in the steamer and cover it with a lid. Cook for about 12-15 minutes (to check if it is cooked, take a toothpick and prick the dhokla; if it comes out clean, it is cooked).
Keep the cooked dhokla aside.
In another pan, heat oil and add the mustard seeds, sesame seeds, curry leaves, hing and whole green chillies, and sauté them for 10-20 seconds.
Pour the tempering mixture over the dhokla and garnish them with coriander leaves.
These are some yummy north Indian breakfast dishes that you can make for your family and enjoy with them. Try out the above breakfast recipes and have a wholesome breakfast.
Also Read:
Snacks You Can Eat in Your Office
What Happens When You Skip Breakfast?
Healthy Jowar Recipes You May Want to Try Read more
Suggested for you

How to Prepare for Going Back to Work After Maternity Leave
Returning to work after having a baby is something that most women would love to do, but are apprehensive about. Looking after your child is definitely a soul-filling, satisfying job to do- but that does not mean that you are under an obligation to do just that for the years to come. Going back to work is always a great idea, provided you have made the right arrangements and are prepared for it.
It is not as easy as it sounds- you will definitely be anxious and worried always when getting back to work after maternity leave. However, you are sure to calm down once you get to grips with the situation, and you will soon find yourself enjoying life even more. However, the important thing is to ensure that you have made the best arrangements for your child, and are prepared- both physically and emotionally- to get back into the real world. Here are ways to transition back to work after maternity leave smoothly.
Tips for Going Back to Work After Delivering the Baby
Some of the tips are:
1. Trustworthy Childcare
The answer to the question of who is going to look after your child has to be sorted out as early as possible. It has to be somebody you can trust to take care of your baby so that the baby is never harmed. If you have family members to look after your child, you are lucky - else, start searching for a good daycare facility. It is also important to remember that no time is too soon- especially considering that many great daycare facilities now even have a waiting list. So start searching for a good place as early as possible, even if that is before the child is even born - it plays a huge role in your mental well-being.
2. Plan Breastfeeding
Remember to check whether there are clean, empty areas at your workplace for breast pumping. Tell your employers about your situation, and make sure that you have the required facilities at your workplace, so as to be comfortable while breastfeeding. Another thing you can do is to start practising the new breastfeeding schedule as early as possible so that your child gets used to it by the time you return to work.
3. Stock Up
When you return to work after your maternity leave, you have to have a few essentials with you. This includes a breast pump, nursing pads and healthy snacks so that you are never hungry. A good breast pump not only does half the work for you but also reduces the hassle of breast pumping. Nursing pads are a must too, as a dress stained with breast milk is not something that you would love to show off! Snacks are important, as you may have been snacking more than you know when you are home caring for your child - all of these can make the transition very smooth.
4. Keep a Photo of the Child
You are definitely going to miss your child when you are at work, even if it is only for a short duration. After having had the child in close proximity for such a long time, mothers can be affected by separation anxiety really hard. So remember to keep a photo of the child with you always, so that you feel more comforted when you look at it- but remember to not look at it always, as you will end up missing your baby even more! Smartphones have definitely made our lives easier with regard to this aspect, haven't they!
5. Flexibility
There is no harm in asking, so ask your employer for flexibility regarding work matters if you can. Ask as early as possible, perhaps even before you give birth. This can give them time to prepare for it, and you might get flexible timings or even work-from-home options to help you care for the child better.
6. Set a Date
Set the date of returning to work to somewhere in the middle of the workweek. This can help you get to grips with the situation better, and you can ease back into your workplace much smoother.
7. No Changing Childcare
No matter how appealing the childcare you heard from your friend seems, do not change your current childcare. This is because babies take time to get comfortable with a person, and changing the facility frequently can result in the child being unsettled and anxious. Also, the relationship between the mother and the childcare is an important one too, so that you can discuss how your baby is doing and about her progress.
8. Quality Time
When you get back to work after your baby is born, the prospect of taking work back home to be near your baby can be an appealing one. However, this is counterproductive - not only are you too distracted to work properly, your baby will not get the attention he deserves either. So devote the time you spend at work to completing it, and ensure that your child gets quality time with his mother when you are back home.
9. Always Have Backup
No matter how well you have laid out plans regarding your child, they can all unravel in a jiffy. Your baby might get ill, or your babysitter might get ill - it all results in your plans being thrown to jeopardy. So always have a Plan B, which is sure to come in handy sometime or other. It can be a friend, family or even another babysitter.
10. Make a Cooking Plan
Cooking at home can be difficult once you start working, as you will want to spend that time bonding with your baby. So make up a cooking plan, and spread out cooking over the week. You can cook in bulk during the weekends, and use the time you get after work to better effect. It is best to split cooking duties with your partner so that both of you get time with the baby.
11. Sleep
Sleep is important for a mother, even if she is not going to work. You will soon find out that juggling between work and your child is harder than you think, so stock up on your sleep as much as possible - you will need it.
12. Don’t Make Big Decisions
The first few days of getting back to work are overwhelming - you will feel out of control with the situation and feel that everything is moving too fast for you. At this time, you might think that the whole thing was a mistake, and worse, you might even take the huge decision of quitting. So before taking any decisions you may regret, try to navigate the new environment for a few days.
13. Make An Effort
You might think that new clothes or putting on some makeup are not a big deal, but they influence you more than you know - it has been proven that women get a massive confidence boost through such simple tasks.
Getting back to work after pregnancy can feel overwhelming, and you might feel that caring for the baby is the right thing to do at such an early stage. Guilt is common among working mothers, but there is nothing to be guilty about - your child is a blessing, and should never be something that weighs you down! Work will be better for you in the long run, and you do not have to feel guilty at all if you have made the best arrangements for your child.
Also Read: Breastfeeding At Work Read more
Suggested for you

Suggested for you

Effective Home Remedies for a Summer Rash
During summers, prickly heat can cause your skin to break out in a rash. It is very uncomfortable for the skin. It can develop anywhere on the body. Here are some home remedies for a summer rash.
1. Neem Leaves
Neem leaves are known for their anti-inflammatory astringent and antibacterial elements. Neem will help reduce rashes on the skin.
How to Use
Make a smooth paste of neem leaves and apply on the affected areas.
After 20 minutes the paste will become dry.
You can use this every day before your bath.
After 20 minutes, wash off with cool water.
2. Aloe Vera
Aloe vera has a cooling effect on the skin which makes it an effective remedy for rashes.
How to Use
Extract aloe vera gel from the leaves.
Apply the gel on the affected areas.
The skin will absorb the gel.
You can use it every morning.
3. Cucumber
Cucumber has cooling effects on the skin. It will help clear your summer rash.
How to Use
You can drink cucumber juice. It will help to cool the body down completely.
Rub the cucumber slices on the affected area.
4. Sandalwood Powder
The moisture and cooling elements of sandalwood are very effective in soothing the skin.
How to Use
Take a bowl and add 2 tablespoons of sandalwood powder in it. Pour 1 tablespoon of low-fat milk into a bowl and make a smooth paste.
Apply on the affected areas of skin.
After 20 minutes wash it off the body.
You can use this two days a week.
5. Coconut Milk
Coconut milk provides the skin with nourishment.
How to Use
Apply the coconut milk on your body. It will naturally hydrate the skin.
You can use this every day before your bath.
6. Henna Powder
Henna has an antibacterial element which helps reduce itching.
How to Use
Take a bowl and add 2 tablespoons of henna powder. Add a little water to make a smooth paste.
Apply on the affected areas.
After 20 minutes, wash off the paste.
7. Oats
Oats can relieve the itch caused by the rash.
How to Use
Add a little water to 2 tablespoons of powdered oats to make a smooth paste.
Apply on the affected areas.
Wash off after 20 minutes.
8. Yoghurt
Yoghurt has cooling and soothing elements. It has antifungal and antibacterial properties.
How to Use
Apply yoghurt on the affected areas.
Wash off after 20 minutes
9. Chickpea Powder
It is also known as gram flour. It acts as a cleanser for the skin by removing dead skin cells.
How to Use
Add some water to 2 tablespoons of gram flour to make a smooth paste.
Apply on the affected areas. Wash off the paste after 20 minutes.
10. Ice Cubes
Ice can help soothe irritated skin.
How to Use
Cover the ice cube with a towel and gently place it on the affected areas of the skin.
Additional Tip: Wearing summer-friendly outfits will help prevent rashes. Applying cooling powder, cooling cream and oil will help reduce rashes.
Disclaimer: The views, opinions and positions (including content in any form) expressed within this post are those of the author alone. The accuracy, completeness and validity of any statements made within this article are not guaranteed. We accept no liability for any errors, omissions or representations. The responsibility for intellectual property rights of this content rests with the author and any liability with regards to infringement of intellectual property rights remains with him/her. Read more
Suggested for you
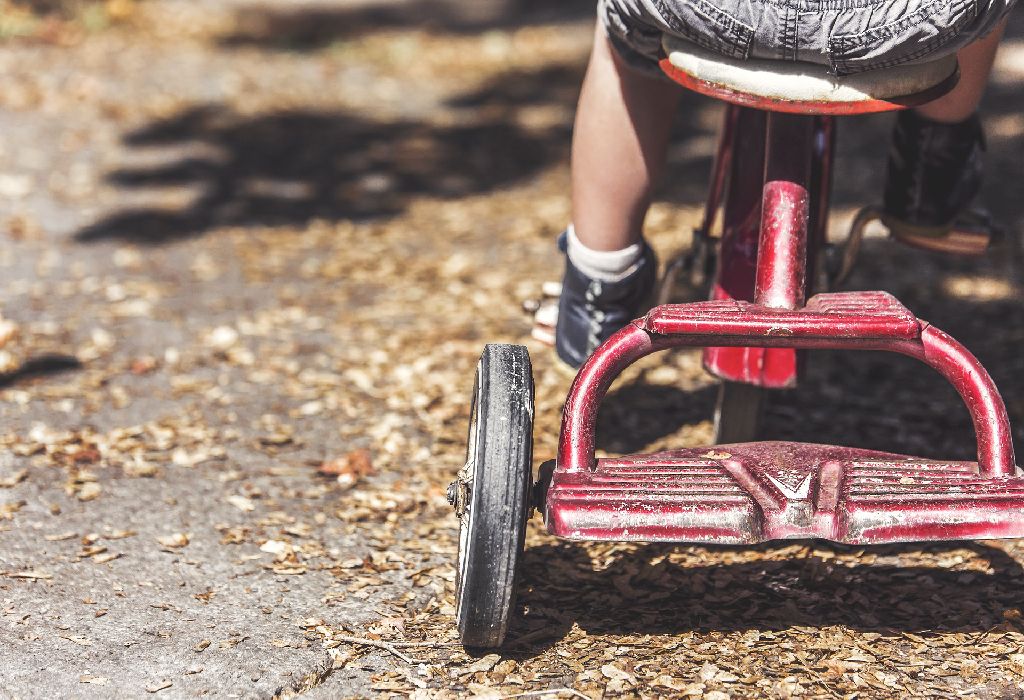
Your Two Year Old Toddler on a Tricycle
Have you been wondering at what age can a child pedal a tricycle? If he has touched the two-year mark, it's a safe age for him to pedal. Teaching your toddler to pedal a tricycle will only take a day. Allowing him to practice and become steady is necessary.
You need to have patience with your toddler when teaching him to pedal a tricycle. There are techniques and tricks you can employ to make the learning process easy. Try not to run out of patience.Here are some effective tips on teaching your toddler to pedal a tricycle.
Handy Tips for a Toddler Learning to Ride a Tricycle
1. The Initiation
The first step involves getting your little one a small tricycle. Ensure that the seat is comfortable. A good seat will prop him up to allow him to hold the handlebars. His feet should also be able to touch the pedals. In order for your toddler to really get the tricycle going, ensure that his knees are bent at the full extension point.
2. Safety
Safety is of utmost importance. Before your toddler starts to learn to ride a tricycle, ensure that his head is fitted with a helmet that is strapped on securely. Make it mandatory for him to wear a helmet before he rides a tricycle or a bicycle.
3. Position
In order to ensure your toddler’s safety, ensure that the tricycle is positioned in a safe zone. This will make the pedalling lessons go off without having to worry about your little one falling. A location with lots of grass(hint: the garden) that comes with a slight downward slope is perfect for that initial ‘push’.
4. Balance
Your little one will have to get his balance right to master the tricycle. His rear should be firmly planted on the tricycle seat with his hands firmly on the handlebars and feet on the pedals. These precautions will pave the way for a successful tricycle lesson.
5. The Push
You have to be the one that gives your toddler his first push on the tricycle. Keep reminding him to keep his hands on the bar and feet on the pedal. If his feet come off the pedal, stop the lesson and ask him to reposition them. You can then continue to push your toddler down the slope while urging him to start pedalling. If things go right, he will be smiling with glee for accomplishing the feat.
6. Persistence
Don't stop the pedalling lessons. Continue working with your toddler to ensure he gains experience with pedalling. The process will not be easy. It will probably be a few months before he is motivated to pedal without assistance. So, when can a toddler ride a tricycle? When he is confident.
If you stick to the plan, your little one should soon become adept at putting the pedal to the metal. There will be a few bumps and bruises along the way, but, aren't those a part of every learning process? Remember; when you're teaching a toddler to ride a tricycle don't ever forget to keep a close watch on the child. Read more
Suggested for you

8 Family Travel Traditions For a Wow Vacation
Do you love to go to vacations with your family? For it is the time to really sneak out of your individual busy lives and enjoy some endearing moments together as a family. Browse through our unique travel tradition ideas to get more out of your family trips.
Travel is much more than mere sight seeing. It rejuvenates you and gives you lots of fond memories to cherish forever. How about making your family trips more exciting and memorable by attaching them to some unique family travel traditions?
Family travel traditions are a terrific way to treasure your travel memories for a long time. Think of something simple that you can follow everywhere, something that makes you look forward to your next travel destination, something that can be passed on to generations! It's like having a piece of the country you have been to as a time-sake.
Discover Travel Tradition Ideas That Suit Your Family
1.Gather Things - from the Fleamarket to the Seashore!
Well, it could be anything unique to the local culture. You could get colloquial collector's stuff such as postcards, T-shirts, coasters, refrigerator magnets, key-rings, local currency or mementos from different places you visit. Or something unusual such as pebbles, shells, stones, or shot glasses from the vacation country. After all, there's something really special about those Swiss knives, French perfumes, and Ghana's dark chocolates.
2. Create Travel-Shelves at Home
Dedicate few travel shelves at home to proudly display your dear possessions. They will help you refresh yourself after a long day - and even encourage planning for the next trip!
3. Tap to Some New Music
Travel can be truly a great teacher - so can music! Create a holiday playlist by recording street music and dance videos of different countries. It will simply bring alive your moments spent there!
4. Learn Some Local Cooking
Resolve to learn a native recipe at each of your family travel vacations. It will entice you to prepare it back at home as well. Remember to take pictures. Later on, whenever you whip it up at home, it will remind you of your wonderful time at that country. You could keep on adding to your multi-cuisine recipes and pass them on to the future generations.
5. Create a Trademark Dance Experience
Do in Rome as Romans do - that's what they say! Take a family selfie at a famous spot, where all of you are wearing local costumes. Then make a time-lapsed video, slow motion video or a regular dance video where your family is dancing to the native tunes. It will be crazy fun!
6. Carry the "World Map" Around
If you're going for a cross-country hop, or even travelling to multiple cities, carry a world map with you. Point to the visiting country with a 'We were Here' caption in your group selfie. All of you can sign the map and keep it as a memorabilia for future.
7. Build a Scrapbook
This is an absolute must! Create a scrapbook, a journal, or a travel blog to collate all your favourite moments. You could also paste pictures, bus tickets, postcards, and any such flat items from your trip.
8. Create Your Personalised Travel Book
Write a little narrative about your stay; it will make a fun reading for future. Keep these narratives carefully stored at home. You could bind them into a book too.
So, stop wasting your time and money in hoarding random gifts from different countries. Decide on a travel tradition idea for your family to tie your travels with a common thread. Stay true to your chosen family holiday traditions and create some everlasting memories to look back at. Read more
Dr Ghouse has added a new answer
Trying To Conceive
8 hours ago
Q. Hello I had my period missed for April month and today I got my period. Is it normal to have period after 1 month or is there anything I should be worried about? Iam worried please let me know if that's ok or should I consult my doctor
Read more
Dr Ghouse
Paediatrician
8 hours ago
A. consult your doctor for any evaluation required. if there is no relief it is better you see your doctor for proper examination particularly physical examination if there is need for doing investigations to find out the problem and treatment ok
Dr Ghouse has added a new answer
Guardian of 0 children
8 hours ago
Q. hllo am in 34 week of pregnancy,cramps in my hand and foots,my pulses is very fast,i feel tiredness internally,are these symptoms are normal
Dr Ghouse
Paediatrician
8 hours ago
A. get investigations particularly hemoglobin level. if there is no relief it is better you see your doctor for proper examination particularly physical examination if there is need for doing investigations to find out the problem and treatment ok
Dr Ghouse has added a new answer
Guardian of 0 children
8 hours ago
Q. i feel some fever internally also
Dr Ghouse
Paediatrician
8 hours ago
A. please check the temperature and get the investigations. fever can be because of different reasons most of the times viral bacterial sometimes due to less immunity there can be recurrence better to treat only with paracetamol if the fever more than 100degr
Rashmi has added a new answer
Guardian of 0 children
7 hours ago
Q. Now I am having pain till then my miscarriage has been done at home

Rashmi
Mom of a 9 yr 8 m old girl
7 hours ago
A. I’m sorry I’m unable to understand your query as you haven’t given any detail about it so whatever the situation is you should get a check with your gynaecologist the doctor would be able to give you better help in whatever treatment of precaution you need to require further
shilpi Bhandari has added a new answer
Guardian of 0 children
3 hours ago
Q. Hello
What is better normal or csec?

shilpi Bhandari
Mom of 2 children
2 hours ago
A. hello dear this is not about which is better this is all about your body and the condition of the baby no doubt the normal procedure is the painful but side effect are not there but after C6 you have to be little more careful and you have to take more precaution but again I am saying that this is not about the better one this is about the condition of your pregnancy
Santu has added a new answer
Expecting Mom due this month
38 mins ago
Q. #asktheexpert
1) till how many days after delivery baby needs to keep on uterus temperatures/warm temperature?
2) Can baby & mother both take bath after 24 hours of delivery?

Santu
Mom of 2 children
35 mins ago
A. It depends on moms and babys health I feel and suggest It's better to check with your doctor and follow their advise. That would be one of the best and safest option for your baby as of now. Take care.
Check out this new Memory

Arpitha C R
Mom of a 2 m old boy
1 min ago
Like
Comment
Share
0 Likes
0 Comment
Check out this new Memory
Mitul Panchal
Father of a 2 yr 2 m old boy
3 mins ago
#stylishbaby

Like
Comment
Share
0 Likes
0 Comment
Check out this new Memory
Mohd Shoaib
Guardian of a 10 m old girl
3 mins ago
#grandphoto

Like
Comment
Share
0 Likes
0 Comment
Check out this new Memory

M Azeeem
Father of a 11 m old girl
5 mins ago

Like
Comment
Share
0 Likes
0 Comment
Check out this new Memory
Ameera Muneer
Mom of a 4 yr 1 m old girl
8 mins ago
#grandphoto

Like
Comment
Share
0 Likes
0 Comment
Tell us more about yourself get More Personalised
 Infant0 to 6 Months
 Baby6 Months to 2 Yrs
 Toddler2 to 4 yrs
 Kids4-6 yrs
 Big Kids6+ yrs
 Expecting
 Trying to Conceive

