

.svg)
.svg)
.png)

Enter Child Details

Add Profile Photo


Videos you might be interested in


Videos you might be interested in
Videos you might be interested in
Suggested for you
Homemade Peel Off Face Masks for Healthy and Clear Skin
Nowadays, peel off masks have gained a lot of popularity amongst fashionistas owing to their beneficial properties like lifting away grime and providing nourishment to skin thereby making it soft and moisturized. However, some studies have shown that they play a practical part in treating acne-prone skin, purging pores and extracting excessive oil from the skin, only if they contain charcoal, clay and glycolic acid. Read about some of the best face peel off masks you can make easily and quickly at home.
What are the Benefits of Peel Off Masks?
Besides giving a perfect radiance and firmness to your skin, peel off masks have numerous benefits. From deeply cleansing the skin to removing black-heads and dead skin cells from the skin, peel off masks aid in better circulation of blood too. So, it is time to uncover some wonderful benefits of peel off masks to achieve top-notch skin.
These masks make skin smooth and glowing by removing the top layer to slough away the dead skin cells.
By visibly reducing the size of open pores, the peel off masks add firmness to the skin to make it look younger and also boost skin complexion.
Also, if peel off masks become a part of your weekly routine, you may notice a huge reduction in the appearance of fine lines and wrinkles, especially if they have Vitamin C, E or extracts with anti-inflammatory properties.
Peel off masks tend to absorb excess oil from the skin, leaving you with a natural matte and clean complexion.
Generally peel off masks, regardless of the brand, are either plant-based or fruit extract-based that tend to give a healthy boost of antioxidants to your skin. And, antioxidants fixes major skin issues like dark spots, acne, pigmentation and uneven complexion.
Peel off masks gently uproot fine facial hair from your skin and remove dullness from your complexion.
How to Make Peel Off Masks at Home?
The market is flooded with different ranges of peel off face masks, but there is always a chance that those chemically synthesized products may not suit your skin type. If you opt for DIY peel off masks at home, you need not worry about skin compatibility issues and expiry dates. Moreover, homemade face masks will save you a lot of money. So put your face forward and know everything you need to know about face peel off masks.
Homemade Peel-Off Mask for Blackheads
Want to get rid of pesky blackheads? Here are two natural peel off masks to try:
1. Egg White & Lemon Juice Peel Off Mask
Egg white tightens the skin pores, while lemon juice contains alpha hydroxyl acids which help to keep the skin clean by removing blackheads and other impurities gently.
What You Will Need
1 egg white
1 teaspoon of fresh lemon juice
How To Use It
Take out egg white in a separate bowl and mix a spoonful of lemon juice in it. Apply it to your face leaving the eye area. Gently press the tissue on your face, dab some more freshly prepared egg white solution on the tissue to hold it in place. Leave it for 25-30 minutes. Once it gets dried, peel the mask slowly starting from your forehead.
2. Milk & Unflavoured Gelatin Peel Off Mask
This homemade peel off mask with gelatin will let you discover a squeaky clean skin by immediately removing the blackheads.
What You Will Need
1 spoon fresh raw milk
1 spoon unflavoured gelatin
How To Use It
Mix 1 tablespoon of both raw milk and gelatin together in a microwave-safe bowl. Heat it in the microwave for 5 to 10 seconds. Let it cool down and stir until it becomes thick like a gel. Then brush it on your face, let it dry for 10-15 minutes and finally peel it off slowly.
Homemade Peel-Off Mask for Acne
Try these effective homemade peel-off masks to reduce the instances of T-zone, acne and other skin impurities.
1. Charcoal & Gelatin Peel Off Mask
Activated charcoal takes away toxins from your skin, thereby reducing skin acne.
What You Will Need
1 tablespoon activated the charcoal powder
1 and a half tablespoon of gelatin powder
How To Use It
Mix the ingredients with some water in a bowl to form a thick paste. Since gelatin is bit sticky, so microwave it for 30 seconds to get a creamy texture. The mask can be applied on your face. Leave eyebrows and hairline because it will be painful to remove the mask from that particular area. Allow it dry for about 30 minutes and peel it off gently in the upward direction. Rinse off your face, pat it dry and apply a moisturizer.
2. Gelatin, Honey & Lemon Peel Off Mask
This is a different homemade recipe to try out amazing benefits of essential oils in your peel off face mask. Take a look:
What You Will Need
1 spoon gelatin powder
2 tablespoons of steamed milk
1 spoon fresh lime juice
1 spoon manuka honey
How To Use It
Start by mixing 1 spoon of gelatin powder with 2 tablespoons of steamed milk, then add honey and lemon juice, mix them well. To add some moisture to the mixture, you can add Vitamin E or tea tree oil (that’s optional). Also, a few drops of essential oils (either peppermint or lavender) when added to the mixture, will give you a nice consistency. Once the homemade mask is complete, apply it on your face and say bye-bye to acne spots or pigmentation.
Homemade Peel-Off Mask for Glowing Skin
Regardless of treating comedonal acne like blackheads and whiteheads, peel off masks when used regularly can also contribute to glowing and spotless skin.
1. Orange & Gelatin Peel Off Mask
Being rich in antioxidants, oranges not only just prevent acne, but also slow down the signs of ageing and rejuvenate skin to achieve that coveted glow. So drop off the idea of using pricey store-bought facial masks, instead, try this orange peel off mask at home to experience a completely bright and radiant skin.
What You Will Need
2 tablespoon of fresh orange juice
1 tablespoon of unflavoured gelatin powder
How To Use It
Pour in 1 tablespoon of fresh orange juice in a heat-resistant bowl. Add some unflavoured gelatin powder to it and place it on the flame. Stir it continuously until the gelatin powder dissolves. Turn off the flame and let it cool down. Cleanse your face and rinse with cool running water, and then apply the mask, avoiding eyes, eyebrows and mouth area. Leave the mask for 20-30 minutes and peel it off gently in the downward direction, starting from your forehead to chin. Rinse your face to remove the remaining mask, pat it dry and apply your favourite moisturizer.
2. Egg White, Milk & Honey Peel Off Mask
Honey is a natural cleansing agent that not only removes impurities from your skin but also draws in water to moisturize the top layer of your skin. However, the essential vitamins and nutrients present in the milk maintain the beauty of the skin, while the lactic acid content in it helps eliminate the dead skin cells. Try this DIY peel off mask with honey for deep cleansing and brightening.
What You Will Need
1 egg white
1 gelatin leaf
1 tablespoon honey
10 ml warm, unsweetened fresh milk
Warm water
How To Use It
Place the gelatin leaf in a bowl and cover it with some warm water. Mix other ingredients in a separate bowl containing warm water and heat it gently. Then pour in the already prepared gelatin solution, and continue stirring until a thick, gel-like mixture is formed. Using a brush, put the mask and wait until it dries off. Then, rinse your face and apply toner and moisturizer.
Homemade Peel-Off Mask for Moisturizing Skin
Follow these simple homemade peel off masks without gelatin and pamper yourself to get a perfectly moisturized skin.
1. Banana Peel Off Mask
Banana can be used as a natural ingredient in homemade peel off mask to get a soft and moisturized skin.
What You Will Need
1 ripe banana
How To Use It
Mash a medium-sized ripe banana to form a smooth paste. Apply it gently on a clean face and neck. Let it sit for about 15-20 minutes, and then rinse your face with cold water
2. Milk & Glycerin Peel Off Mask
Dry skin is a common issue in winters, but if you want that lustre back in your skin, then try this amazing peel off mask to make the skin smooth and moisturized.
What You Will Need
1/4th cup of milk
3 tablespoon gelatin powder
2 tablespoon of glycerin
How To Use It
Boil milk in a pan and dissolve gelatin powder in it. Switch off the flame and mix glycerine in it. Put gel on your face, leave it for 5 minutes, and then add the second layer of the mask. Let it dry completely, then gently peel off the mask in an upward direction and finally wash your face with cold water.
Tips to Remember While Using Peel Off Masks
Peel off masks have different consistencies and formulation, so there are few guidelines to follow to avail its benefits in a better way.
Always use peel-off masks after a shower, because the warm water, when used in your shower will provide you steam and opens up the clogged pores. This, in turn, softens the dirt on your skin, making it easier to be cleaned.
Avoid using your palms/fingers/hands to apply any mask on your skin, instead use a paintbrush for even application. And, do wash the brush after every use.
If peel off mask is left for long, our skin gets over-dried. And cold water won’t prove to be an effective idea to break down the mask, but lukewarm water will help you wash off the face easily.
Apply toner on your skin after the removal of peel off masks to lock in the benefits of the mask for a smoother, plumber and younger skin.
Don’t forget to cleanse your skin before applying any peel off mask, because otherwise, it will not get into your skin pores leaving a very less or no effect.
Do not attempt to try a peel off mask in the bath, because it will not dry properly, and you will be let with half-dried gunk.
So, all beautiful ladies out there, I am sure with the above-mentioned DIY peel off masks you can easily create a professional spa experience in the comfort of your home itself.
Also Read:
DIY Face Packs for Glowing Skin
Kitchen Secrets to Consider for Making Your Skin Look Younger
Foods Not to Eat for Having a Clear and Glowing Skin Read more
Suggested for you
Postpartum Hives - Causes, Symptoms, and Treatment
New mothers are so focused on their babies that they forget about how important it is to care for themselves. Unfortunately, the hormonal changes experienced after delivery makes it much harder to do as you are most likely going to suffer some ailments as a result. Postpartum hives are one such problem.
What Are Postpartum Hives?
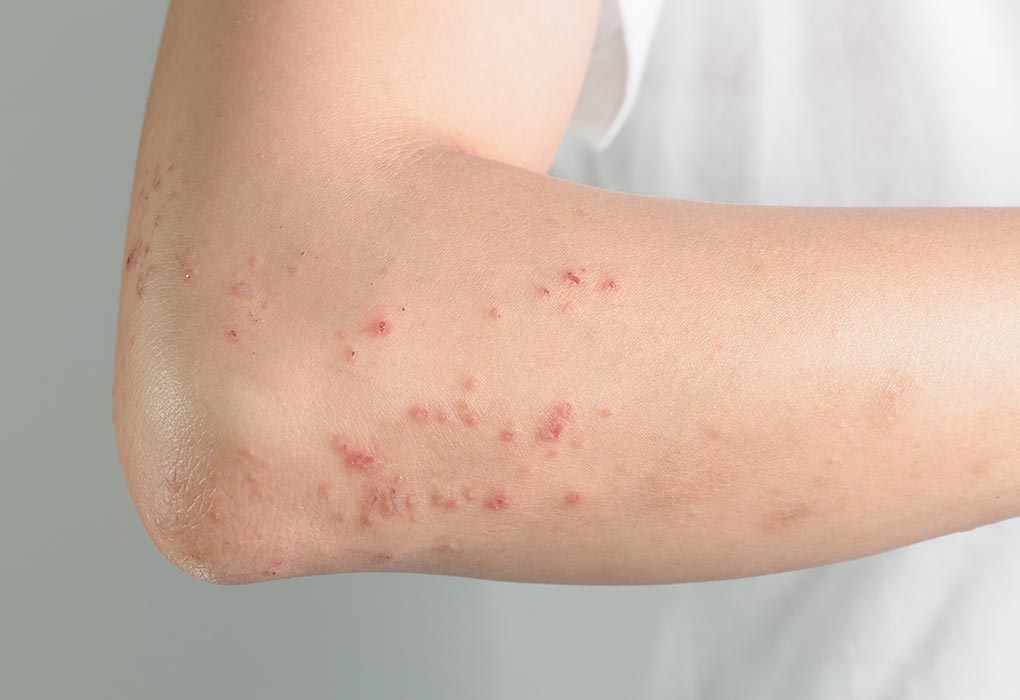
Allergens and hormonal changes after delivery result in a protein called Histamine being released into your bloodstream. This may result in your immune system reacting negatively, causing red and itchy skin on different parts of the body known as postpartum hives.
Is It Normal to Get Hives After Pregnancy?
Postpartum hives have been known to affect at least 20% of women after delivery. They tend to occur at different times after giving birth and usually appear on your arms, back and feet, though some women have also reported them occurring on their legs as well.
What Are the Causes of Postpartum Hives?
Here are some reasons why hives can sometimes appear:
Insect bites or stings
Hormonal changes after delivery
Stress
Medical conditions like acute thyroid conditions
Exposure to intense sunlight, heat or very cold climates
Environmental conditions either outside or inside the home
Certain medications
Certain foods or additives in the food.
What Are the Symptoms of Post Pregnancy Hives?
Here are some postpartum hives symptoms to look out for:
Scaly skin
Itchy skin
Swelling that results in pain or burning sensations
Blanching of the skin, where areas of the skin become very pale or white
Raised welts on the skin
Possible Complications of Post Delivery Hives
There are some cases where postpartum hives may lead to complications that could be life-threatening. They are as follows:
A reaction called anaphylaxis that affects the whole body and that leads to having difficulty in breathing.
Blockage in the airway due to the throat swelling.
How to Treat Hives After Childbirth
There is no exact cure for postpartum hives, but you can try out the below steps:
1. Drink Plenty of Fluids
Drink plenty of water and up your fluid intake.
2. Topical Applications
The burning and red patches can be soothed if you apply some cream or lotions. Consult your doctor about the most effective creams and lotions that you can use to get some relief.
3. Manage Stress
As stress is a factor that plays a role in causing hives, you should try to manage your stress levels as much as possible. Learn to meditate and try to rest as much as you can.
4. Get Help
If you can get help, this will allow you more time to rest and will, in turn, also give you more time to spend looking after your child and yourself.
5. Consult a Dermatologist
You can speak to a dermatologist about what medication is best and get a prescription for it.
4 Home Remedies You Can Try for Postpartum Hives
Here are some remedies you can try yourself at home that are natural and safe:
1. Oatmeal
With its anti-inflammatory properties, oatmeal can help soothe the skin and provide relief from all the itching and swelling caused by hives.
How to Use
Take a microfibre cloth and put one cup of oatmeal in it.
Soak this in a bowl of hot water for about 15 minutes and then add it into your bathwater.
Soak your body in this bath for 15 minutes once every day. Make sure the temperature of the water isn't too hot, as it can further irritate the skin.
2. Cold Compress
By shrinking the blood vessels, the histamine release can be prevented from increasing. The cold compress will also provide relief from inflammation, itching, and swelling.
How to Use
Use a towel or microfiber cloth to wrap some ice cubes and place it on the affected area
Try this for 3-4 times a day
Cold baths or showers are also recommended
3. Aloe Vera Gel
Aloe Vera is incredibly effective for healing and improving skin conditions.
How to Use
Fresh aloe vera gel should be applied on the affected parts of the skin and left on for about twenty minutes.
Rinse off with cool water.
This can be done several times a day.
4. Apple Cider Vinegar
Filled with anti-histamine properties, apple cider vinegar provides relief from the inflammation.
How to Use
Mix apple cider vinegar with water in equal amounts and with a cotton pad, clean the infected skin. Do this twice a day.
How Long Do Postpartum Hives Last?
Though you are probably miserable that you have developed this condition rather than getting the chance to enjoy your baby properly, don't worry. This condition generally resolves itself in about 6 to 8 weeks time. With proper care, it can take lesser than that as well.
Postnatal Hives And Breastfeeding
The one thing that concerns most mothers suffering from this condition is the kind of effect it could have on breastfeeding and the risks their babies may have to face after drinking their milk. Medications such as antihistamines containing loratadine and fexofenadine are considered safe, as studies reveal that the exposure breastfeeding infants have to these drugs is quite minimal and highly unlikely to result in any side effects, making them compatible with breastfeeding. At any rate, it's best to go with any medication only if your doctor has approved of it.
While it may be convenient to ignore your skin issues, it is best that you look after yourself as well because you have a little baby who is completely dependent on you for everything. Consult with your doctor about any medication that you may want to take.
Also Read: Postpartum Anemia Read more
Check out this new Memory
Yasmin banu
Guardian of a 2 m old boy
1 min ago
#grandphoto

Like
Comment
Share
1 Likes
0 Comment
Suggested for you
Suggested for you

Suggested for you

Suggested for you

Trending Accessories in India in 2019
We’re two months into 2019 – things are fast changing! The trends that ruled markets and malls and magazines last year are about to be replaced with new ones, because that’s how quick fashion is changing. We did a little digging to tell you what is going to rule this year!
Top Accessories that Will Trend in 2019
Move away tassels and chokers, because there’s so many other cool accessories that are going to rule 2019. Here’s our prediction:
1. Thin Strappy Heels
These elegant, simple, and no-nonsense accessories are the trend already! Aptly known as the ‘barely there’ heels, they’re perfect for any occasion and go with almost any outfit, starting from saris to kurtis and even party dresses. They’re also trending on most online stores and are being sold at heavy discounts, so hurry and take your pick!
2. Sculptural Heels
Sculptural heels are the perfect mix of eccentric and classy. The factor that distinguishes sculptural shoes from regular shoes is the odd and funky shaped heel of the shoe – it could be oval, triangular, or in any other geometrical or random shape there is. One of the most popular pair in this category is the shoes with transparent heels – with the rest of the shoe looking as regular as can be. These are super eye-catching. Sculptural heels are the perfect accessory for an evening event or party.
3. Shrunken Bags
While big is undeniably beautiful, we’re loving ‘small’ too! These shrunken bags are compact, easy to carry, convenient, and don’t steal the show from your outifit. One of the popular accessory trends of 2019, you’ll find a myriad cute and adorable designs and patterns in stores both online and offline. These bags are the perfect gift idea as well – who can resist a cute bag that can fit in all the essentials without turning misshapen or difficult to carry?
4. Pearls
Yes, they’re back! Pearls are making their way into 2019, and in extremely creative ways! Aside from pearl earrings and necklaces (which are also beautifully designed in contemporary patterns), pearls are being used in creative ways like in hair clips, hairbands, embellishments on purses and on clothes as patch-work. You know what this means - get your old pearls out, and get your creativity flowing!
5. Embellishments
Another awesome accessory trend in 2019 that’s slowly going to make its way into our closet is embellished everythings! From wallets to purses to plain dresses, jackets and even shoes, be prepared to see gorgeous embellishments on your everyday outfits and accessories. The best part about this trend is that you can make your simple outfit pop just by carrying some fancy embellished accessories.
6. Angular Sunglasses
Move over, cat eye frames – angular glasses and sunnies are the chic-est 2019 accessory! These glasses are cute, eccentric and super chic when worn the right way. You can choose from the many options available, right from cylindrical to hexagonal. Be prepared to set out looking like an absolute trendsetter with these angular frames this year!
7. Floral Jewellery
Floral is everywhere this season – from clothes to wedding decor to home decor! Floral patterns provide a beautiful, fresh look to anything, so it’s only fair that floral jewellery became the trend this year. Don’t shy away from wearing beautiful flower-shaped earrings or a necklace or bracelet with dainty flower patterns on them. It’s the season – enjoy it! However, there’s a fine line between gaudy and tasteful with florals, so opt for this trend after careful research!
8. Oversized Earrings
In the jewellery space, there’s a lot of things that are going strong, and oversized earrings is one of the norms. This 2019, don’t shy away from wearing long, chunky earrings with a bare neck to really bring focus to your gorgeous earrings! You can go for any style you like in the oversized category, from danglers to big hoops – the possibilities are endless! Here is our list of trending earrings you can scout for in your next shopping trip!
These are our predicted accessory trends for 2019. Go on and try these out – stores both online and offline have many of these trends stacked up. Go on, get trendy!
Also Read:
Trending and Fashionable Office Wear Ideas for Women
How to Choose the Best Sunglasses for Your Face Shape
Trendy Hairstyles You Need to Rock This Year Read more
Dr Ghouse has added a new answer
Guardian of 0 children
8 hours ago
Q. hllo am in 34 week of pregnancy,cramps in my hand and foots,my pulses is very fast,i feel tiredness internally,are these symptoms are normal

Dr Ghouse
Paediatrician
8 hours ago
A. get investigations particularly hemoglobin level. if there is no relief it is better you see your doctor for proper examination particularly physical examination if there is need for doing investigations to find out the problem and treatment ok
Dr Ghouse has added a new answer
Guardian of 0 children
8 hours ago
Q. i feel some fever internally also
Dr Ghouse
Paediatrician
8 hours ago
A. please check the temperature and get the investigations. fever can be because of different reasons most of the times viral bacterial sometimes due to less immunity there can be recurrence better to treat only with paracetamol if the fever more than 100degr
Rashmi has added a new answer
Guardian of 0 children
7 hours ago
Q. Now I am having pain till then my miscarriage has been done at home

Rashmi
Mom of a 9 yr 8 m old girl
7 hours ago
A. I’m sorry I’m unable to understand your query as you haven’t given any detail about it so whatever the situation is you should get a check with your gynaecologist the doctor would be able to give you better help in whatever treatment of precaution you need to require further
shilpi Bhandari has added a new answer
Guardian of 0 children
3 hours ago
Q. Hello
What is better normal or csec?

shilpi Bhandari
Mom of 2 children
3 hours ago
A. hello dear this is not about which is better this is all about your body and the condition of the baby no doubt the normal procedure is the painful but side effect are not there but after C6 you have to be little more careful and you have to take more precaution but again I am saying that this is not about the better one this is about the condition of your pregnancy
Santu has added a new answer
Expecting Mom due this month
1 hour ago
Q. #asktheexpert
1) till how many days after delivery baby needs to keep on uterus temperatures/warm temperature?
2) Can baby & mother both take bath after 24 hours of delivery?

Santu
Mom of 2 children
1 hour ago
A. It depends on moms and babys health I feel and suggest It's better to check with your doctor and follow their advise. That would be one of the best and safest option for your baby as of now. Take care.
shilpi Bhandari has added a new answer
Guardian of 0 children
47 mins ago
Q. dual marker test is for what purpose??
shilpi Bhandari
Mom of 2 children
17 mins ago
A. The double marker test helps determine whether the unborn baby has any risk of developing neurological abnormalities or mental disorders
Check out this new Memory

Priya Priyanshu
Mom of a 4 m old boy
New Milestone

Like
Comment
Share
0 Likes
0 Comment
Check out this new Memory
Priya Priyanshu
Mom of a 4 m old boy
New Milestone

Like
Comment
Share
0 Likes
0 Comment
Check out this new Memory
Rajya Lakshmi M
Mom of a 1 m old boy
2 mins ago
My cute baby boy posing in the pic for 1 month birthday

Like
Comment
Share
0 Likes
0 Comment
Check out this new Memory
Priya Priyanshu
Mom of a 4 m old boy
2 mins ago

Like
Comment
Share
0 Likes
0 Comment
Tell us more about yourself get More Personalised
 Infant0 to 6 Months
 Baby6 Months to 2 Yrs
 Toddler2 to 4 yrs
 Kids4-6 yrs
 Big Kids6+ yrs
 Expecting
 Trying to Conceive

