

.svg)
.svg)
.png)

Enter Child Details

Add Profile Photo


Videos you might be interested in


Videos you might be interested in
Videos you might be interested in
Suggested for you
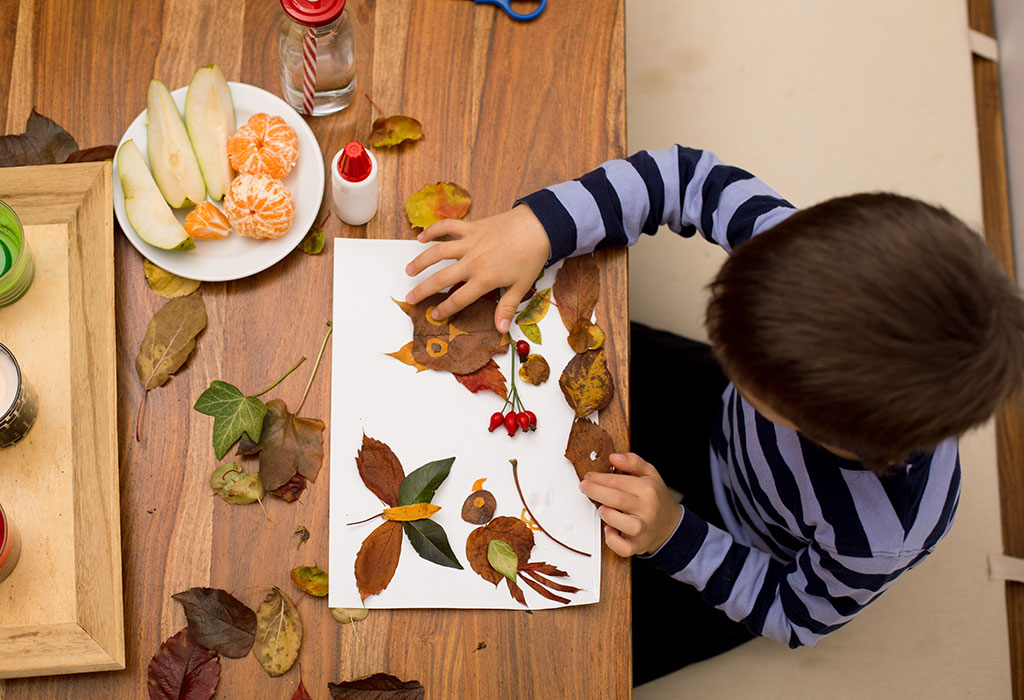
25 Best Out of Waste Material Craft Ideas for Kids
Keeping kids busy and occupied is no easy task! Of course, modern gadgets and TVs can make the job easier, but these solutions are best used in moderation! So, let’s do things the old school way and learn a trick or two about keeping kids occupied with arts and crafts!
Waste material craft for kids is a great way to bond with children and dedicate some time to learn something new! From things to decorate your home with, to bits and bobbles that they can wear as jewellery or even cute toys! There are so many things that can be made using waste things lying around the house! So, put on your creative hats, and try these craft ideas using waste material!
Safety Tip: For some activities listed here, you need a hot glue gun. We recommend that you do not allow children to use this on their own and supervise them because the gun can get very hot and may cause burns.
Super & Creative Waste Material Craft Ideas for Kids
Craft out of waste material is pocket-friendly and encourages children to reuse things while exercising their creativity! Here are some cool, easy and fun waste-material craft ideas for kids!
1. Milk Carton Bird House
Use an old milk carton for this activity, which will not only be fun and engaging but will also enchant your children by attracting birds to your balcony.
Things You Need
Milk or juice carton
White spray paint
White adhesive, such as Fevicol
Hot glue gun
One plastic spoon
Coloured tissue papers
Cutter or knife
Sponge brushes
Soft book cover big enough to make a roof
Wool
Procedure
Spray paint the milk or juice carton and leave it to dry.
Dilute the white glue with water and put a thin layer of it on the cartons and the roof made of the book cover.
Before the glue dries up, use the coloured tissues or paper randomly on the cartons for a colourful effect. You can even overlap one tissue over another.
Make a hole in the top of the carton using a cutter and another on the side of the carton to make the door.
Just below the door, cut a small ‘X’ shape and insert a plastic spoon in it. This is where the bird seeds can be put.
Now fix the roof on top of the carton using the hot glue gun.
Make two tiny slits on the roof, about 2 inches apart from each other. Put the wool through this to hang the pretty birdhouse!
2. Popsicle Stick Bookmarks
Make holiday reading fun with these DIY bookmarks. They make great gifts for friends too!
Things You Need
Popsicle sticks
Fabric scraps
Glue
Ribbons
Felt pens
Googly eyes
Procedure
Start with washed and dried popsicle sticks.
Let the kids twirl and wrap the fabric scraps around the sticks with glue leaving enough space for a face, which should be about 1/4th on the top.
Ribbons can be glued as belts or hair accessories.
Finally, stick googly eyes and draw a mouth on each of the sticks.
Your cute little dressed up bookmarks are ready!
3. Glittery CD Fish
Help your child make an aquarium of her very own with these attractive fishes
Things You Need
A CD
Glitter
White adhesive
Yellow card paper
Scotch tape
Scissors
Googly eyes
Procedure
Apply the adhesive to the CD all over, only leaving the middle portion empty.
Sprinkle the glitter all over the area on the CD. Leave it to dry.
3. With the yellow card paper, cut a mouth, fins and tail and stick these on the blank side of the CD using the tape after it’s dry.
Attach the googly eye to one side of the fish’s face.
Your fun fish is ready!
4. Ombre Spoon Vase
Make space for all those flowers your children are going to collect for you on their walks with this simple vase. It is a great way to keep stationary too!
Things You Need
One large can or jar
Paper plate
Plastic spoons, depending on the size of the jar
Scissors
Hot glue gun
White spray primer
Acrylic paint of your choice of colour, and white
Procedure
Use the white spray primer and coat the jar.
Cut off the handles of all the plastic spoons but one.
On the paper plate, pour out blobs of coloured paint in a row.
Leave one blob as it is to be the darkest and add white paint to other blobs so that the shades become lighter and lighter. There, you have Ombre shades.
Paint the spoon heads; some in light shades, some in medium, while some in dark shades of the chosen colour. Make sure you paint enough spoon heads to required to cover the jar. Let them dry.
Stick the dried spoon heads to the jar in layers according to their shade. You can have it light to dark or the other way around!
Your Ombre spoon vase is ready!
5. Tin-can Chimes
Convert boring tin cans into musical chimes on a lazy afternoon in a few simple steps. Here’s how:
Things You Need
Tin cans with lids, 3 or more
Nail and hammer
Washers, one for each tin
Paintbrush
Tempera paints in different colours
Wool or string
Glitter
Procedure
Paint the tin cans in different colours.
Add some glitter to the cans while they’re wet.
After they dry up, make a hole at the bottom of each can using the hammer and the nail (this part is best handled by adults)
Take a long piece of wool or string through the holes. Tie the two washers at the other end of the string, inside the tin cans.
Hang the cans in a way that they overlap or hit each other when there's a breeze.
Your tin-can chimes are ready!
6. Itsy Bitsy Spider
Help your child make creepy-crawlies you won’t mind having in your house. These spiders are the perfect addition to your kids room
Things You Need
Bottlecap
String or wool
Paints and paintbrush
Glue
Scissors
Paper
Googly eyes
Procedure
Paint the bottle cap red.
Cut 8 strings of the same length.
Stick 4 strings on either side of the cap.
Now stick 2 googly eyes or make eyes from the paper and stick them on the cap.
Your spider is ready to scare people!
7. Pineapple Craft Pen Stand
Be reminded of everything summer with this bright pen stand which is guaranteed to bring some sunshine to your study table. It is just what you need to organise all that stationary you always need at hand
Things You Need
Green wool
Green paper
Tape
Plastic bottle
Paints and paintbrush
Glue
Red sketch pen
Procedure
Paint the plastic bottle yellow and leave it to dry
Make zig-zag lines on the green paper and cut the paper to form the shape of a pineapple top or the shoots.
Cut the green wool into small strips and stick them across the top and the bottom of the bottle so that the strings create a crisscross pattern.
Make thorn patterns on the yellow paper with a red pen.
Stick the top made of paper on the rim of the bottle.
Your pineapple craft pen stand is ready for use!
8. Ice Cream Stick Toy Fighter Plane
Why buy a toy when it is so much more fun to make one! Help your little pilot make a plane and watch him go
Things You Need
4 ice cream sticks
1 wooden clothespin
Paint
Eraser
Paintbrush
Glue
Cutter
Procedure
Paint the ice cream sticks in colours of your choice and let them dry.
Paint the clothespin in the same or a different colour, and leave it to dry
Cut an ice cream stick into 3 pieces and join two end pieces in a straight line with glue. This is to make the plane’s propeller
Cut a tiny little bit of the eraser, paint it and leave it aside to dry
Glue 2 ice cream sticks to the mouth of the clothespin, one on the top and the other at the bottom, parallel to each other.
Glue a smaller ice cream stick to the tail of the clothespin.
Glue the eraser to the ice cream stick to complete the propeller.
Finally, stick the propeller on the mouth of the clothespin. Your plane is ready!
9. Tin Can Lanterns
Engage the kids, use up your throw-away items and prepare for the next festival all in one go with these attractive lanterns. Here’s how:
Things You Need
Tin can
Hammer
Wire
Nail
Pliers
Tea light candle
Spray paint
Procedure
Remove the label and glue from the tin can, and let it dry.
Fill the can with water and put it in the freezer for some time.
Take the can out of the freezer, remove the water, and then poke a hole in the top of the can and one at the bottom.
Take a 12-inch wire and make a handle attaching it to the two holes
Make various holes around the can with hammer and nails. You can choose to create a shape with these holes or a random pattern.
Paint the cans in fun colours, inside and outside. This might require several coats.
Once it’s all dry, you can put fairy lights or tea light candles in them for effect!
10. Sock Puppets
Make storytime fun with these simple puppets. It is a good idea to make puppets of your child’s favourite characters. A cut-out cardboard box makes the perfect theatre for an engaging show.
Things You Need
Two socks - plain or printed
Googly eyes or buttons
Wool
Wool needle
Black thread for sewing
Scissors
Procedure
Make sure the socks are washed properly and dry.
Sew the googly eyes or the buttons on the heel of the socks. Put 2 eyes per sock.
Cut 12 six-inch strips of wool. This is for the puppet’s hair.
Sew the hair on top of the sock above the eyes. Stitch it in a way that makes it resemble hair parting.
Put your hands in and the puppets are ready!
11. Popsicle Photo Frame
Display your favourite pictures instead of letting them gather dust in albums with these easy photo-frames
Things You Need
8 popsicle sticks
Scissors
Glue gun
Paint
Crayons
White paper
Procedure
Colour the popsicle sticks on both sides in different colours.
Stick popsicle sticks in such a way that they form a square shape, with the ends jutting out on the four sides.
Cut a white paper to 9x12 inch size. Glue the popsicle sticks along the edges of the white paper to create a frame. Chop off the excess paper.
Your frame is ready!
12. CD Coasters
Make sure all those drinks your kids spill don’t ruin your furniture by helping them make these reversible coasters. Here’s what you need to do:
Things You Need
CDs
Thin Cardboard
Felt tip pen or pencil
Scissors
Glue
Fabric scraps
Procedure
Trace the outline of the CD with a pencil on the cardboard and cut the shape out. You need 2 such circles for each coaster you make as you need to cover up the hole of the CD.
Glue the cut out cardboard circles on each side of the disk so that the hole is covered.
Glue the top of the cardboard and stick the fabric scraps that are cut to the same shape.
Your reversible coasters are ready to use!
13. Recycled Bottle Vases
Teach your kids the importance of recycling with these pretty bottle-vases.
Things You Need
Glass or plastic bottle
Paint primer
Paintbrush
Thick tape
Spray Paint
Procedure
Clean the bottle to remove the label.
Paint the bottle with primer.
Spray paint the bottle in a colour of your choice.
Once the paint dries, top it up with another coat of spray paint.
You can also make patterns on the bottles! For this, you need to wait till the paint primer has dried up. Then use the tape to make the design you want. When you remove the tape after spray painting the bottle, that part will still be transparent! You can even use washi- tape to make the design of your choice on the bottle.
Your bottle vases are ready to use!
14. Turtle Made with Walnut Shells
Give your child’s CD fish a turtle for company, and help your child decorate her aquarium with this cute walnut turtle
Things You Need
Cardboard
Half a walnut
Yellow and green paint
Scissors
Tape
Black marker
Glue
Procedure
Paint half the walnut shell yellow. Now once that dries up, trace the details of the shell with green paint.
Draw the base of a turtle on to a thick green sheet. Make two of these and cut them out.
Stick both together along with a triangular shape for the face of the turtle.
Stick the walnut on top of the base, make eyes and a mouth on the triangular shape and voila! Your turtle is ready!
15. Bear Mask with Paper Plates
No kids’ party is complete without masks. Help yo kids prepare for a bear-themed party with these easy-to-make masks.
Things You Need
A large paper plate
White, light and dark brown chart paper
Brown paint
Scissors
Paintbrush
Hot glue gun
String
Procedure
Start by measuring and marking the child’s eyes on the paper plate which should be bigger than your child’s face. Make holes with the scissors exactly where the eyes will be. You can try it on to see whether the position is correct after cutting the holes.
Next, paint the paper plate brown (tempera paint is preferable).
Cut out two circles of dark brown paper for the ears, and of light brown paper to make the inner circle for the ears. Stick them together.
Make the eyes with white paper and then make a black ring around the holes you had previously for the child’s eyes.
Cut one big circle of the light brown paper for the mouth and nose area. Draw the mouth and the nose on it.
After this, use the different elements to put the bear’s face together with glue on a paper plate.
Make two small holes on the bear’s cheeks with a sharp pencil. Pass the string through it and make a knot so that it stays. The size of the string should match the size of the child’s head.
That’s it! Your bear mask is ready!
16. Bottle Paper Bank
Saving is a habit which must be encouraged in every child, as it helps them realise the value of hard work and money. Get them started with these DIY banks
Things You Need
Clean plastic bottle
Piece of paper
Felt tip pens or markers
Glue
Procedure
Clean and dry the bottle.
Cut a slot big enough to send a coin through and seal the edges with glued paper or tape.
Cover the rest of the bottle with the paper and hand it to your child to paint or make patterns on.
The money bank is ready for some sweet savings!
17. Ocean in a Bottle
Bring home the beach and refresh memories of your last vacation with this curio. Here’s how you can make it
Things You Need
Big plastic bottle
Water
Funnel
Blue food colouring
Mineral oil
Rocks
Seashells
Sand
Glue gun
Procedure
Clean the plastic bottle, and make sure the label and the glue are gone.
Using the funnel, fill the bottle with sand. There should be enough to cover one side when the bottle rests on its side.
Add some seashells, rocks and maybe an aquarium toy or two that fit in.
In a separate bottle, mix some water with blue colouring till you get a colour like the blue of the ocean.
Pour the blue water into the bottle with the sand till it’s about 2/3rds filled. Then pour mineral oil into the remaining part of the bottle that’s empty.
Glue the cap of the bottle so that it cannot be opened and leave it to dry.
Tilt your bottle to see the ocean and the waves when you want!
18. Button Bracelet
Dig into your sewing box for some wearable artwork. This button bracelet is quick and easy to make and makes an awesome gift too
Things You Need
Buttons
Elastic
Metal crimp tube
Shanks
Pliers
Procedure
Thread the elastic through the shanks and make sure the buttons are turned upside down to overlap.
When you have done this with enough buttons, and it is large enough to wrap around the wrist, thread the ends of the elastic through a metal crimp tube to seal it.
Trim off the excess elastic with the pliers and your bracelet is ready!
19. Mason Jar Snow Globe
The most attractive things are often the easiest to put together. Introduce your child to this mason-jar snow globe and give them a chance to display their creativity
Things You Need
Mason jar
Hot glue gun
Decorative ornaments
Glycerin
Glitter
Water
Silver paint
Procedure
Paint the lid of a mason jar with silver acrylic paint.
Stick the ornaments on the inside of the lid using a glue gun.
Fill the jar up with water to the brim. Add some glycerin and glitter to it.
Screw the lid on carefully and tightly.
Turn the mason jar and keep the lid as the base to see the snowfall!
20. Paper Wind Turbine
Science meets art in this quick craft. Make a paper turbine and attach it to your kids’ bicycles to teach them how the wind works
Things You Need
5 paper cups
Cardboard box lid
Sand
White paper
Board pins
Glue
Scissors
Procedure
Colour 2 paper cups blue and leave 3 as they are.
Pile and glue all the cups, one on top of the other to form the tower.
After this, make a pinwheel with the paper and attach it to the topmost cup with a pin.
Fill the cardboard box lid with sand, and place the windmill on it or stick it with glue.
Your paper wind turbine is ready!
21. Match-Bot
Help your kids make a robot of their very own with these easy–to-collect materials
Things You Need
4 matchboxes
2 matchsticks
Coloured sheets
Scissors
Glue
Procedure
Cover a matchbox with coloured paper.
Make a hole at the bottom of the box using a matchstick.
Make the robot’s antennae using 2 matchsticks.
Draw the robot’s eyes.
Make a body sticking together 3 more matchboxes as the body and the legs.
Using a matchstick, connect the head with the body in the shape of a table.
Your match-bot is ready!
22. Mini Suitcase for Dolls
Get ready to take your dolls on a vacation with these cute mini-suitcases. These suitcases also help your child organise her trinkets.
Things You Need
Matchbox
Coloured paper- light and dark brown
Scissors
Glue
Felt pens
Procedure
Cover the top of the matchbox with the dark coloured paper.
Cut thin strips of light brown paper and stick them on the sides.
Make a small handle with the light brown paper and stick it on top.
Make 4 semi-circles with the light brown paper and stick them on the side.
Add two strips for the upper and lower ends and insert these back into the cover. You can use this to store tiny bits and baubles!
23. Abstract Alligator
Convert an ordinary clothespin into a snappy pet! This cute alligator is ready in a jiffy and can be a perfect addition to storytime.
Things You Need
Wooden cloth clip
Glue
Scissors
White paper
Sketch pens
Green paint
Procedure
Colour the clip with green paint.
Draw teeth on white paper and cut them.
Stick the teeth on both sides of the clip.
Draw eyes and nostrils with the black marker on the top of the clip, above the area where the teeth are stuck.
Your cute alligator is ready!
24. T-shirt Tote Bag
Convert your kid’s favourite frayed t-shit into an attractive beach-bag. Here’s how
Things You Need
An old t-shirt, with any neck
Scissors
Procedure
Cut a circle along the neck of the shirt.
Cut off the left and the right sleeves so that they are completely removed. Make sure the cut on both sides is the same.
Turn the tee inside out.
Chop off the rim at the base of the shirt.
Make fringes of 5 cm each at the bottom of the tee and tie two of these together in knots. Tie all the fringes so that the base of the bag is sealed.
Flip the tee again, and your bag is ready!
25. Tennis Ball Key Holder
Make an organiser for your home as your kids learn a new craft with this convenient key-holder
Things You Need
Tennis ball
Cutter
Googly eyes
Procedure
Cut a big slit in the tennis ball, right above one of the lines. This will be the mouth of the ball.
Attach two googly eyes spaced out right above the slits so that it looks like it has a face.
Hang it on the wall as a fun key holder. You can put anything into the mouth of the ball to hold it there!
26. Popsicle Stick Storage Box With Sliding Lid
Things You Need
Popsicle Sticks
Glue
Paint
Decoratives
2 pieces of paper - 5x5 inch
Procedure
Using the piece of paper as a template, make a base of the popsicle box. Stick the popsicles all over the paper to form a flat base.
Then, keep sticking popsicles only on the edges to create a box with a hollow centre.
When you build it till a preferred height, Add two popsicles only on two opposite sides. After this add another layer of popsicle sticks along all the edges. This will create a gap for the lid to slide through.
Let the box dry.
For making the lid, use the second square-shaped paper as a template and stick the ice cream sticks parallel to each other. Let it dry.
After the box and the lid, both are dry, cut the lid in a size appropriate for it to slide through the gap in the box.
You may now paint the box with your favourite colours and decorate it with beads, ribbons, etc. and store anything you want in it.
With these craft ideas, you can put waste materials at home to good use. By trying out these craft ideas, not only will your kid learn to make new things, but he will also learn the importance of recycling them. To promote creativity, you can also get DIY kits for your kid. These kits contain age-appropriate activities that will keep your child busy. Yes, he will draw, colour, and paint all by himself. As he tries out these activities on his own, his skills will develop and so will his confidence.
Also Read: Summer Craft Ideas for Toddlers & Preschoolers Read more
Check out this new Memory

Dimpal
Mom of a 10 m old girl
New Memory

Like
Comment
Share
1 Likes
0 Comment
Check out this new Memory

Mohan m
Father of a 4 m old girl
1 min ago
#grandphoto my sweet beauty and beast 😊😊♥️

Like
Comment
Share
1 Likes
0 Comment
Suggested for you
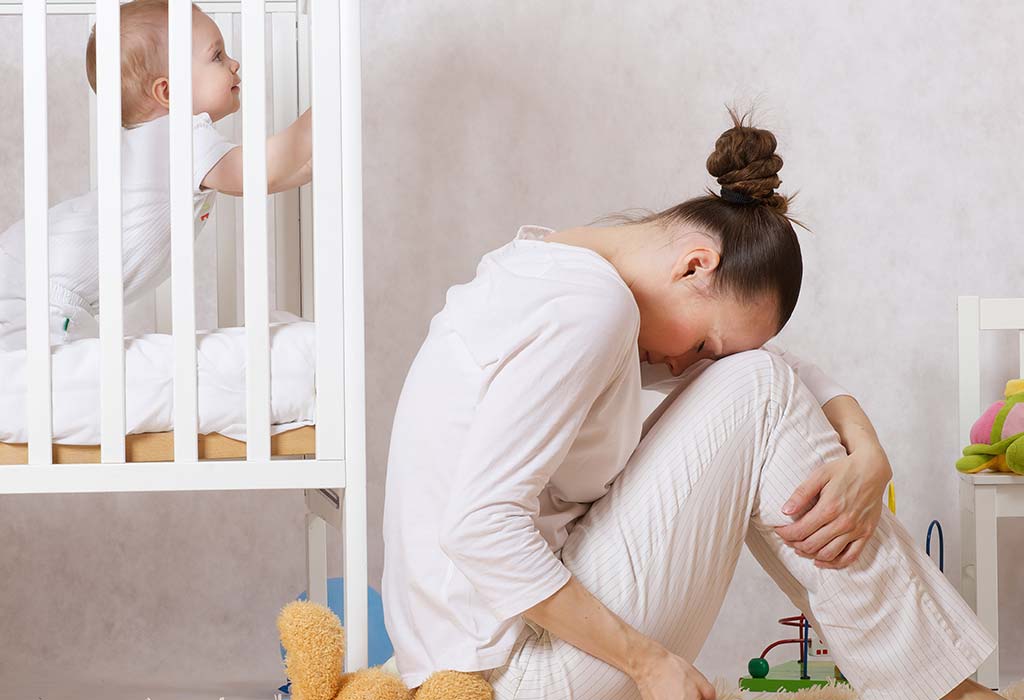
The Postpartum Struggle is Real - Here's How You Can Deal With It
I am a dreamer, well not the 'dream it & achieve it' kind of a person, but a daydreamer! Mostly, I look at the world through rosy glasses - all thanks to the mushy movies & stories I grew up watching and reading.
When I was pregnant, I was all prepared for a happy ending of my pregnancy and a joyous start to motherhood, just like I had watched in movies. All I could think during that time was this - "I will deliver the baby; the baby will be given to me in my arms and I will fall in love with her the minute I see her." And so our lovely journey would start. But none of this happened!
Yes, I delivered the baby. But my labour was not just about sweating, but also about swearing and promising myself to never ever go through this again. I visualised myself dying. I was unhappy that my didn't progress naturally and then I saw my baby after 3 hours of giving him birth. I didn't have the energy to hold him and when I did see him - I didn't have the feeling of love for him - I didn't have that feeling for the next three days.
The initial journey was far from what people call joyous. I was crying every single day. My body was in terrible pain; I was always tired and my baby was constantly crying. I couldn't keep my eyes open and my baby wouldn't let me sleep. People who visited me and their constant talks only doubled my agony.
This is pretty much the summary of my postpartum days.
When I had to take my baby for a checkup on the 7th day after his birth, I remember looking at myself in the mirror. I couldn't recognise myself. I looked like the most unkempt person I have ever known - my attire was a complete mismatch & I saw hollow eyes staring back at me. Even my doctor empathetically suggested that I should get some rest.
Today, I am a lot wiser and happier person. And most important, I am also in love with my baby. Do you want to know how this change came in me? Following are some pearls of wisdom from my diary. If you feel sad or are in pain post delivery, read this.
1. Have Zero Expectations About Labour
Just like everything else in life, expectations about your labour can be the mother of all problems. Have a plan, but do not expect it to work. Trust your doctor and go with the flow.
2. Surround Yourself with Your Loved Ones
No, I am not suggesting to you surround yourself with nosy relatives & annoying friends. You need to be with mature and easy going people. Be with someone, who can be your support system in the initial days of pregnancy.
3. Express What You Feel
Talk to your partner about how you feel. Do not bottle up your emotions - let it out! Cry if you need to, ask for help if it gets overwhelming for you, or see a doctor if it does not get better. Do what feels right but do not say you are fine if you are not.
4. Take Enough Rest
I know it is easier said than done, but it's not impossible. If it means turning down on the guests, do it. Our ancestors rightly set aside 45 days for the new mother and the baby because they knew that a new mother needs that much time to heal. So listen to them!
5. Do Not Be Alone
This is not the time to show your superhuman skill. Get help! Make sure that you have someone to help you out. Someone who you can be with when you feel lonely.
6. Get Some Fresh Air
You can sit in your balcony, go out for a stroll, meet a friend for a quick coffee, or do anything else that works for you and your baby. This will ensure that you don't end up getting frustrated.
7. Remember That You Will Take Some Time to Bond With Your Baby
If you are a first-time mum, don't expect to fall in love with your baby at first sight. You may even wonder why you did this to yourself. But hang in there as it will get better with time. In the meanwhile, talk to your baby, nourish your baby, and take care of yourself. And if it gets too much to manage, hand over your baby to someone in your family and take a break.
Here's a Note for Husbands -
Once you have a baby, your life will change completely and you know that your wife has done most of the work here. So be as kind, supportive, and loving as you can be. If you were a doting husband during her pregnancy, you need to be the knight in shining armour after her pregnancy. Trust me, you can make her or break her at this point. Shoulder all the responsibilities when you can and when you can't, make her some soup or something else she likes. Don't forget to be partners now that you are parents.
From pregnancy to delivery to parenthood, it's an amazing journey and trust me, time flies! So be strong, be healthy, and stay happy. No matter what the situation, remember 'This too shall pass'.
Disclaimer: The views, opinions and positions (including content in any form) expressed within this post are those of the author alone. The accuracy, completeness and validity of any statements made within this article are not guaranteed. We accept no liability for any errors, omissions or representations. The responsibility for intellectual property rights of this content rests with the author and any liability with regards to infringement of intellectual property rights remains with him/her. Read more
Suggested for you

Working In Night Shifts During Pregnancy- Is It Harmful
In today's competitive world where everyone is running a rat race, of course, women are also not behind. Thus, balancing work life while being pregnant is undoubtedly a challenge for every woman. As work life is equally important as family life, one of the most pertinent questions that arise in this context is: Is working night shifts during pregnancy harmful? Well, the answer to this question is that as long as you are conscious and careful, nothing is detrimental!
Can Pregnant Women Work in Nightshifts?
Managing work life while being pregnant can indeed be a challenge and working in night shifts can, unfortunately, be unavoidable sometimes. It is difficult for pregnant women to work in night shifts, the main reason being lack of sleep. A woman needs a lot of rest when pregnant and therefore working in night shifts can be harmful during this time.
Possible Health Risks of Working in the Night Shift While Pregnant
Is there a link between night shift and pregnancy risk? Below are some health problems that can be developed as a result of working the night shift.
1. Lack of Sufficient Sleep
Working the night shift can throw your sleep cycle out of sync, and you may end up getting lesser sleep than expected. This can affect your immune system which is already lowered due to the pregnancy. Also, studies have shown that poor quality of sleep can lead to issues like babies with low birth weight.
2. Change in Cardiac Rhythms
The heartbeat tends to slow down when one is asleep, following the usual discipline of the body. Lack of proper sleep hinders this body clock which is essential to maintain especially during pregnancy. Therefore, working in night shifts lead to change in cardiac rhythms in the body.
3. Stress and Anxiety Attacks
Working for long hours especially during the night shifts can trigger anxiety attacks and stress in pregnant women. This affects the health of the foetus and can increase the chances of its preterm delivery.
4. Miscarriages and Premature Birth
Studies have often shown that women who work for long periods, especially in night shifts, are at higher risks to suffer premature delivery of the baby and in worse cases, even miscarriages.
Precautions to Take While Working Night Shifts
Make sure that you don't stress yourself at work in any way as that is harmful to your baby. Prioritising or organising things might help you deal with things better.
Avoid standing for an extended period as an uncomfortable position might exert pressure on the foetus.
Keep your gynaecologist's phone number handy, lest an emergency may crop up.
Pregnancy itself can lead to vision problems, therefore avoid too much of work on laptops, computers, etc. as they stress your eyes even more.
Avoid exposure to excessive light or too dim light as it is known to cause stress in the eyes.
Make sure your sitting posture is comfortable. Sitting in an uncomfortable position while being pregnant can exert pressure on the foetus.
Keep your work light so that you don't exhaust yourself as that adds to your weakness during pregnancy.
Never starve yourself. Keep some healthy food such as fresh fruits to munch on when hungry.
Do not bend down, if you are in an advanced stage. If your work demands so, ask your colleagues for help. Stooping down or bending down is not good for the baby as it exerts a lot of pressure on your belly.
Do not indulge in a heated discussion. Try to keep your calm as much as possible as excessive stress is not suitable for your health during this time.
Try not to lift too much of weight as it can lead to premature birth or low birth weight of the foetus.
Drinking coffee during the night shift may be a great way to drive away sleep. However, studies have shown that consumption of excess caffeine can lead to miscarriages or low birth weight in babies.
Tips to Remember for Healthy Pregnancy
A good 8-9 hours’ sleep is essential during pregnancy. So, even if you are working for night shifts, make sure you catch up with the rest your body needs at other times of the day.
Try to carry some healthy food to work so that you don't have to depend on outside food when you are hungry. This would preferably be fresh fruits, cereals, etc. that is fit for eating during pregnancy.
If you feel sick or uncomfortable for some reason, do not hesitate to share it with your colleagues immediately. You might also call your family for that matter. Whatever is the problem, do not neglect it.
So, even if you can't avoid night shifts entirely during pregnancy, make sure you take good care of yourself and your baby. Try to keep people informed about your problem and don't hesitate to seek their help if required. Be a little alert and stay safe.
Also Read: Household Work During Pregnancy Read more
Suggested for you

Suggested for you

Skype Away the Distance with 5 Useful Tips
Do you find it hard to video chat with your kids? Maybe you need to make the experience more interesting so your little ones pay attention. Video chatting sessions can easily turn into fun times your children will love!
Do you often have to stay away from home and your little one for work and other commitments? You certainly miss your baby and would like nothing better than to stay in touch. Thanks to progress in technology, this isn't difficult anymore. Bonding through video chat with toddlers on Skype is one option that can make the distance dissolve in no time!
Tips for Video Chatting with Children
1. Timing it Right
Toddlers have a short attention span so it's important that you time video chats in such a way that your children are in a good mood and attentive. The best time to chat is in the morning after breakfast as this is when they're most alert. Avoid chatting when they're hungry and tired as they'll only be fussy and irritable.
2. Make Eye Contact
One of the most important tips for a video chat with kids is to make eye contact with them. In order to have toddlers listen to you and respond, it is important that they can see your face and look into your eyes. Try to make them feel like you're talking directly to them instead of through a screen otherwise they'll get bored and inattentive. If your hubby is home, ask him to pitch in and keep your darling entertained!
3. Going for Favourites
Getting your pre-schoolers to show interest throughout a video chat takes some work. You can sing them their favourite song or tell them their favourite story. You could even enact it with some puppets. They'd love that and will be all ears for what you have to say. Try being funny as kids enjoy comic scenes and expressions.
4. Try a Change of Scene
Try chatting with your kids on a phone or a tablet. This makes it easy for you to move around and also gives them the freedom to show you different scenes and views. This is especially so if you have older children who are eager to tell you about school, friends and what's been going on in their lives. However, a change of location should also work well with your toddler.
5. Expect Less
Unlike adults who can chat endlessly for hours, children lose interest quickly. Toddlers and pre-schoolers in particular get bored easily. Don't expect your little ones to chat with you for more than five minutes at a time. Anything longer and they'll be craving something else. It's a good idea to end the call before they start zoning out.
Try these video chatting tips for parents when you Skype with your angels next. Schedule a chat every other day depending on how busy you are. Make sure the internet connection is stable and that your laptop, cell phone or tablet is fully charged. Get closer to your kids even when away! Read more
Suggested for you

God Engraved Her on His Palms and Named Her Even Before She Was Born
For every woman, being a Mother means the biggest achievement of her life. Especially for me, having lost my mother during my teenage years and who lacked parental love and care even more increased the desire to give birth to a baby girl and see my mother in her. The birth of my darling daughter is nothing but a miracle. My wedding story explains why it is such a big thing for us, even though every birth has its own story and importance. My husband and I got married on a special day Feb 14, 2018, hoping for a beautiful future ahead as everyone does. From day 1 of our marriage, we started praying to Jesus that we want a girl child. We thought of naming her as Nithya(combining our names Nitesh and Divya). To our amazement, God answered our prayers and I conceived within less than a month. As we are enjoying my pregnancy, in my 5th month, I fell on my back and got injured on my hand whereas my husband was spared with minimal abrasions. That day we cried out to the Lord for his miraculous healing to me and my child, that we should be safe. We had done the regular check ups and doctor said our baby was totally safe, infact she was actively moving inside which we viewed in the scan. God is great! We still didn't know the gender but whenever we talked to our baby in my womb, we addressed as girl in faith. Finally the day has come when I bore pains and gave birth (normal delivery 3.8 kg) to this little bundle of joy bringing all happiness and smiles into our lives, a girl as we desired. That moment we decided to name her as "Gift from God/ Father's Gift- Avisha"(Hebrew word) and our names combined "Nithya".
Will be thanking God for a lifetime for making me a mother to this child Avisha Nithya and making me complete once again.
I believe, "Serving and caring for my child is an act of worship to the Lord". If all mothers nurse their children with the same attitude, they will not be stressed out to play this strenuous role of being a new mother.
Disclaimer: The views, opinions and positions (including content in any form) expressed within this post are those of the author alone. The accuracy, completeness and validity of any statements made within this article are not guaranteed. We accept no liability for any errors, omissions or representations. The responsibility for intellectual property rights of this content rests with the author and any liability with regards to infringement of intellectual property rights remains with him/her. Read more
Dr Ghouse has added a new answer
Mom of a 1 yr 7 m old child
8 hours ago
Q. Hello My baby is 20 months old He has a adenoids sometimes he closed his left year please suggest what to do???

Dr Ghouse
Paediatrician
2 hours ago
A. you had to take opinion of ENT for treating the problem. if there is no relief it is better you see your doctor for proper examination particularly physical examination if there is need for doing investigations to find out the problem and treatment ok
Rashmi has added a new answer
Expecting Mom due in 3 months
8 hours ago
Q. I am 23 weeks 1 day pregnant. I was feeling the movements actively until today. Baby movements were not that good or maybe I didn’t feel it that way today. Is it a cause of concern? Should I wait for a day or two or should I go and see my gynaecologist?
Please suggest!
Read more
Rashmi
Mom of a 9 yr 8 m old girl
2 hours ago
A. Yes you are right sometimes a woman’s are really light but if in 24 hours you haven’t even felt one time that Baby is moving or any of the so it’s better to get an ultrasound done one time you still have time to visit your doctor if you feel any movement it is all good because if you do not feel the movement within maths 24 hours it’s best to get a check with your doctor
Dr Sameer awadhiya has added a new answer
Guardian of 0 children
7 hours ago
Q. she doing from yesterday at night time only once and she having breast milk as well as formula feed nan pro 1 ,I have concern about like this potty yellow and grey ,I want to know it's normal ???

Dr Sameer awadhiya
Paediatrician
5 hours ago
A. Loose motion are most of the time infective where it is associated with fever and vomiting and its known as gastroenteritis where symptbomatic treatment along wjith management for dehydration is required if loose motions are associated with foul smell mucous high grade fever than it could be bacterial infection which needs antibiotics treatment
Dr Ghouse has added a new answer
Guardian of 0 children
2 hours ago
Q. I am 8 month pregnant. I have UTI. How to treat UTI during pregnancy. Also does UTI resolve itself without any medication if I drink a lot of water?
Dr Ghouse
Paediatrician
50 mins ago
A. it depends on the intensity of infection the strain of organisms present in the urine take proper treatment. if there is no relief it is better you see your doctor for proper examination particularly physical examination if there is need for doing investigations to find out the problem and treatment ok
Dr Ghouse has added a new answer
Expecting Mom due in 4 months
1 hour ago
Q. hello everyone, please suggest me, am getting pain in lower abdomen right side, anybody plz tell me why am getting pain pls
Dr Ghouse
Paediatrician
1 hour ago
A. this needs proper examination to find out problems like appendicitis. if there is no relief it is better you see your doctor for proper examination particularly physical examination if there is need for doing investigations to find out the problem and treatment ok
Rashmi has added a new answer
Expecting Mom due in 2 months
58 mins ago
Q. hi mam for 2days I am seeing my baby bumb decreasing is it cause of worry?
Rashmi
Mom of a 9 yr 8 m old girl
56 mins ago
A. I don’t know how the bumps of your child decreasing that’s not fair to me second you have not mentioned the current age of your child to do it and there is no clarity in the query it would be difficult for me to help us so if you don’t mind can you please repost with all the necessary details associated with your question
Check out this new Memory

Surabhi
Mom of a 4 yr 6 m old boy
1 min ago

Like
Comment
Share
0 Likes
0 Comment
Check out this new Memory

saroj kumar
Guardian of a 10 m old boy
1 min ago
#grandphoto

Like
Comment
Share
0 Likes
0 Comment
Check out this new Memory

Priyanka kawre
Mom of a 2 yr 5 m old girl
3 mins ago
#walloffame

Like
Comment
Share
0 Likes
0 Comment
Tell us more about yourself get More Personalised
 Infant0 to 6 Months
 Baby6 Months to 2 Yrs
 Toddler2 to 4 yrs
 Kids4-6 yrs
 Big Kids6+ yrs
 Expecting
 Trying to Conceive

