

.svg)
.svg)
.png)

Enter Child Details

Add Profile Photo


Videos you might be interested in


Videos you might be interested in
Videos you might be interested in
Suggested for you
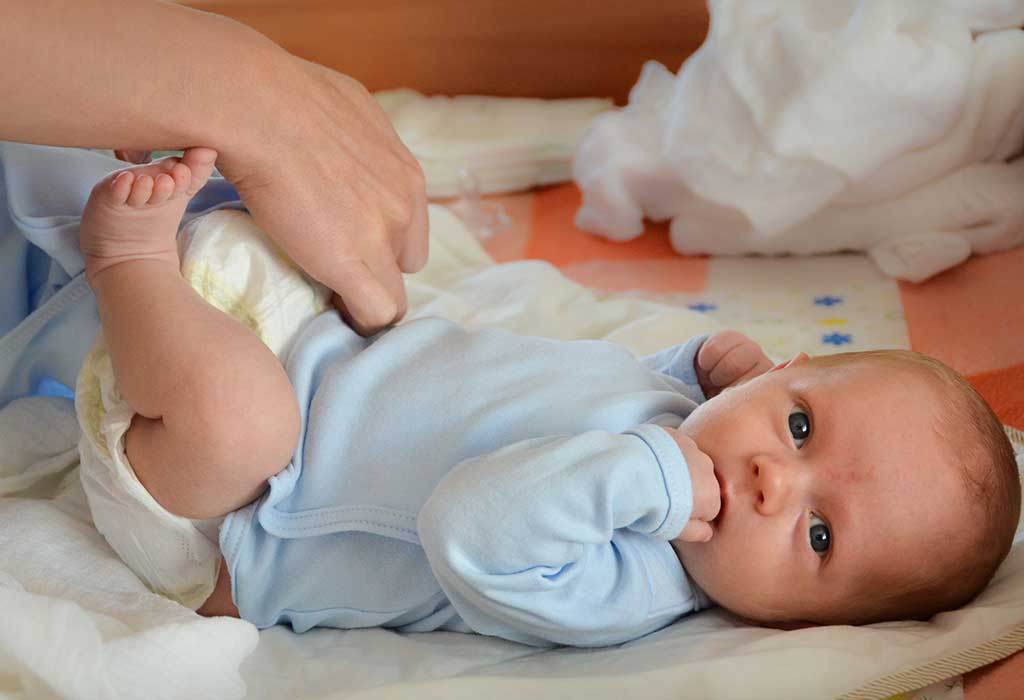
Common Diapering Myths You Need to Stop Believing in for Your Baby’s Sake
If there’s one thing that’s sure to be constant in a mom’s life, it’s the pouring in of advice from all corners. Once the baby is out, relatives, friends, and even random strangers cannot wait to give you their opinion on baby-related issues, right? Sure, a lot of it will be completely helpful and can make your life easier. But when there are 20 different - and we mean different! - tips coming in from every direction on a single topic, it’s bound to get you totally confused. Nutrition, sleep routines, potty-training - it’s all such a maze that you have to get around, trying to filter which advice makes sense and which needs to be ignored. And we’re sure one of your major areas of concern is going to be the big ‘D’ - diapering, of course!
Baby Diapering Myths You Need to Stop Believing
Diapering - do it right and you’ve got a happy, comfortable baby; do it wrong and you’re going to see angry red rashes on your little one’s bottom and will have to deal with his crankiness too! There are several pieces of advice that will come your way from experienced moms and well-wishers, but not all of it is completely accurate. These are a few you need to stop believing in.
1. Using Diapers Leads to Rashes.
Let’s get this common one out of the way, first and foremost! No, using a diaper alone is not the reason why a rash can appear on your baby’s bottom. Chemicals and moisture from your baby’s pee and poo can irritate his skin; add an ill-fitting and/or wet diaper to the equation and you can imagine what happens! Sometimes, even new foods introduced to the baby’s diet can lead to those red patches too. So no, diapers alone don’t cause a rash. The way you can avoid this, as much as possible, is to keep changing nappies frequently, and also by using a good diaper rash cream. Choose diapers made of soft materials, such as Huggies Diapers, which are also clinically proven to prevent diaper rash.
2. Larger-Sized Diapers Help Prevent Rashes.
Once again, this is purely a myth - diaper rash does occur when there’s friction between the baby’s skin and his wet diaper, but that doesn’t mean you should purchase sizes that will be too loose for him. Diapers should be like the clothes your baby wears - well-fitting and comfortable. If the diapers’ size is too large, you’re going to be in for a lot more leaks, messes, and slip-ups! In general, check whether the diaper fits around your baby’s leg snugly, without leaving telltale red marks. You can also check whether the diaper tabs close easily at your baby’s waist without a lot of tugging and pulling.
3. You Need to Wake your Baby in the Middle of the Night if He Has Wet His Diaper.
No, you don’t, not unless his diaper is extremely wet or filled with poo! While your baby’s diaper needs to be changed every 2-3 hours generally (resulting in close to 10-12 diapers per day), this rule can be relaxed a little while he’s sleeping. Put on a fresh diaper before his bedtime. However, as soon as your little one is awake, change his nappy, because the longer the acid content of the pee/poo stays in contact with his skin, the more trouble it might cause. And if you do need to change it during the night, make sure you finish the process quickly without interacting much with the baby, so that both of you can sleep off quickly. The need to change also depends on the type of diaper he’s wearing - if it’s very absorbent, he’s probably not going to wake up feeling uncomfortable. You could choose diapers like Huggies Wonder Pants, which will not only safeguard against pesky leaks from the sides but will also pull in wetness and keep your baby dry for close to 12 hours. No more sacrificing your or your baby’s precious sleep time!
4. You Should use Baby Powder on his Diaper Area While Changing His Nappy.
Again, you’re probably doing your baby more harm than good by using baby powder, especially on sensitive areas. In fact, the American Academy of Pediatrics recommends against the use of baby powder at all, citing that it may cause lung damage if the particles are inhaled. While the idea behind using baby powder while changing diapers was to ensure dryness and prevent diaper rash, diapers today do that job effortlessly. For additional measure, using a diaper rash cream as a barrier between your baby’s skin and the diaper should also do the trick. Keep away from baby powder as much as possible for use on sensitive areas.
5. If There are No Leaks or Tangible Wetness, You Don’t Have to Change your Baby’s Diaper.
Just because the diaper is doing a great job of absorbing wetness doesn’t mean your child can walk around in the same one all day along! The longer your child wears a soiled or wet diaper, the more prone he will be to infections. Even if there is zero leakage or the diaper doesn’t feel too wet, it’s always best to change it every 2-3 hours. In between changes, let your baby’s bottom dry out for a while; give him some nappy-free time.
When it comes to your baby’s cute little bum, we know you want to stay clear of diaper rash or any inconvenient ‘messes’. If you’ve ever had doubts about whether these pieces of advice were myths or facts, well, now you know that along with dirty diapers, you have to dunk these myths in the bin too!
Also Read:
Widely Believed Myths About Baby Skin
Quick Tips for Preventing Baby Diaper Leaks
Most Common Newborn Baby Care Myths Debunked Read more
Suggested for you

How to Check the Temperature of Your Baby
If your baby shows signs of fever, it is essential for you to be aware of accurate ways in which you can check the baby’s temperature. Based on the reading on the thermometer you can decide on whether your baby needs to go to the paediatrician or not.
What is High Temperature in Babies?
In babies, 36.4 ºC or 97.5 ºF indicates a normal oral temperature, with slight variations. However, if the rectal temperature shoots up to 38 ºC or 100.4 º F, it may be an indication of fever, warranting a call or a visit to the baby’s paediatrician.
What Types Of Thermometers Are Used For Taking Baby’s Temperature?
Various types of digital thermometers are used to measure a baby’s temperature. These include:
Multi-use digital thermometer: This thermometer uses metal strips with heat sensors which are connected to an LCD screen. A digital thermometer shows accurate reading up to the decimal points. This thermometer can be used to measure the oral, rectal and the axillary (armpit) temperature.
Tympanic digital thermometer: This thermometer is used specifically for measuring the temperature of the ear canal. These thermometers read the infrared heat waves that are released by the eardrum.
Temporal artery digital thermometer: It measures the infrared heat waves released by the temporal artery that lies right under the skin on the forehead. The shape of the thermometer allows it to be placed on the baby’s forehead with ease.
How to Check Baby’s Temperature Using Thermometers?
It is ideal to use a digital thermometer to check your baby’s temperature as it gives quick and accurate readings. If you’re using the thermometer for the first time, follow the instructions on the thermometer pack that has details on how to use a thermometer for babies. Do not immediately measure the baby’s temperature after a bath as it may give inaccurate readings. You will need to hold your baby in a comfortable position before placing any thermometer for accurate results and to reduce discomfort to the baby. Each type of digital thermometer has a different procedure that you need to follow.
How to Measure Rectal Temperature?
Measuring the rectal temperature is the best way to get an accurate reading in babies and toddlers up to the age of three. However, in cases where children older than three are unable to have their temperature measured orally due to a cough or congested nose, a rectal thermometer can be used.
Here’s how to measure the rectal temperature of your baby using a standard digital thermometer.
Use a cotton ball dipped in alcohol to clean the thermometer and wipe it dry. You can apply lubricant or petroleum jelly to reduce discomfort while inserting the thermometer.
Let the baby lie on his stomach as your partner holds him firmly. You can also lay the baby on his back and lift his legs up to his thighs.
Spread the butt cheeks gently, enough to see the rectal opening clearly. Insert half an inch of the thermometer into the rectum. You can insert up to one inch for babies older than six months. Mark the thermometer before inserting so that you know how much to insert.
Wait for two minutes with the thermometer in position until it beeps, or wait till the reading appears on the screen.
Remove the thermometer gently and clean it with alcohol before putting it away.
The baby’s rectal temperature is normally 0.5 ºF (0.3 ºC) to 1 ºF (0.6 ºC) higher than normal oral temperature. If your baby’s rectal temperature is over 100.4 ºF or 38 ºC then he may have a fever.
How to Measure Temporal Artery (Forehead) Temperature?
Temporal artery thermometers are suitable for babies over three months of age. In babies younger than three months it can be preferred over axillary thermometers to be used as a screening device.
To use the temporal artery thermometer you need to,
Hold the baby in a sitting position.
Place the sensor end of the thermometer on the centre of the baby’s forehead and press the scan button. Gently swipe the thermometer across the forehead towards the hairline. Now release the scan button and record the temperature.
The normal temporal temperature in a baby is 0.5 ºF (0.3 ºC) to 1 ºF (0.6 ºC) lower than oral temperature. Readings over 99 ºF (37.2 ºC) may indicate a fever.
How to Measure Tympanic (Ear) Temperature?
Tympanic thermometers are best used in babies over 6 months of age. Babies younger than six months have a narrow ear canal to insert the probe hence it is best to avoid using these thermometers in them. The device needs to be placed correctly in the ear for an accurate reading. If the baby has a lot of earwax, then the reading may be incorrect.
Here’s how to take the ear temperature of a baby:
Position the tip of the thermometer in the ear canal. Ensure to insert the tip only till the mark.
Based on the thermometer the reading time may vary. Read the instructions on the manual to know how long to keep the thermometer.
As these thermometers are sensitive to placement, you may need to take a few readings to get the accurate temperature.
The ear temperature of a baby is 0.5 ºF (0.3 ºC) to 1 ºF (0.6 ºC) higher than oral temperature. If you baby has a temperature of over 100.4 ºF or 38 ºC then he may have a fever.
Taking Armpit Temperature of Baby?
Axillary thermometers are known to be less reliable compared to the others. Although it can be used at any age, it is recommended that you do not use these in babies younger than 3 months as the reading may not be precise.
To measure the armpit temperature of your baby:
Undress your baby over the waist and hold him in a sitting position.
Ensure that the underarm of the baby is dry. Rub cotton dipped in alcohol to clean the tip of the thermometer.
Place the tip in the baby’s armpit and gently hold the elbow close to the baby’s body.
Hold the thermometer in position until it shows a reading or beeps.
Remove the thermometer and clean the tip with alcohol before storing it.
The normal body temperature for infants under the arm is 0.5 ºF (0.3 ºC) to 1 ºF (0.6 ºC) lower than the oral temperature. A temperature reading higher than 99 ºF (37.2 ºC) under the arm usually indicates a fever.
How to Take Oral Temperature of a Baby?
An oral thermometer is recommended for children over the age of four as the child is old enough to hold the thermometer in place himself. If you are using a standard digital thermometer, then you should use different devices for rectal and oral temperature to avoid any infection. Keep in mind that the child should not have consumed anything hot or cold at least 30 minutes prior to measuring the oral temperature.
Here are a few steps you can consider while measuring your baby’s oral temperature:
Clean the thermometer with alcohol and place it between the tongue and the lower palette in the mouth. The thermometer should be held in place with the tongue and the lips and not with the teeth.
Although the child is old enough to hold it in place, do not leave him unattended with it.
Keep it in position for about three minutes and note the temperature.
After use, wipe it with alcohol and store it safely.
How to Ensure The Accuracy of the Reading?
Following the step by step instructions on the manual can help get an accurate reading. You can also keep in mind the following aspects to get an accurate reading:
Allow at least 15 minutes after your baby has had a bath before you measure his temperature, as bathing increases body temperature.
Do not take the temperature at least for 30 minutes after your child has eaten anything hot or cold.
If the baby is wrapped tightly or your child is wearing too many clothes, allow them time to cool off before taking the temperature.
Things to Remember
Keep in mind the following things before and after using a digital thermometer on your baby.
Keep separate thermometers for oral and rectal temperature measurement.
Follow the instructions on the manual to get accurate results.
Keep the thermometer out of the reach of children to prevent possible choking hazards.
Clean the thermometer thoroughly with alcohol before and after use to prevent bacteria and infections.
It is essential that you measure the accurate temperature of your child to determine whether he has fever and a digital thermometer gets you the best results. The right procedures can help you record the temperature of your baby and take further steps accordingly.
Also Read: Fever In Babies Read more
Check out this new Memory

Asfiya Imran
Mom of a 3 m old girl
2 mins ago

Like
Comment
Share
1 Likes
0 Comment
Suggested for you
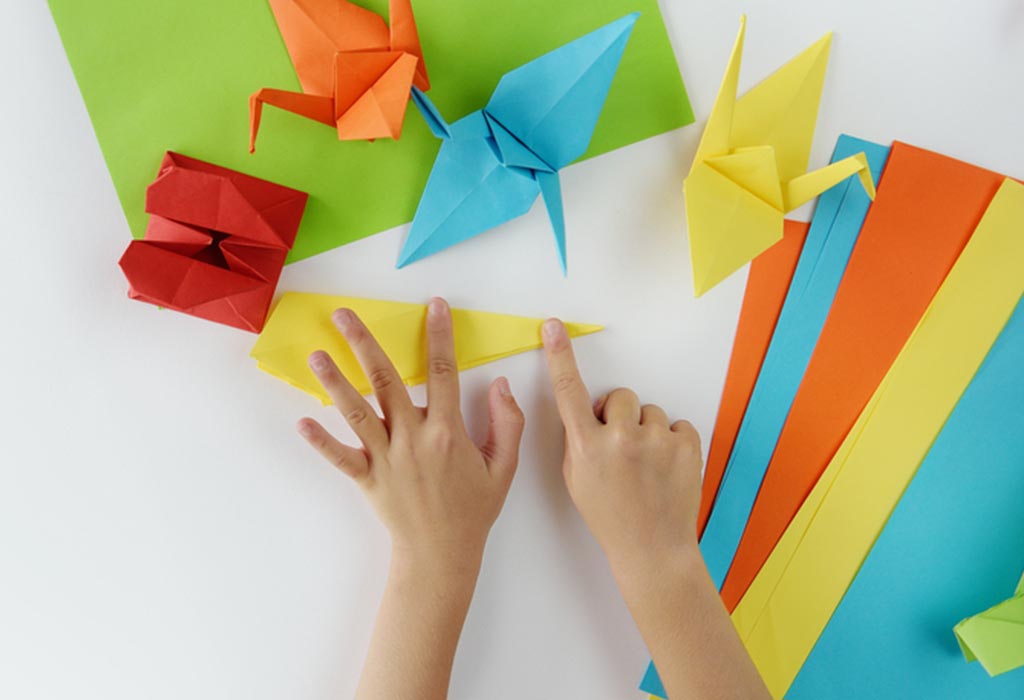
15 Easy Origami Crafts for Kids
Origami is the ancient art of paper folding without cutting, glueing, pasting and marking. It is a great way to improve the aesthetic sensibilities of children.
Origami Crafts for Children - Step by Step Instructions
Origami for kids is a fun activity. Listed below are 15 origami ideas for kids with simple origami instructions for kids.
1. Rose
Awaken the botanist in your child with this rose origami.
How To Make It
Take a square paper and fold in half horizontally.
Unfold and fold vertically.
Fold each corner into the middle crease blitz base.
Fold each corner into the middle crease making a double blitz.
Fold again, in the same way, making a triple blitz.
Press down over the folds to make creases.
Curl back the layers of the paper.
2. Fox
The fox is very simple to fold and very easy for the beginners.
How To Make It
Fold the square paper in half diagonally.
Fold in half again.
Open up the last fold. With the long side of the triangle in the bottom, fold it so that the top and bottom points touch.
Draw eyes and nose.
3. Simple Paper Plane
Paper planes are the first origami models most kids learn to make.
How To Make It
Fold a rectangular paper lengthwise and make a crease in the middle.
Unfold and fold the two corners towards the crease.
Fold the corners again, but this time the folds should be lengthier than the earlier fold. It should resemble a roof of a hut with steep sides.
Fold again in the middle but this time outwards.
Fold the sides down so that they are aligned with the bottom of the object and make sharp creases.
Lift the sides up to form wings.
4. Boat
A boat is the most well-known origami art for kids.
How To Make It
Fold a rectangular paper in the middle.
Keeping the paper folded, make another fold vertically.
Open the fold and then using the crease fold the bottom corners up to the middle.
Fold one layer from the bottom up along the bottom of the front flaps.
Repeat the step for the opposite sides.
Unfold and then fold the bottom corners along the crease.
Unfold and insert the overlapping flap on the left underneath the right section.
Open the bottom and fold it making a crease.
The fold one layer up to the top and repeat the same on the other side too.
Pull open the right and the left flaps and flatten it in the shape of a boat.
5. Japanese Fan
Japanese fans are one of the simplest origami creations.
How To Make It
Take a rectangular shape paper.
Start folding in long skinny folds using your fingers.
Fold till the end of the paper.
Once the folding is completed, press it to make a crease on each fold.
Keeping the folds all together and vertically, make a fold in the middle.
6. Penguin
It has easy folds and can be made by small children.
How To Make It
Take a square piece of paper (black on one side and white on the other side).
Make a crease by folding (it will look like a triangle after folding) at the centre with the black portion inwards and white portion outwards.
Unfold it again. Then fold the bottom corner just below the crease.
Turn the paper over (white portion upwards).
Fold in the left and right sides keeping enough space to create an invisible triangle.
Fold the pointed top downwards (this will be the head).
Tugging at the middle crease, fold the sides back.
Pull out the beak and flatten the back of the head.
7. Fortune Teller
The Fortuneteller is easy to make, and children have a great time playing with it.
How To Make It
Take a square white sheet of paper.
Join the upper half of the paper with the lower half.
Unfold. Then fold the left corner of the upper half and bringing the base till the crease line.
Do the same in the right corner.
Continue with the same process in the lower half as well bringing both the corner bases to the crease line.
Turn the side and again fold the corners bringing all the corners to the centre.
Colour all the triangles in different colours.
Write a fortune underneath each flap.
Fold the bottom half to the top
8. Cup
An easy to do origami model.
How To Make It
Take a square piece of paper, preferably origami paper.
Fold the bottom corner to the top corner.
Fold the left edge of the triangle to the bottom edge, and then unfold.
Fold the left end corner of the triangle to the end of the crease line on the right.
Fold the right corner to the left corner.
Fold the top flap down and turn the paper over.
Do the same on the other side too.
Open up the pocket
9. Elephant
Help your kids get close to nature by teaching them to make an origami elephant in very simple steps.
How To Make It
Take a square paper.
Fold the paper in half by folding the top corner to the bottom corner.
Press with your fingers and create a crease.
Unfold. Then again fold from the left side to the right side. The again unfold.
Fold the left and right edges of the triangle to the centre crease.
Fold both top corners and bring them to the side.
Fold the left and right corners in.
Turn the figure over.
Fold up the elephant’s trunk and fold in. Then bring the trunk down keeping a bit of the trunk folded in.
Fold the trunk in an out like an accordion or just the way we do while making a fan.
Pull the trunk down and add eyes with a marker.
10. Butterfly
The origami butterfly’s wings spread out nicely and look really realistic.
How To Make It
Take a big square piece of paper.
Fold along the diagonals and then unfold.
Fold along the other diagonal and then again unfold.
Fold the square horizontally and then unfold.
Fold the square vertically and again unfold.
Holding the two sides, push the centre together.
Flatten the sides above and below until it becomes a flat triangle with layers.
Take the bottom corners of the top layer triangle and fold them to meet at the top corner.
Turn it over and fold the top of the triangle backwards over the bottom edge so that the tip sticks out a little bit.
Insert the tip that sticks out over the side and turn the card over.
Make a fold in the middle.
11. Tulip
This easy origami Tulip can easily be made by kids.
How To Make It
Place a square paper with colour side downwards.
Fold it in half making a triangle.
Fold into another triangle and unfold it.
From the right corner, make an angled fold diagonally upwards on each side.
From the left corner, wrap the flap around the rest of the object.
Fold the cornerback behind the figure.
12. Hat
A cool hat made out of paper.
How To Make It
Take a rectangular paper.
Fold the paper lengthwise into two equal halves and then unfold.
Fold the paper in half – top to bottom and then unfold.
Make a triangle by folding the right and left corners to the centre.
Fold up the bottom flaps in the front as well as in the back.
13. Shirt
An origami shirt can be used to make a cute card.
How To Make It
Take a rectangular paper and fold 1/3rd of the paper (from the edge upwards).
Turn it over and fold it lengthwise. Make a crease and unfold.
Fold in both the sides to meet the centre line.
Fold the two bottom corners outwards.
Turn it over and turn the top edge (about 1/4th).
Turn over again. Fold the top two corners diagonally making them meet the straight line at the centre.
Fold up the bottom edge and tuck it under the collar.
14. House
Make an origami house in simple and easy steps.
How To Make It
Take a square sheet of paper with the colour side down.
Fold the paper from the left to the right edge and unfold.
Fold from top to bottom.
Fold both the edges bringing each to the centre crease.
Turn it over and fold the left and right edges to the centre.
Open the top right and left flaps, spread out the corners to the side and flatten them down.
Turn it over and draw the door and window.
15. Lady Bug
Make a pretty ladybird in a coloured paper or a polka dotted paper.
How To Make It
Take a paper (square in shape) with the white side up and fold it diagonally.
Fold the triangle in half and unfold.
Fold the top two corners downwards, but the flaps should not be in line with the centre crease. Leave a gap in the middle.
Turn it around and fold down the top corner to the centre point.
Fold a little of the folded down top corner and flatten it.
Origami as an art can be enjoyed by children as well as adults. It is an excellent activity for developing the attention span, fine motor skills and the ability to follow instructions.
Also Read: Greeting Card Making Ideas for Kids Read more
Suggested for you
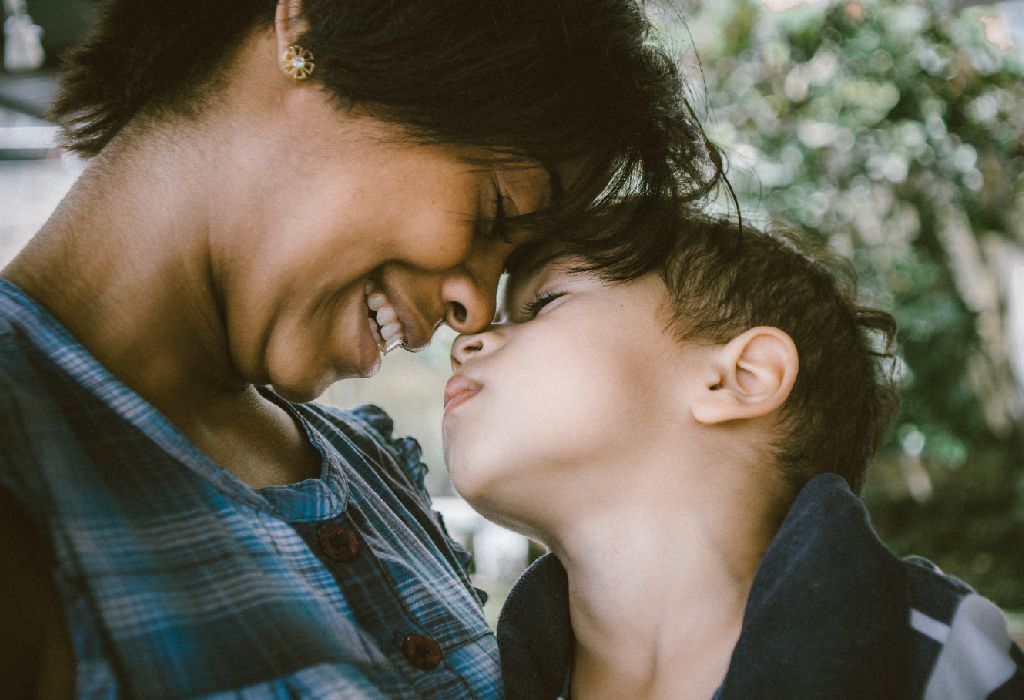
This is What Your Kids Need From You – Age By Age Guide On Parenting!
Being a parent is not for the faint of heart. Kids behave differently at different stages of their development. How should you support them as they grow up, meet new people and go through challenging experiences? Well, knowing certain signs to look out for can make this much easier.
We have brought for you a virtual journey throughout your parenthood – right from when your baby is born to when he learns to crawl, jump, and take confident steps all the way to college! This guide, approved by child development experts, will give you concrete pointers on the kind of support your children seek from you, their mom.
Infants & Babies (0-12 months)
Cuteness aside, babies below a year can be quite a handful! No matter how much you try, they will end up putting anything and everything in their mouth. Since their movement is limited, babies explore the world through their senses – seeing, touching, tasting, hearing and smelling. What you need to do is be consistently attentive to their needs to help them feel safe and secure. Track their feeding carefully, cuddle and hug them, and support them as they try to explore the world through their tiny hands and feet.
1-2 Years Old
This is the age when most babies begin to speak. But along with words like mamma and daddy, they will also learn to say no – and often! Luckily, they have short attention spans which you can use to your advantage. When you catch them doing something they shouldn't be doing, distract them. More often than not, this will work like a charm.
Your child will also begin to understand what you are saying to him. If you appreciate them when they do something praiseworthy, they are more likely to do it again. Also, be gentle when you are correcting undesirable behaviour, or else you might make them defiant or anxious.
3 Years Old
The best word to describe a typical three year old is this – feisty! Your child will start to make their own decisions, and they won't always be to your liking! It will be a challenging time for you, but you have to be patient. Have some rules in place, and ensure that your child follows them consistently, and as often as possible.
To support them at this age, ensure you say no only when absolutely necessary – this is the age children really start exploring the world. If you show too much disapproval, you might end up taking away your toddler's initiative to know more about the world. Also, encourage them to make decisions to make them feel powerful, but keep the ball in your court – say, do you want a banana or an orange? Chocolate is not an option!
4 Years Old
This is the age when you can start explaining to your kid the reason behind your rules, because if you don't, they will refuse to listen! Encourage exploration of the world by regular trips to the zoo, the park, and any place you think will be interesting to visit. Also, friends are important at this stage, so make sure your child is spending enough time with peers.
One more thumb-rule at this age – your little one badly wants to impress Mamma; please acknowledge good behaviour with lots of hugging!
5 Years Old
Now is when your child will actually know right from wrong, but don't expect them to always do the right thing. Unlike before, your child will prefer to play with kids of the same gender. In an attempt to fit in, they will do what most of their peers are doing. Make your child aware that just because everybody is doing something, does not mean it is okay to do the same.
Make sure you spend quality time with your children for them to share their secrets with you. You also need to give them extra emotional support by discussing feelings and thoughts; your children now understand and struggle with them!
6 Years Old
Peer approval and acceptance will continue to be important and will play a major role in shaping personality at this age. Make sure you are aware of the company your child keeps.
Help your child develop a sense of responsibility by giving chores such as setting and clearing the table. For better bonding, ensure that you spend ample time as a family, even if it is something as simple as playing a game of carrom together.
7 Years Old
This is the age of great development in intelligence - jigsaw puzzles and creative games! You might be surprised by the mature way in which your child communicates with you. However, your child will need help identifying and dealing with emotions. In particular, there will be an increase in negativity and drama.
Even if you feel that they are making a big deal out of nothing, don't say this as you will hurt their feelings. Instead, listen to their problems and help them figure out how they can solve them.
8 Years Old
An eight year old enjoys solving problems independently, but your opinion will still be valued. A sense of worth will be established at this age, so be careful that you argue and criticize only when absolutely necessary.
Just remember this - spend plenty of time together to strengthen your bond. Encourage your child to explain their point of view if you have an argument.
9 Years Old
Nine is a period of physical and emotional changes and challenges. Not only is a nine year old on the brink of adolescence, they also have to struggle with complex and demanding school things. What friends think and say will be more important than anyone else's opinion.
It will be frustrating to be less in control than ever before, but avoid being too bossy – it will only backfire on you! Instead, try to understand them by asking them about the reason behind their thoughts and actions. Once you understand the way they think, it will be easier to make them see things from your point of view.
10 Years Old
Now that your child is officially a tween, be prepared for a noticeable increase in defiance, excuses and misbehaviour. Increased discipline on your part is not going to prevent your kid from acting out. Be realistic; know now when to ignore bad behaviour and when to fix it.
Get your kid more involved in household chores and decisions, such as where to go on holiday. For an early start on money management, consider giving pocket money – your child will love the added responsibility!
11 Years Old
Your child will now be able to reason with more adult-like logic. Even the school curriculum will include complex subjects such as the solar system and algebra to challenge him to consider new ideas, and question old ones. So naturally, at times, their attitude may seem disrespectful.
Try to see this behavioural change as curiosity and inquisitiveness. Answer questions and doubts as calmly as possible.
12 Years Old
Being the year right before teenage, your preteen will occasionally turn into a moody, angry and rebellious person. These changes will be baffling and tough for him or her to deal with, so your support is essential.
Let your child know that whatever is happening is completely normal – and that you are always there to help. Now is a good time to teach essentials like physical and emotional changes, and how not to give in to peer pressure.
Adolescence
Adolescence needs no introduction, does it? It is an age parents fear the most. The age where friends and social outings take precedence, family time is drastially reduced, and worst of all – you simply cannot understand what's going on in your teen's mind! Don't worry though. If you have bonded with your child in pre-adolescent years, they will respect and love you, even if their behaviour might make you feel otherwise. Give your teen space, give them information instead of lectures, let them know you are always there for them, and you're sorted.
Knowledge is power – especially when it comes to understanding normal behaviour for your kids. However, all the knowledge in the world will not prevent you and your kids from making mistakes along the way. All you can do is love each other, be patient, and enjoy the journey! Read more
Suggested for you

Embellished Juttis - Your Wedding Season Staple!
The wedding season is upon us, and we bet you have a couple of wedding invites lined up already. Dressing up for every occasion sure is a task; right from planning your outfit to getting your hair & make-up right - weddings can be hectic. Add all that to the pressure of selecting the perfect footwear - heels, stilettos, open sandals? It would be a miracle if a single footwear paired well with every kind of traditional dress, wouldn’t it? Well, what if we told you that there is a simple yet elegant north-Indian footwear that goes well with any clothing you pick? Pretty amazing right? Well, you guessed it - we’re talking about the super comfortable and forever trending Punjabi juttis, with a hint of bling!
The fashion world is cyclical and Punjabi juttis are in the eye of it. They’re simple, flat, hand-crafted juttis that are an expression of Indian heritage and ethnic design. Though previously regarded as Indian royal footwear worn by men & women belonging to noble families, people nowadays relate juttis to easily accessible, comfortable footwear. You need only slip your feet in, and you’re good to go; no strings attached!
Here’s How Juttis Can Be Your Best Pals This Wedding Season
Even though women consider juttis as old-fashioned because they’re flat, here’s how they can be your go-to footwear during weddings.
1. Juttis Put an End to Your Hunt for Bling
Weddings are all about bling; irrespective of whether it’s your own brother’s wedding or your husband’s best friend’s sister’s wedding, you’re always on the hunt for something jazzy! We all have that one pair of heels that comes to mind when we think about bling in our wardrobes. Well, add some more bling with a nice pair of embellished juttis. They’re super stylish, comfortable enough to wear for a couple of hours at a stretch, and no doubt trendy. Plus, you can’t ever go wrong with a pair of juttis. They’re elegant and timeless, and that’s precisely what you’re looking for at weddings, right?
2. Juttis Complete Your Traditional Look
When you wear a pretty lehenga or a traditional floor-length gown, it’s unreasonable to expect a pair of high heels to complete the look for you! The sole reason being that they’re western. Traditional clothes demand fabulous accessories. So if you can take the effort to match your bangles & earrings to your dress, why settle for a single pair of heels? Go ahead and grab a pretty pair of embellished juttis that match your outfit. This modern-day footwear can be paired with every traditional outfit - sarees, shararas, dhoti pants, lehengas, churidars and even palazzos, you name it!
3. Flat Juttis Equal Comfort
Heels are great, no doubt, but be honest when you ask yourself this: How comfortable are heels compared to flats? You know the answer right? Indian weddings can be long, not to mention exhausting. To be honest, nothing beats the feeling of coming home after a long get-together and placing your bare feet on the cold floor. You’re more likely to long for this feeling when you’ve stuffed your feet in a pair of heels for a couple of hours. But that’s not how juttis will treat you. They’re flat and comfortable, feet-friendly some would say. No matter how long the wedding lasts, juttis will not make your hips and back ache. You can easily walk around in them, without worrying about their heel sliding into the grass on the lawn. The best part about juttis is that once you put them on, they let you be yourself without having to check on them every 5 minutes.
4. Pastel Shades to Fit Your Needs
For those of you who steer clear from bling, pastels shades are ideal. If the thought of embellished juttis puts you off, then know this that tiny golden flowers on a pair of peach juttis too fall under this category. Not too jazzy, yet perfect for traditional outfits. When you wear an outfit that says bling, you’re not always looking for something equally sparkly right? This is exactly where pastel shades will come to your rescue. Opt for a pair in pretty pastels and go easy on your feet this wedding season. They’ll effortlessly complete your look, not to mention the elegance they add to every outfit.
5. Juttis Offer Scope for Customization
For women who are very picky about their footwear, juttis offer a wide scope for customization. Being originally hand-crafted, juttis give you the opportunity to play around with colours and tassels. Right from picking the kind of material and the cushioning of the sole, you can make the perfect pair for your feet, something that will go well with your traditional outfits. Right from colourful sequins, ghungroos & mirrors to katdana & zardozi work, there are a lot of ways to style them. Embellished juttis with pom poms and tiny beads are ideal for weddings and numerous other functions. The best part is that getting a pair customized is not as expensive as one might think. Juttis are reasonably priced, and they are easily available in Indian local markets.
So ladies, why wait? Go grab a nice pair of juttis to jazz up your style this wedding season. Irrespective of whether you love serious embellishments, mirror work or our very traditional phulkari work on your juttis, know it for a fact that they won’t disappoint you!
Also Read:
Packing Essentials for Destination Wedding
Appealing Gestures to Revive Your Marriage
How Money Can Ruin Your Marriage? Read more
Suggested for you
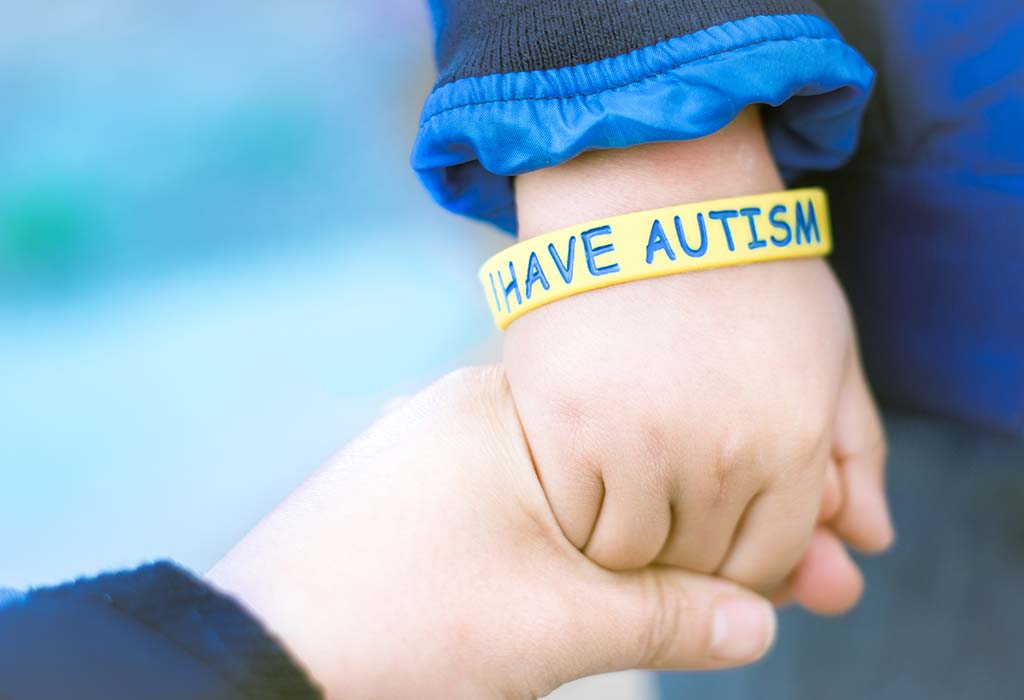
Mothering an Autistic Child
Dear Riaan,
I want you to know something today your mother has never felt. Something which hit my mind when I received a very beautiful message from one of my friends. I know the world will teach u lots of things going further and it will be defined only as an illness, but this is not true. Mumma wants you to know that there are certain kids born to be special, exactly like u. Their journey is different, time taken to achieve certain milestones is longer but still they are as human as us.
The real pain starts when a mother gets to know that her child is different. Sometimes all things which seem perfect to us might be broken inside. A mother smiling in front of u might be shattered inside. As she has dreams for her autistic child, she needs a caring hand to hold her child when she is not around.
Doctors in India ( as per my knowledge) only check the physical growth in a child. They check the height, weight, head size, vaccination schedule, etc, but they will never guide u about the learning that such a child needs.
Certain changes should be brought about for this:
Pediatrician should observe not only the physical growth and development but also mental health and look if the child has autism.
Counsel the parents that their child will lag in development.
Govt should have clear guidelines about further steps to be taken once a child is diagnosed with ASD.
Play schools should have special educators or psychologists who can help such children.
Govt should regulate the fees being charged by therapy centres so that it is affordable.
Airports, railway stations, malls should have sensory spots where swings, gym balls, rocking chairs, etc are kept for children.
Schools do not want to admit such children. That mentality should be changed.
To all moms of autistic children, there is a reason God has chosen you to tackle such a child as he knows that only u have the strength to overcome this struggle. Keep your spirit high and walk like a warrior.
Please share if you have any experience similar to this and share all the informative links in the comment section
Disclaimer: The views, opinions and positions (including content in any form) expressed within this post are those of the author alone. The accuracy, completeness and validity of any statements made within this article are not guaranteed. We accept no liability for any errors, omissions or representations. The responsibility for intellectual property rights of this content rests with the author and any liability with regards to infringement of intellectual property rights remains with him/her. Read more
Manisha Singh has added a new answer
Trying To Conceive
4 hours ago
Q. #asktheexpert mera baby 3 month ka h use gas bhuat banti h is karan wo bhuat rota hai

Manisha Singh
Expecting Mom due in 1 month
3 hours ago
A. it's very common for babies having gas problem ...you should recommend your doctor for this
Sai Prasanthi R L has added a new answer
Trying To Conceive
4 hours ago
Q. Hi
what to give 6 months old baby to eat

Sai Prasanthi R L
Mom of a 10 yr 2 m old boy
3 hours ago
A. Hello dear! Once your baby completes 6 months you can start giving small quantities of semi solids like homemade cerelac, mashed bananas, apple puree, ragi and so on. Continue with breastfeeding. Keep Babyhug tummy roll on handy
Dr Muhsina has added a new answer
Expecting Mom due in 2 months
3 hours ago
Q. now I am in 30 weeks of pregnancy I have vomiting.I couldn't control what the reasons for this vomiting
Dr Muhsina
Expecting Mom due in 3 months
3 hours ago
A. Some women may have vomiting throughout their pregnancy. The most common reason for vomiting during the third trimester may be gastritis. Make sure you eat small frequent meals, preferably every 2 hours. If your baby's weight during checkups are adequate..u needn't worry much about this. You can also consult your doctor and take anti emetics and PPIs if the vomiting is bothering you or interfering with your daily activities.
Mohammad amin has added a new answer
Guardian of 0 children
1 hour ago
Q. Is it okay is the baby does not pass stool for one day?

Mohammad amin
Guardian of a 2 yr 11 m old boy
12 mins ago
A. yes it's ok
Dr Vandan H Kumar has added a new answer
Guardian of 0 children
1 hour ago
Q. Is it okay if my baby does not pass stool for one day?

Dr Vandan H Kumar
Paediatrician
37 mins ago
A. no need to worry about the frequency and colour of the stool if the consistency of the stool is semi solid to solid.
also there is no need to worry about the smell of the stool if the consistency is normal.
you have to meet the doctor if it is watery inconsistency or hard consistency otherwise semi solid to solid stool is normal.
also passing stool after taking food is normal. r
Rashmi has added a new answer
Expecting Mom due in 6 months
1 hour ago
Q. Q.Asktheexperta# I m an expecting mother of 29 yrs. LMP 10 Feb 2024 . my husband's HPLC report shows thalassemia minor trait while mine is hb d Punjab trait . can we continue with this pregnancy ??

Rashmi
Mom of a 9 yr 7 m old girl
56 mins ago
A. Well you should check with your gynaecologist for that she has to go through all the reports and the issues that you are facing you and your husband and accordingly she can tell you what is the situation how your child is going because lot of things depend upon how the child is growing
Check out this new Memory

Vineeta Shukla
Mom of a 1 yr 10 m old girl
New Milestone

Like
Comment
Share
0 Likes
0 Comment
Check out this new Memory
Chandana A K
Guardian of a 1 m old girl
1 min ago

Like
Comment
Share
0 Likes
0 Comment
Check out this new Memory
Vineeta Shukla
Mom of a 1 yr 10 m old girl
2 mins ago

Like
Comment
Share
0 Likes
0 Comment
Check out this new Memory
Vineeta Shukla
Mom of a 1 yr 10 m old girl
3 mins ago

Like
Comment
Share
0 Likes
0 Comment
Tell us more about yourself get More Personalised
 Infant0 to 6 Months
 Baby6 Months to 2 Yrs
 Toddler2 to 4 yrs
 Kids4-6 yrs
 Big Kids6+ yrs
 Expecting
 Trying to Conceive

