

.svg)
.svg)
.png)

Enter Child Details

Add Profile Photo


Videos you might be interested in


Videos you might be interested in
Videos you might be interested in
Suggested for you

Finger Feeding a Baby - Benefits, Drawbacks and Techniques
You might be aware of the technique called finger feeding to latch on a baby’s mouth successfully. The initial stages following childbirth can be tough for a child to immediately use his reflexes and muscles to feed off the breast successfully. Rather than let him go hungry or use a bottle, there is an alternative that is closer to the actual breastfeeding action.
What is Finger Feeding?
There is a specific technique where a feeding tube attached to a finger can be used to deliver breastmilk or formula to the child. Termed as finger feeding, it allows the baby to suck on the finger like a breast and learn to feed the natural way.
When is Finger Feeding Useful?
Finger feeding may not seem like the most natural or convenient way to feed a child. However, there are a few scenarios where opting to go ahead with finger feeding might be useful for the baby in the first place.
Current lifestyles might make it necessary for the baby to stay apart from the mother for extended durations. This could cause the baby to feel anxious and refuse to accept a bottle as a replacement. A few babies might accept a sipper cup or feed a bit with a syringe, but if a child is more responsive to the touch of your finger, then finger feeding might be the right way to proceed ahead.
Breastfeeding often has to be done without a break, with your baby needing a feed every couple of hours. This, and the numerous changes a woman's body goes through after childbirth could cause the nipples to be extra sensitive, causing them to be sore or even develop cracks. In these cases, they need a break and need to rest a bit. Rather than develop a tendency to accept a bottle, finger feeding might be a better option. This can allow the baby to return back to the breast easily as well.
At times, the baby might take time to develop the strength to breastfeed successfully or the mother might need some time to recover properly. In such scenarios, opting for a bottle may introduce a confusion in the baby’s senses pertaining to the feeling of the nipple, making him difficult to accept a natural breast. Fingers are much closer to actual human skin and finger feeding can prevent such problems.
Babies need to understand how to use their tongue to latch on to the breast and suck it properly. The initial rush of hunger can make it difficult for them to feed and learn it at the same time. Finger feeding can help them practice that act while being fed properly.
Newborn babies tend to be sleepy and their hunger can frustrate them. This can also lead in a behaviour where a child simply refuses to latch on to the breast properly. Finger feeding can help cut down that frustration so that the latching can take its own pace to develop effectively.
Benefits of Finger Feeding
Whether using a finger feeding syringe or resorting to any other technique, there are a bunch of benefits that finger feeding brings to a child compared to other feeding techniques.
Finger feeding allows the baby to practice his sucking skills to latch properly.
Compared to other techniques, finger feeding keeps the skin to skin contact going strong.
There are rarely any refusals to finger feeding, as compared to refusing a bottle.
A baby does not develop any confusion between a rubber nipple and a real one.
Compared to using a sipper cup or a bottle, finger feeding allows sticking to the natural action of sucking, making it easier to return to breastfeeding.
Drawbacks of Finger Feeding
No technique is absolutely fool-proof and can definitely not be used as a replacement for the real one. Even with finger feeding, there are a few shortcomings as well as issues that can make things difficult for the child than they actually are.
The difference between a nipple and a finger is quite evident. Furthermore, the breast tissue also plays a major part in making the baby comfortable and used to the mother. There are very real dangers of the fingers entering too far into the throat, or the tube touching the back of the mouth, causing the baby to gag or throw up, resisting the feed altogether.
The position of the feeding tube between the fingers needs to be appropriate. Holding it above the fingers can cause it to brush with the roof of the mouth repeatedly, resulting in a soreness and pain.
When a baby breastfeeds, he pretty much has a good control over the flow of milk, allowing him to adjust it as he needs. With finger feeding, the flow might tend to be slow causing the baby to suck harder. If it is too fast, it can either lead him to choke on it or cause overfeeding.
Some mothers might opt for using homemade finger feeding systems. These may not always function properly, causing a mess with milk leaking around. Furthermore, cleaning the tubes and other apparatus can be a repetitive chore.
Finger feeding is generally not deemed as an appropriate way to feed every child. If a child suddenly gets aware of the tube, he might refuse any kind of feeding mechanism, leading to a calorie loss.
What Supplies Do You Need for Finger Feeding Your Child?
When deciding to go ahead with finger feeding your baby, it is necessary to put together a few apparatus and objects that can help you achieve the same. These could be locally sourced or might have to be procured from an online store.
A feeding tube of the number 5 of a length of at least 90 cm.
A needle-less syringe with about 60ml of volume.
Transparent medical tape.
Elastic band
Clean sterile gloves (optional)
Hand sanitizer
The feed, either in the form of formula or stored breastmilk.
A bag or a container to store all the items safely.
How to Finger Feed a Baby
Before proceeding to start finger feeding your baby, go through the following steps to know the right procedure, helping you keep your baby safe at all times.
Make sure your hands are absolutely clean and do not have sharp fingernails.
Position your baby comfortably.
Tape the feeding tube on the side of your finger, keeping its end just where your finger ends.
Dip the opposite end of the tube in the milk securely.
Encourage your baby to open his mouth and place your soft finger on the roof of his mouth. Don’t venture too far inside and stop when he naturally latches onto your finger. Your fingernail should be touching his tongue.
Make sure his lips are folded outward and maintain your finger position within. Gently touch his tongue to make him start sucking the way he would on the breast.
The initial feeding times would be longer as your baby gets used to the feeding mechanism. The milk will drain from the container intermittently, as your baby takes multiple breaks while feeding. Remove your fingers when you feel your baby rejecting them from within.
How Can Finger Feeding Be Used as a Suck Training Exercise?
There is a good chance that finger feeding techniques can be used to help provide your baby with suck training. However, these should be done only if recommended by your doctor and in the way suggested to you. Latching on the breast and sucking the nipple to get the milk is a function of the lips as well as the tongue. These together play a vital role in controlling the flow of the milk, especially with the tongue roaming over the ridge of the gums, closer to the roof of the mouth. The right tongue movement not only makes breastfeeding easier for the child, but it is also less taxing on the breast of the mother.
FAQs
Parents wonder if they should use a finger feeding tube or go with a syringe instead. These are just a few questions amongst many others, which might arise when deciding to go ahead with finger feeding.
1. How much and how long should I finger feed my baby?
The amount and duration of finger feeding depend primarily on the reason why you are opting for finger feeding in the first place. These factors change if you can breastfeed at certain periods or cannot do so at all. Your doctor can be a better judge of the same but a general finger feeding session should last anywhere around half an hour to 45 minutes. The sessions might have to be repeated more frequently if breastmilk is being used since it tends to digest faster than formula.
2. How does one clean the finger feeding supplies?
Don’t go the typical way and boil the feeding tube the way you would for a bottle. The tube can get hard and make it difficult for the baby to feed properly. Use warm water with some mild soap, rinsing it properly and removing any feed present in it. Dry them and store in a towel or a sealed sterile container.
3. Is finger feeding the same as breastfeeding?
Definitely not. Finger feeding should have opted only if breastfeeding doesn’t seem to be an option permanently or a minor time period. It is not a permanent fixture.
4. What if my baby is not getting enough supplement by finger feeding?
A baby with uncontrollable hunger can make it difficult to finger feed properly. In such a case, make use of a syringe or a bottle to make sure his nutrition is intact. Later, introduce finger feeding again when he is in a calmer state of mind.
Finger feeding a newborn can be quite tricky in the beginning but you will get the hang of it over time. Breastfeeding is irreplaceable and should be returned to as soon as possible. Until then, finger feeding is the way to go in the appropriate manner.
Also Read: Baby Feeding Tips - Birth to 4 Months Read more
Suggested for you

Interesting Facts About White Tiger for Kids
Children usually bond with household pets, residents at a petting zoo, classroom pets, and even the neighborhood cat, as these creatures spark a lifelong love of animals. However, encounters with wild animals can be extra-special and become a child’s treasured memory, especially with the magnificent white tiger characteristics. Seeing wild animals in nature opens up a whole new world of wonder which makes them curious about their appearance, behavior, lifestyle, and habitat. Read on to find more amazing White tiger facts and information for preschoolers.
White Tiger Lifespan and Appearance
The fascinating appearance of white tigers makes them look like mythical creatures. Here is some information about their appearance and lifespan.
A subspecies of tigers, the white tiger is the pigmented variation of the Bengal Tiger.
All white tigers have blue eyes with round pupils. Their eyes can be green and amber color as well.
Due to their white coat, they are often referred to as bleached tigers—the color results from the genetic mutations that are part of their natural species diversity.
The absence of pheomelanin, a pigment found in the normal orange tigers, results in white furs.
It has grey and light brown stripes on a light cream-colored coat.
Its distinctive coat pattern with stripes are like fingerprints, with no two tigers having the same pattern.
As the white-and-black color of white tigers makes them stand out from their surroundings, they often fall prey to other carnivores or hunters.
They have white-colored face fur and a rose pink nose.
White tigers fully grow by 2-3 years.
The white tigers live for around 10 to 20 years in the wild.
The weight of a White male tiger can be between 200 to 230 kilograms. They grow up to 9.8 ft. in length.
The average length of a male white tiger is about 8-10.2 feet, while the female tiger measures between 7.1 to 8.5 feet.
White tigers are bigger from birth and continue that pattern into their adult years.
As per the recent breeding records of 1700 Bengal Tigers kept in Indian zoos, the mortality and longevity rates of orange and white tigers are the same.
White Tiger Behavior and Lifestyle
White tigers are incredibly quick, agile, and very capable swimmers, allowing them to cross boundaries such as rivers and moats. However, they are very poor climbers. Some interesting facts about their behavior and lifestyle:
White tigers are crepuscular – they hunt primarily in the morning and evening.
They stalk their prey in the night by approaching it quietly and attacking by surprise.
The white tigers prefers to live in its territory that covers a radius of 10-30 sq miles.
As white tigers swim well, they can kill their prey even while swimming.
They sleep for about 16-18 hours per day.
Their speed can go up to 50-60 km per hour.
The male white tiger might share several women Tiger’s territory for mating.
White tigers are more muscular, stronger, and more aggressive than Orange Tigers.
Reproduction of White Tiger
Reproduction between white tigers is slightly different from how similar animals generally reproduce. Here are some fun facts:
Specific recessive genes of two Bengal Tigers combine for a white tiger to be born.
Male and female white tigers get attracted to one another by their roars and scent marks. A white tigress reaches the age of sexual maturity in around 3 to 4 years.
The gestation period of a White Tigress is for three and a half months, and approximately 5 cubs are born at a time.
The cubs are incubated within her uterus and are nourished through the umbilical cords. They are born live. The cubs are born in a secluded den that the mother prepares for them.
Crossbreeding Bengal tigers with Siberian tigers increases the odds of producing white cubs.
All white tigers are inbred within the family members and are not purebred.
White Tiger Diet
White tigers are carnivores that eat only meat by hunting other animals. Some interesting facts about their diet:
It mostly eats plant-eating herbivores found in the forest and its outskirts. Langur monkeys, goats, buffaloes, wild boars, and deer are some animals they usually kill.
It can eat about 18kg of meat at one go and will hunt again after a few days of feasting.
The diet of a Captive white tiger includes chicken, horse meat, or kangaroo meat.
Due to their large size, they use their weight to throw down their prey and bite its neck to kill it. They have formidable and retractable claws that help to capture and hold on to their prey.
In the case of the unavailability of herbivores, they may also hunt leopards, young wolves, young elephants, and rhinoceros.
White Tiger Habitat
White tigers in the jungle share their habitat with the orange Bengal Tigers. Some more interesting habitat facts are:
Their habitat depends upon the animals it usually hunts and eats in the forest.
Abundant food, water, and trees make up the best habitat for white tigers. The grassy areas and their stripes help give them some camouflage!
Like all Bengal tigers, white tigers used to live in the wild in Asia, particularly in countries like India. They now live in captivity, which helps to keep them protected.
White tigers cannot survive in snow.
No known white tiger exists in the wild anymore. They are all found in captivity, mainly in zoos, circuses, rescue sanctuaries, and places designated for animal display.
White Tigers have no natural predators; humans hunt them for exotic skin color, trophy hunting, traditional medicine, exotic pet trade, and habitat destruction.
Other Fun Facts About White Tiger for Children
Some fun facts about white tigers in detail:
Besides the Bengal tiger, the white tiger is believed to be the world's second-largest tiger species after the Siberian tiger.
Uncontrolled trophy hunting, loss of habitat, and habitat fragmentation are the reasons for the extinction of wild white tigers and the dramatic decline in wild tigers in general.
White tigers have enzymes in their fur which react to temperature, causing them to grow darker in the cold.
The white tiger has cultural significance as well. It is one of the Four Symbols of the Chinese constellations. Also called the White Tiger of the West, the animal is known as Baihu in Chinese, Byakko in Japanese, Baekho in Korean, and Bạch Hổ in Vietnamese. White tiger represents the west in terms of direction and the autumn season.
The earliest record of the existence of white tigers was put on display at the Exeter Exchange in 1820 in London.
The inbreeding of white tigers in strict captivity often cause certain genetic issues, like Down syndrome, scoliosis, cleft palates, mental impairments, and cross eyes.
Only 12 white tigers were seen in the wild throughout the twentieth century.
White tigers are bred only for entertainment and not for conservation purposes. Thus, The American Zoological Association (AZA) believes that these cats should not be bred and directs AZA-accredited zoos against breeding.
Teaching wildlife conservation through fun and interactive education can be a first step towards protecting the natural landscapes that wildlife needs to survive. The growing awareness of white tigers can make them more appreciative of the natural world and sensitive towards their friends and family. Many conservation biologists are trying to protect wildlife so that kids can live in a world where animals like white tigers still exist. Thus, learning about biodiversity and sharing what they know with their friends can enhance their emotional development and build their social skills.
Also Read:
Cool Lion Facts for Kids
Fun Cheetah Facts for Children
Interesting Zebra Facts for Children Read more
Suggested for you

Cumin / Jeera Cookies
We are sharing with you a classical savoury cookie recipe that'll be loved by people of all ages. These cookies flavoured with cumin and carom seeds, are made with whole wheat flour. Pack a couple of them in your kid’s lunch box along with a sandwich for a complete meal.
Serves
Preparation Time
Cooking Time
4 People
10 - 15 Minutes
15 - 20 Minutes
Ingredients
½ cup whole wheat flour
¼ cup maida
¼ tsp baking powder
A pinch of baking soda
¼ cup soft butter
2 tbsp powdered sugar
¼ tsp salt
½ tsp cumin seeds
½ tsp carom seeds
2 tbsp water if needed
Method
Step 1
Pre-heat the oven at 180 C and grease a baking tray.
Step 2
In a bowl, add the flours. Add baking powder, baking soda, salt, sugar, cumin and carom seeds and stir. Now add the butter and using your hand mix it.
Step 3
Knead the flour well with fingers till smooth. Add water little by little if required.
Step 4
Shape the dough into 10-12 even sized balls with greased hands.
Step 5
Flatten them a bit by placing between the palms. Place them on the prepared baking tray and mark the top with a fork.
Step 6
Bake the cookies for 12-15 min at 180 degree till they are light golden. Cool them completely before storing. Enjoy!
Nutritional Information
Calories
204 K cal
Proteins
2.6 g
Fats
11.8 g
Carbohydrates
22.2 g
Cholesterol
31 mg
Sodium
230 mg
Potassium
65 mg
Read more
Suggested for you
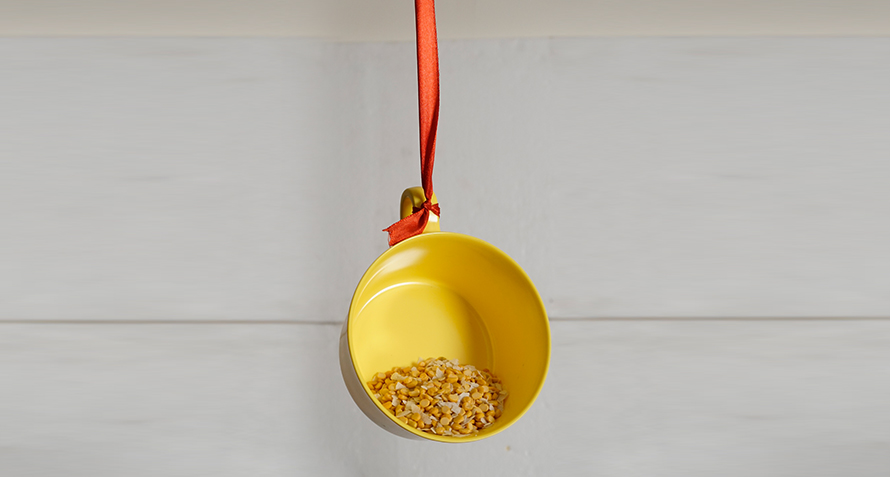
DIY Teacup Bird Feeder
Sure, it is important to train your children at sports, music and academics; every parent has dream for their child. But there are some things that are even more important while bringing up a child. This activity will teach kids to care for creatures and learn to co-exist peacefully.
Summer's here and the heat is getting us tropical inhabitants quite irritable no? Just imagine our little feathery friends having to fly around in search of food and water with no air conditioning or fans to relieve them from the heat. Sigh!
It is best to teach our kids at a young age to care for animals, birds and fish...plants too! And what better way than to start with a simple but effective DIY activity that look gorgeous and helps out all the birdies that are seeking some food and solace from the heat.
What you need
A Large Tea-cup (saucer optional)
Bird seed or small grains
SUPER Adhesive glue like araldite
Ribbon
Step-by-step instructions
Rinse and dry your cup or soup bowl.
Tie your ribbon through the handle of the cup and fasten tightly.
Put your bird seeds or grains into the cup and hang it at your window! Voila!
Watch the birdies flock to your window and make some new feathery friends.
If you do choose to use a saucer as well, use a super strong adhesive and stick the saucer to the bottom of the tea-cup. This allows the grains to fall on the saucer and also gives the birds a foothold.
Messiness Score
3
Level Of Difficulty
Medium
Parental Involvement
High
You will observe your child doing...
Every child will be open to caring for another creature. You will find your child asking questions about birds and what they do on merciless summer days.
It will be fun because...
You and your child will get to observe birds come and pick on the seeds. It is pure joy to see that you've helped out a helpless creature in need!
Fun Tip: You can also put some water in a saucer near the bird feeder. Another fun thing you can do is decorate the tea cup if it isn't already printed. Read more
Suggested for you

Suggested for you

The Benefits of Helping Preschoolers Understand and Discuss Their Emotions
Your baby has grown up entered the terrible two's. Every emotion is overwhelming for him and he most likely will not know how to express how he is feeling. Learn some tried and tested ways to help your child understand and express their emotions in a healthy way.
They aren't called the terrible two's and three's for no reason. Or for that matter even the fearsome fours. All these scary terms boil down to the exact same thing – your child hasn't learn to recognize and deal with emotions just yet. This more often than not leads to tantrums and major meltdowns that leave you feeling helpless, frustrated or even anxious!
Some may say they'll grow out of it and indeed they will, but is it wise to just “let them be” or are there some life lessons to be taught at this fragile stage? Are there some long-term benefits to be learnt at this point?
Studies prove by both theory and practicality that emotional intelligence begins to develop at a very young age. If children are taught to find solutions to overwhelming emotions, they can gain a lifelong skill at a tiny age. It is proved that such children are less aggressive, kinder adults who are better at academics as well.
There are a few conscious things caregivers can do to help children in this stage of life.
1. Give Emotions A Name
Helping your child put down a concept or association to the image can help him deal better with it. Observe the behaviour, whether it be yelling, crying or not speaking at all, and take the child through a 'reflection' process. Ask then why they are behaving that way, what made them unhappy or angry. They will learn to associate different stimuli with certain emotions.
2. Make Emotions 'Normal'
Try not to classify emotions as good or bad at the age when children are learning to deal with them. Every emotion at this stage is overwhelming and so normalizing every emotion helps to comfort them when they are angry, sad or fearful. It helps them know that every human being feels these emotions, helping them get a better perspective. Give them examples of when you felt the same way and how you reacted. And find a solution to the emotion that helps comfort and reduce the burden of it.
3. Develop Acceptable Solutions
Teaching a child what actions are appropriate to an overwhelming emotion is as important as teaching them the emotion itself. Help them to verbalise what is okay and what isn't. This is also a good time to teach them “time outs”. For e.g. taking a break by yourself when you are angry with someone or napping when tiredness makes you irritable.
4. Read Picture Books
This doesn't seem like the obvious choice but reading fiction actually helps a child understand empathy. Apart from that, the pictorial representations help them understand emotions through illustrations better.
Did you use any of these methods to help your child emote better? Did you have other techniques of helping your child express his emotions in a healthy manner? Do write in and let us know! Read more
Rashmi has added a new answer
Expecting Mom due in 5 months
3 hours ago
Q. Is there any issue with this test

Rashmi
Mom of a 9 yr 7 m old girl
3 hours ago
A. You have not given any details about us to what test are you talking about or anything associated with that for that matter can you please repost your question with all the necessary details required to understand your question as accordingly I can assist you on that
Dr Vandan H Kumar has added a new answer
Guardian of 0 children
1 hour ago
Q. my baby is 8years old and she wets bed can anyone suggest me what to do??

Dr Vandan H Kumar
Paediatrician
1 hour ago
A. normally bedwetting is very common during the night time and the child is able to tell you regarding urination during the daytime.
usually this problems improves with increasing age of the child and usually no medicines are given until and unless recommended by the doctor( you can easily wait for ten years of age of the child)
usually treatment of medicines (if started) gives only symptomatic relief and the problem goes away only with increasing age with the strengthening of the muscles of the bladder which control the urination.
steps
decrease the amount of water intake just before going to bed and make the child pass urinex before going to sleep.
also you can wake up the child at around 2 o'clock 3 o'clock and make the child pass urine.
never criticizex the child for this act because this will again aggravate the problem due to stress.
meet your doctor who will tell you more regarding this .
Sunita Mahato has added a new answer
Trying To Conceive
50 mins ago
Q. sir job vacancy are avalable

Sunita Mahato
Mom of 3 children
45 mins ago
A. not the platform fr this question
take care...
Sunita Mahato has added a new answer
Mom of a 1 m old child
40 mins ago
Q. #asktheexperts why my 1 month old baby latch every every 10 15 mins in the afternoon
Sunita Mahato
Mom of 3 children
30 mins ago
A. every 10 to 15 mins baby wants attention and all the time to be in lap so
dnt develop that habit...
maintain a feeding gap of 2 hrs...
always burp after feed..
take care
Rashmi has added a new answer
Trying To Conceive
26 mins ago
Q. Hello doctors.. I am 32 weeks pregnant... I am getting vibration feeling near right upper abdomen... mostly when I lying on left side it's getting vibration feeling... it's normal?
Rashmi
Mom of a 9 yr 7 m old girl
New Answer
A. Different women have different feeling during the time of pregnancy so it would be normal but if it is happening constantly with you then it would be good for you to get it checked with your doctor whatever is required doctor advise you after examining
Sai Prasanthi R L has added a new answer
Expecting Mom due in 4 months
23 mins ago
Q. I want something very good products to my coming baby

Sai Prasanthi R L
Mom of a 10 yr 2 m old boy
6 mins ago
A. Hello dear! Try Babyhug skin care and clothing products for the baby. There are safe and effective for almost every skin type. Consult your doctor for further assistance in this regard. Good luck and take care
Check out this new Memory

vibhuti
Mom of a 1 m old girl
New Milestone

Like
Comment
Share
0 Likes
0 Comment
Check out this new Memory

Arun Nunia
Guardian of a 7 m old girl
New Milestone

Like
Comment
Share
0 Likes
0 Comment
Check out this new Memory

Malini Devi
Mom of a 11 m old boy
1 min ago

Like
Comment
Share
0 Likes
0 Comment
Check out this new Memory

Chitra Nagdali
Mom of a 6 m old boy
2 mins ago

Like
Comment
Share
0 Likes
0 Comment
Check out this new Memory
vibhuti
Mom of a 1 m old girl
4 mins ago
#MamyPokoMilestoneMemories

Like
Comment
Share
0 Likes
0 Comment
Tell us more about yourself get More Personalised
 Infant0 to 6 Months
 Baby6 Months to 2 Yrs
 Toddler2 to 4 yrs
 Kids4-6 yrs
 Big Kids6+ yrs
 Expecting
 Trying to Conceive

