

.svg)
.svg)
.png)

Enter Child Details

Add Profile Photo


Videos you might be interested in


Videos you might be interested in
Videos you might be interested in
Suggested for you
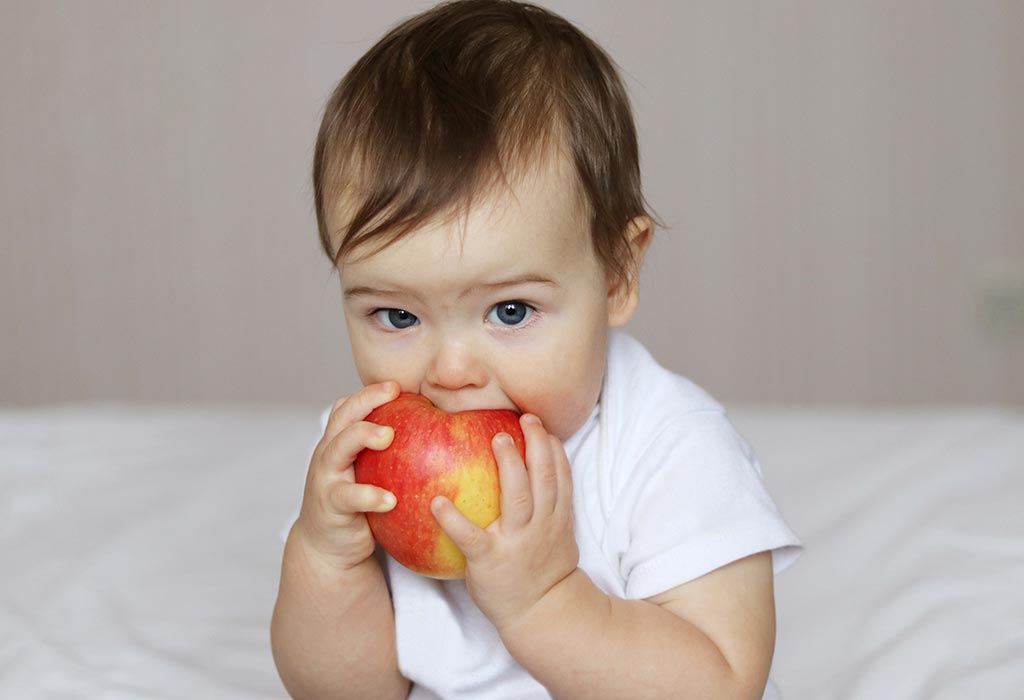
10 Simple Homemade Apple Recipes for Babies
Apples have been directly linked with maintaining a good healthy heart since they contain substances that reduce the amount of cholesterol in the body as well as provide various antioxidants to maintain the inner health as well. The structure of apple plays an important role as it is formed by a combination of fibres that are both soluble as well as insoluble. Both of them work towards stimulating bowel movement and keeping the intestine healthy at the same time. Furthermore, apples are great food for babies and using them in various ways can bring about tasty food items right in front of you.
10 Easy-to-Make Apple Recipes for Babies
To help your baby consume apples in a delicious manner, here are a few recipes:
1. Tasty Applesauce (For 5 Months and Above)
Out of various applesauce recipes for babies, this one is the easiest and quickest to make and introduce your child to apples.
Ingredients
Apples, peeled and cored
Unsweetened apple juice
Water
Cinnamon, grounded
Nutmeg powder
Vanilla essence
Method
Take the apples and chop them together. Place those pieces in a pan. Add some more water to it, creating a layer, and follow that up with the apple juice.
Heat the pan and let it start boiling. Lower the flame, place a lid and let it continue to cook for around 8-10 minutes until the apple pieces start getting soft. Don’t overcook to melt them completely.
Once they start getting tender, remove the flame and take the pan aside. Pick out the pieces and mash them together to a consistency that feels right for your baby.
For some added flavour, sprinkle a little bit of cinnamon and nutmeg powder. To give it an added style, add a tiny drop of vanilla essence.
Serve it nice and warm to your little one. If you want to serve it cold, add the flavours only when you are serving, while keeping the other portion frozen.
2. Apple Soup With Sweet Potato (For 6 Months and Above)
Combine the flavours of both these food items to create a delicious lip-smacking comforting soup.
Ingredients
Flour
Butter
Chicken broth
Applesauce
Sweet potatoes, cooked
Ginger, grounded
Cinnamon, grounded
Breastmilk or formula
Method
Take a pan and add some butter to it. Heat it and let the butter start melting. Add flour to the melted butter in the pan and stir it all together. Continue cooking it thoroughly until it starts getting a golden colour.
Now start pouring the chicken broth into the pan gradually. Remember to keep stirring while you do so. Follow that up with the applesauce, pieces of sweet potato, ground ginger and cinnamon all together.
Stir the entire mixture well and increase the flame to make it boil. Once boiling, lower the flame and let it simmer for another 5 minutes or so.
Once done, pour that mixture into a blender and run the blender for a few minutes until it starts getting the consistency of a puree. Pour this puree out of the blender back into the pan.
To this puree, add some milk and let it heat again until it gets nice and warm. Serve this warm soup to your child.
3. Apple and Grape Squash (For 6 Months and Above)
Put together this fantastic recipe to let your little one taste a wide variety of flavours.
Ingredients
Grape squash
One peeled and sliced sweet apple
Melted butter
Honey
Cinnamon
Nutmeg
Cloves, grounded
Method
Prepare the oven by heating it to about 180 degrees and keep it ready.
Cut the grapes into small pieces and place them aside.
Grease a baking tray and place the grapes in it with the skin side facing upwards.
Cover the tray and place this in the oven. Let it sit in for about 20 minutes or so.
While that goes on, take a bowl and add the pieces of apple to it. Follow it up by pouring some melted butter, honey, cinnamon, nutmeg and ginger altogether. Mix them well.
Take out the tray from the oven and flip the grapes. Pour the apple mixture over it, cover the tray and place it in the oven again for another 20 minutes.
If your baby is below the age of one, replace honey with sugar or any other sweetener.
4. Apple and Chicken Meal (For 7 Months and above)
As your child starts having solids, this meal will make him ecstatic and have more of it.
Ingredients
Chicken breasts, skinless and chopped
Apple, chopped
Sweet potato
Cinnamon powder
Chicken stock
Eggplant
Method
Take the sweet potato and peel it. Chop it into small pieces.
Take a pan and add the chicken stock to it. Heat it and let it start boiling.
Once boiling, add the chicken breasts to it and lower the flame. Let the preparation cook for about 10 minutes.
Follow it up by adding pieces of the apple and sweet potato. Stir it together and let it cook for another 10 minutes.
Once that is done, add the pieces of chopped eggplant to the pan and let it simmer on the flame for a few more minutes. Once the potato gets tender, remove the heat.
Run this mixture in the blender for a small time to make it a little consistent. Add cinnamon to it and serve it well.
5. Apple Shake (For 10 Months and Above)
One of the popular apple juice recipes for babies, this one adds the benefit of milk to make a great shake.
Ingredients
Apple
Water
Raisins
Almonds
Cinnamon
Milk
Method
Take the apple and place it inside a steamer or a pressure cooker. Let it steam the entire apple for nearly 10 minutes so that it is properly cooked.
Once it cools down, take it out and peel the apple properly. Remove any seeds that are present inside it.
In a bowl, add the apple pieces, along with milk. Mix it well. Peel the almonds and add them to the bowl, too. Mash the raisins into a puree and add it to the bowl along with a simple pinch of cinnamon powder. Avoid the powder if your baby doesn’t like it.
Add the entire mixture into a blender and run it multiple times to make it smooth. Make sure the almonds are crushed completely while blending.
If your baby is a year old or more, you can add honey to this to elevate the flavour.
6. Baked Apple Dish (For 6 Months and Above)
Turn the fruit into a great snack option for your child that has a different flavour with the same nutrition.
Ingredients
Various apples
Butter
Method
Cut the apples and remove its core. Do not remove the outer peel.
Take some butter on your finger and apply it to the inner part of the apple. If your baby loves cinnamon powder, feel free to apply a little bit of that as well.
Take a shallow tray with some water in it. Place these pieces in the tray.
Put the tray in an oven and set the temperature to 200 degrees. Let it bake for about half an hour or so until the pieces start getting soft. Keep a track of the water in the tray.
Once cooled down, take the tray out and remove the peels if you want them to. Feel free to cut the pieces further or mash them together for your little one.
7. Apple Salad Breakfast with Grains (For 10 Months and Above)
Let your little one have a nice filling breakfast now that he can start having solids properly.
Ingredients
Water
Salt
Yoghurt
Raisins
Peach
Apple
Wheat
Brown rice
Method
Take a pot and add water and salt to it. Place it on a flame and heat it until it starts boiling. Follow by adding the brown rice and wheat to the pot. Then, reduce the flame, cover the pot, and let it cook for about 8-10 minutes.
Once cooked, turn off the flame and let it cool for a few minutes.
Spread a baking sheet on a platform and spread these grains on it. This increases their fluffiness.
Chop the apples together and add them to a bowl. Peel the peach and cut it into small pieces. Add it to the bowl as well.
Put all the fruits into the grain mixture along with some raisins, mashed if needed.
Follow up this entire mixture by adding some yoghurt to it, making sure it covers everything properly. You may proceed to add some wheat germ if needed as well.
As an alternative, you can add the fruits to the pot as well, making an even more consistent recipe.
8. Apple Rice Pudding (For 10 Months and Above)
Some nice sweetness to go with the sweet and sour taste of the apple.
Ingredients
Brown rice
Water
Ginger
Cinnamon
Brown sugar
Raisins
Apples
Method
Take a good-sized pan and add together all the fruits, grains, spices and ingredients together to it.
Place the pan over a medium flame and let it sit for about half an hour or so. This should be time enough to soften the rice. Around this time, the mixture itself will get a little soupy and a nice aroma will start rising, too.
Add milk to this mixture and let it cook for another 8-10 minutes. Ensure to keep the mixture soupy and not get gravy-like. Keep stirring it throughout so that it doesn’t stick to the pan, and add milk and water if needed.
Once cooked, cool it down and serve it to the child.
9. Apple Banana Custard (For 8 Months and Above)
For your little one who has a sweet tooth, this recipe will be quite a delight for him.
Ingredients
Apple, peeled and cored
Banana, peeled and deseeded
Cinnamon powder
Breastmilk or formula
Method
Prepare the oven by heating it to around 180 degrees.
Steam the apples and combine all ingredients in the blender to make a smooth mixture.
Pour this in a baking dish and let it sit in the oven for around 15-20 minutes.
Stick a knife in the mixture to check for softness and take the tray out when right.
10. Apple Papaya Dish (For 10 Months And Above)
Combine different fruits for a great tasting experience.
Ingredients
Sweet apple
Peeled and chopped papaya
Method
Steam the apples after peeling and chopping them and blend them until they are mush.
Add the papaya to this and run it again until it turns into a consistent puree.
Making sure your baby can eat apples and develop a liking for them can open an avenue of various food items for your child. By opting for an apple stew recipe for your baby you can create a wide variety of recipes and let your baby enjoy the beautiful flavours.
Also Read: Homemade Custard Recipes for Babies Read more
Check out this new Memory

Tishu
Mom of a 1 m old boy
New Memory
#MamyPokoMilestoneMemories

Like
Comment
Share
1 Likes
0 Comment
Suggested for you
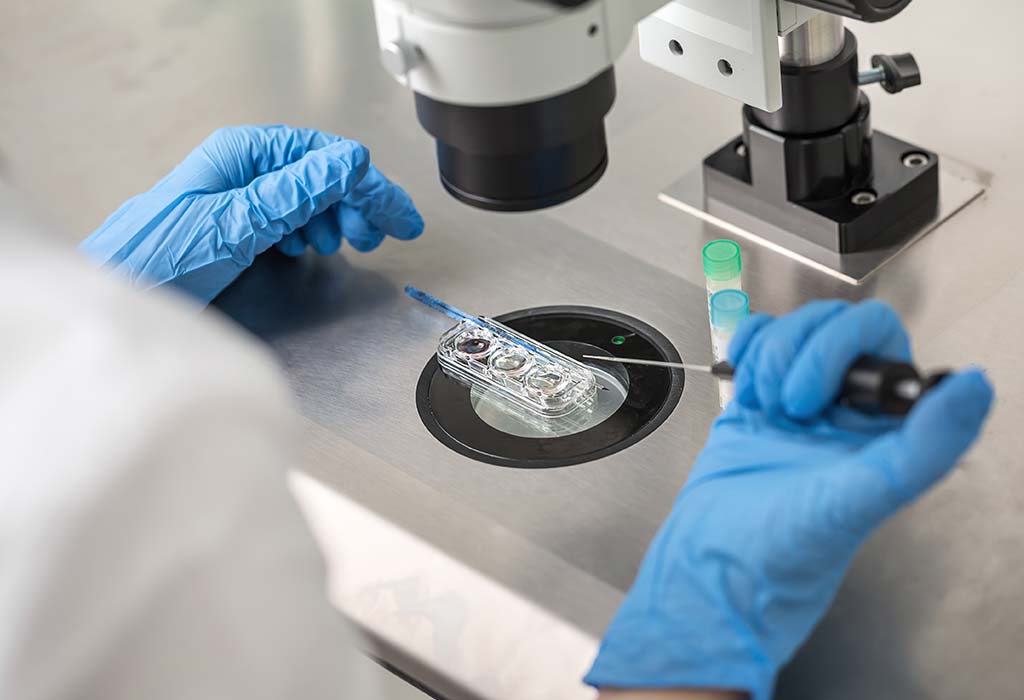
IUI (Intrauterine Insemination ) vs IVF (In Vitro Fertilization) - Which is Right for You
When you are looking at fertility options, two of the most common methods are intrauterine insemination and in-vitro fertilisation. These two are often the most confused with one another, but the difference between the two is quite large.
Difference Between IUI and IVF
Let’s discuss the difference between ivf and iui:
Procedure
In IUI, the sperm is put into the woman's uterus during the time of her ovulation so that fertilisation can occur during this time. This is timed along with a woman’s period cycle or medications she is using to enhance ovulation. In IVF, the process goes through a number of sittings: first, fertility medications are used to activate the ovaries, an outpatient egg retrieval process is done under a gentle anaesthetic, then the embryos are grown in the lab following which they are injected into the uterus via an embryo transfer process. In this way, IUI is less physically taxing than an IVF.
Pros
The pros of IUI are:
Due to its uncomplicated process, for the question of IUI or IVF for male infertility and unexplained mild fertility, IUI is often advised first.
It requires little medication and is less invasive than IVF
It is less expensive than IVF, although medication and monitoring costs are separate.
The procedure takes only a few minutes and causes very little discomfort.
The pros of IVF are:
IVF allows for PGT (preimplantation genetic testing)
Depending on the patient’s health status, the IVF success rate per cycle is quite high, around 40% as compared to a natural conception which has a per cycle success rate of 20-25%
It is suitable for women with damaged tubes and couples with endometriosis or male infertility.
Risks
IUI carries a slightly bigger risk of chromosomal defects or congenital malformations. It also carries a risk of higher order multiple pregnancies (triplets or more). Even though the clinic will monitor your eggs to make sure only a desired number will mature, this does not completely take away the risk. IVF on the other hand also carries the risk of gene defects, especially since they are bypassed rather than treated. Multiple pregnancies, preterm delivery, neonatal hospitalisation, and low birth weight are also slightly increased in patients who undergo IVF. However, IVF has shown recent advances as of late where hospitals do a transfer of 1-2 embryos in each cycle of IVF. Due to this, the risk of multiple pregnancies in IVF is much lower than it used to be.
Success rate
Many variables affect each procedure, so it is not that easy to determine the success rate of IVF vs IUI, but according to statistics, IUI has a lower success rate than IVF. The gap widens as a woman grows older. The average live birth rate of IUI is:
16% (below 35 years)
11% (35-39 years)
7% (40-42 years)
1% (43-44 years)
nil (over 44 years)
IVF has a high pregnancy rate, but not all conceptions go up to live birth. This success depends on many variables like the patient’s age, type of sperm used, infertility duration and so on. The success rate of IVF live births are:
40% (below 35 years)
30% (35-37 years)
20% (38-40 years)
10% (41-42 years)
5% (43-44 years)
Cost
The cost of IUI vs IVF in India varies significantly. An IUI process will cost a lot less compared to an IVF process. However, depending on your chances of conceiving through IVF and your medical diagnosis, it might be more cost-effective to proceed straight to an IVF process rather than undergoing multiple unsuccessful IUI procedures before resorting to an IVF procedure.
Time Factor
The time factor has both good and bad outcomes when you are comparing the two procedures. If you’re lucky and your first IUI is successful, you could bring home a baby much faster. However, since there is a gap in the success rates between both processes, IUI vs IVF over 40 years of age patients suggests that going for an IVF is faster rather than multiple unsuccessful IUI cycles.
After reading all this, you may have the question of iui or ivf which is best? Well, IUI can be a good first line of treatment if you are a woman who:
has a normal uterine cavity
has a good ovarian reserve (a healthy amount of eggs in the uterus)
has the ability to ovulate, even with fertility medication
at least has one perfectly fine fallopian tube
IUI is very effective for
Issues with cervix: IUI can bypass cervical mucus hindering fertilization
Ovulatory issues: IUI can help women with irregular periods conceive on time.
Mild male infertility: Since the sperm is prepared from the healthiest, active sperm and placed directly in the uterus, it can overcome issues of sperm motility or with ejaculation.
Same-sex couples: Same-sex couples can use donor sperm or their sperm with a surrogate.
IVF, on the other hand, may yield better results thanks to a higher success rate. If you choose to skip straight to IVF, it can prove to be a better option for patients:
who are above the age of 38
Decide to use donor eggs.
who may want genetic screening
have a less ovarian reserve
have fallopian tubes which are blocked
have endometriosis
who suffer from severe male infertility problems.
Whether you choose IUI or IVF, the first step is to find a trustworthy fertility clinic that considers your individual needs more important than a followed protocol. A fertility specialist can help you choose which approach is the best for you according to your diagnosis and medical history. Good information warrants a good decision, so start with a thorough medical diagnosis and investigation. Understanding every aspect of your infertility issues will better help you and your doctor to create a successful treatment plan for healthy baby delivery.
Also Read: Assisted Reproductive Technology(ART) - Infertility Treatment Read more
Suggested for you
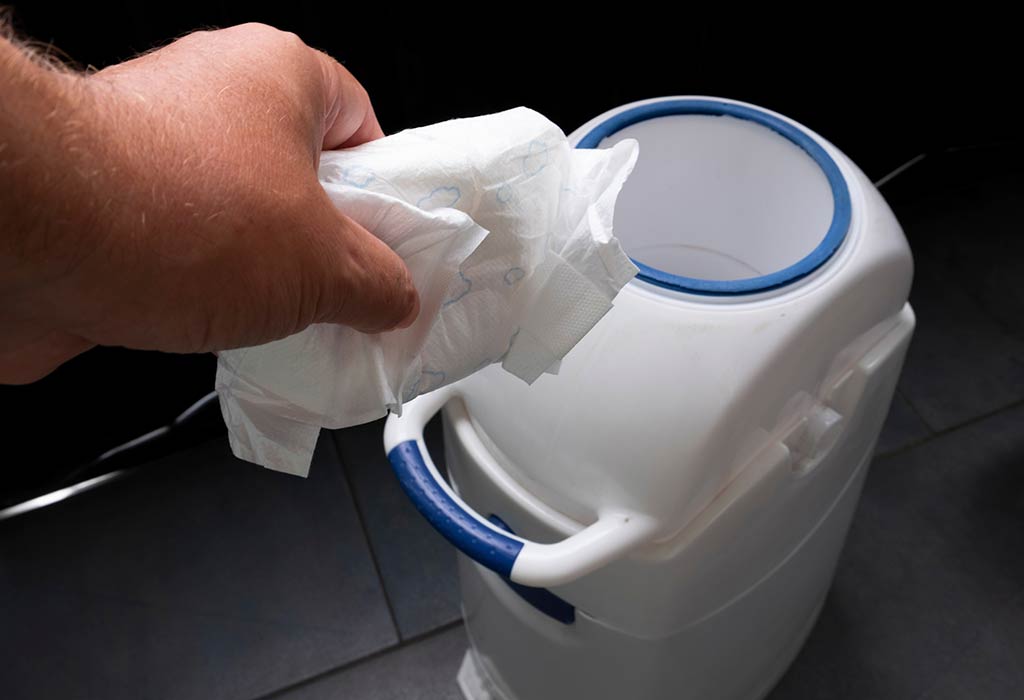
Diaper Pail - How It Works and Tips to Pick One
A diaper pail is one of the most used items for every parent. A diaper pail comes in handy when you pile up stacks of diapers and still keep the odor away from the room or your baby's lovely nursery setup. Here we bring you some good insight on the necessity of having a diaper pail, how to choose the right one, the advantages of having a diaper pail, and other points to keep in mind. Having the right diaper pail will indeed improve the quality of your life. Read on to know more.
What Is a Diaper Pail and Why Is It Necessary?
A diaper pail is a garbage or trash can designed specifically to store dirty and used diapers. It is a smart investment for parents that can be used for years, from day one when a baby arrives home until they grow into a toddler. With your baby growing, the need to use and change diapers will also increase. You will continue to see diapers piling up and the use of your diaper pail also increasing than ever before.
A diaper pail may not be an absolute necessity. While a regular trashcan can be used, in all probability, you will end up breathing from your mouth instead of your nose. Using a regular trashcan or a garbage bag may make the beautiful setup nursery of your little munchkin smelly and stinking within a short period.
People mostly want to prevent the spread of stench from dirty diapers and want a uniquely designed diaper disposal system. It will neutralize the odor and allow you to store a huge number of diapers, which will prevent you from frequently running to the outside trash to dump throughout the 24 hours cycle. This indeed saves time for new parents.
How Do You Choose a Diaper Pail?
Different models of diaper pails have different benefits. While all diaper pails try to overcome the stench issue, below are a few features that you might want to consider to choose the right diaper pail for your baby's nursery.
1. Convenient to Use
This one's important to consider. When changing a diaper, you will need to have one hand on your baby. Look for a diaper pail with a foot pedal that makes you go hand-free and easy to use. Additionally, having a child locking system on the diaper pail can be advantageous to keep curious kids away from opening and closing them continuously.
2. Odor Blocker
One of the primary reasons to buy a diaper pail is to keep the odor at bay. Hence, look for a diaper pail that has an odor control system. It's a good idea to pick diaper pails made of non-porous steel that have odor-blocking capacity better than the plastic ones, which would allow the smell to leak. Alternately the ones that come with scented bags to ward off the smell.
3. Correct Size
Ensure to pick a diaper pail that is of the right size. Two factors to consider while choosing the size would be, first being the space where the pail would be kept. It should easily accommodate the space identified. The second factor will be the number of used diapers that the pail would hold in it. That would control the frequency of emptying the can throughout the day or week.
4. Diaper Pail Liners
While you can always choose a typical kitchen trash bag, some diaper pails require special refill bags, like a scented or a deodorizing one. However, you can buy a diaper pail and liners separately too. Ensure to determine the cost for the refills when you surf to choose between different bags.
5. Ties on Bags
Bags would usually have a tie-off in the end. You would use your bags or buy refills with a tie-off available.
There are different options and choices of diaper pails available - you can choose from the hands-free diaper pail to the economical and even eco-friendly ones. You can also buy a diaper pail for cloth diapers to keep them separate.
How Do Diaper Pails Work?
A diaper pail's primary objective is to store dirty diapers made of cloth or disposable ones. Diaper pails block the unavoidable and unpleasant stench of the used and dirty diapers for several days at a stretch. It effectively seals the odor that's old and unpleasant. It also reduces the frequency at which you need to take the diaper garbage out and dump it in the trash outside your house on the garbage day.
Any classic diaper pail will have a clamp system and bags to seal off each diaper stuffed into the trash. As every individual diaper is contained, that sudden rush of smelly air will not pop out when the trash is opened or when the bags are changed. Some diaper pails come with a squeegee that will help you to push the other diapers inside and make space to put in more used diapers.
Advantages of a Diaper Pail
Diaper pails are easy to use. They are made of non-porous steel, which helps contain the odor much more effectively than plastic ones. Diaper pails come with a locking system; hence it comes in handy to keep curious toddlers away from all the mess they can create. Imagine you have twins or, for that matter, a pet; the diaper pails remain locked and closed. Despite prying on the lock, they will not be able to unlock it.
Hands-free foot pedal diapers are available that come in very handy at the time of change. You will not need to keep touching the lid with your hands to open them. These cans are durable and can be used as regular trash cans once the diaper days are over. These are simple and easy-to-use cans. You can load and empty them easily.
Steps to Clean a Diaper Pail
Cleaning a diaper pail is a smelly task. However, it is important to clean a diaper pail thoroughly as the diaper pails can be prone to sheltering mold and mildew that can be health risking. It could compromise the baby's and even the parents' health if not kept in check. At times the interior of the pail can retain the foul smell for long, even after the diapers have been long trashed. Below are the steps that you need to follow carefully to clean a diaper pail.
Step 1: Wear a rubber glove on each hand.
Step 2: Next steps are to remove and get rid of the dirty diapers from your diaper pail.
Step 3: The bag cartridge needs to be removed from the top of the diaper pail.
Step 4: Take the diaper pail outside in the backyard or put it in the bathtub for cleaning.
Step 5: You can use a garden hose or showerhead to properly rinse off the inside and the outside of the diaper pail.
Step 6: Squirt any dish soap or castile soap in the interior and exterior of the diaper pail.
Step 7: If you get any bad odor, you can neutralize it by sprinkling baking soda inside and outside the diaper pail.
Step 8: Allow five to ten minutes for the soap and the baking soda to set and penetrate properly
Step 9: Now, take a sponge or an old rag to scrub the diaper pail thoroughly. It's a good idea to keep a separate sponge just for cleaning the diaper pail.
Step 10: Now, you can rinse out the diaper pail thoroughly with water to clean the soap.
Step 11: To avoid mold and mildew from breeding inside the diaper pail, spray a concoction made of tree tea oil, vinegar, and borax. Now in circular motions, rub it in using another rag.
Step 12: Re-spray some borax solution inside the diaper pail.
Step 13: Allow the interiors of the pail air to dry for as long as probable. You can also dry it off properly with a cloth or a towel. Of course, the outside of the pail needs to be dried too.
Step 14: It is important not to leave any moisture once it has been cleaned and rinsed.
Steps to Clean Cloth Diaper Pail
The basic steps to clean cloth diaper genie are similar to how you clean a disposable diaper pail. Below listed are the cloth diaper pail ideas for cleaning.
Step 1: The first step is to wash the pail liner and the cloth diapers as you normally wash them.
Step 2: Now, use the showerhead, garden hose, or a diaper sprayer to spray the interiors and exteriors of the diaper pail.
Step 3: It is a good idea to have some water left in the bottom of the pail. This will help to effectively clean the soiled part of the diaper and soak up the smell too.
Step 4: Now, squirt any dish soap or a castile soap in the interior and exterior of the diaper pail.
Step 5: To neutralize any bad odor, you can try sprinkling some baking soda inside and outside of the diaper pail.
Step 6: Allow five to ten minutes for the soap and the baking soda to set and penetrate properly
Step 7: Take a sponge or an old rag to scrub the diaper pail thoroughly. It's a good idea to keep a separate sponge just for cleaning the diaper pail.
Step 8: Now, rinse the diaper pail thoroughly with water to clean the soap.
Step 9: To avoid any mold and mildew from breeding inside the diaper pail, do spray a concoction made of tree tea oil, vinegar, and borax. Now in circular motions, rub it in using another rag.
Step 10: Re-spray some borax solution inside the diaper pail.
Step 11: Allow the interiors of the pail air to dry for as long as probable. You can also dry it off properly with a cloth or a towel. Of course, the outside of the pail needs to be dried too.
Diaper Pail Safety Tips
There are no major risks related to diaper pails. However, being cautious about all small little things is important in ensuring hygiene and safety. Read below the tips:
Keep an Extra Diaper Pail: If you have multiple levels in your house, it is a good idea to keep a diaper pail on every level of the house for quick and easy accessibility. This, of course, will create some extra work in the long run; however, you would need to deal with far less serious odors.
Go for Scented Trash Bags: It is a common practice to line the pails with trash bags. You will easily find scented trash bags manufactured by different companies in the market. They are available in different sizes. You will need to pick the right size that fits your diaper pail. You will rid yourself of that 'in your face odor experience' when the can is opened. Also, it helps to keep smelling fresh in between different chores of cleaning.
Use Deodorized Bars: These are like quick fixes, even if it is temporary. You will need to replace these bars every week to cut down on the smelly odor in the air the moment you open the container of your Diaper pail. You can try those DIY ideas to make your bars.
Using Rubber Gloves: This one's the most important purchase you need to make to clean your diaper pails. Don't forget to wear rubber gloves when dealing with your diaper pail. It's an additional precaution you must take because, at times, you will be unpleasantly surprised just in case the liner gets torn and begins to leak.
Keep Disposable Gloves Handy: Wearing disposable gloves makes it easier for you to unload the contents into the toilet or even when you're using a hose to rinse stuff out.
Keep a Dedicated Sponge: Sponges used for cleaning can get mixed up with other sponges or cloths. Use a designated sponge to clean your diaper pail and keep changing them at the end of each month. Try to keep it inside an airtight bag to avoid other things in the cleaning closet.
Make Use of Essential Oils: There are essential oils available in the market that can help to mask smells and keep surroundings fresh. Try tangerine, lavender, grapefruit, and citrus oils with nice aromas and are safe to use around the kids.
The early months and years in the life of an infant or a toddler and even for the new mom, it is all about diapers. Depending on your budget and, more importantly, looking at the convenience of not having to run around the house with hands full of diapers, it's a good idea to have a diaper pail. With all the information stated above, you can take an informed decision about a diaper pail.
Also Read:
Usage of Diapers for Infant
Common Myths about Diapering
Side Effects of using Diapers for Infants Read more
Suggested for you

Multitasking - Easy Ways to Improve This Skill to Excel in Life
Multitasking is the ability to switch between various tasks at the same time and complete them efficiently, sort of like how a computer does. In reality, you don't juggle all the tasks at the same time. Entrepreneurs and people who are exceptional at multitasking do it without thinking. It's a process that happens naturally which ends up ramping up their productivity.
A few examples of multitasking in your everyday life is talking to a friend while going for a walk together, watching TV and texting at the same time, or even listening to your favourite music while you work.
Why Is Multitasking Important?
Multitasking is important because it saves time. It helps you get things done and makes you more productive. Yes, when you complete multiple tasks lined up simultaneously, you free up more time and get to focus on the things that matter. In a way, multitasking can literally change your life when done right. The keyword here is doing-it-right.
What Causes Inefficient Multitasking?
There are various reasons behind inefficient multitasking and why it doesn't work for some people. Here are some of the effects of multitasking inefficiently and the causes behind them.
1. Rushing in
When you rush in and focus on getting the work done instead of focusing on the work itself, you get added stress and multitask inefficiently. You become more sloppy and make mistakes, basically.
2. Not Giving It Time
Not everybody picks up multitasking naturally. It takes time, and when you don't give it the time it needs for new neural connections to form, you start failing at it.
3. Taking on Multiple Tasks at the Same Time
This is one of the biggest reasons behind inefficient multitasking. If you can't do two things at the same time, you're less likely to be able to pull off three or more.
Simple Ways to Develop the Ability to Multitask
If you're wondering how to do multitasking and whether it's actually possible to get good at it, we have some good news - yes, you can do it. But you have to go about it the right way. Below are some ways how you can develop the ability to multitask-
1. Make a To-do List
This may sound like cliché advice, but the best way to begin multitasking is to start with a to-do list. Jot down the tasks one by one based on difficulty levels and tackle them one at a time. Ideally, you want to be able to finish them by the end of the day and not get tired. Get used to the feeling and stay consistent. Then when you start getting the hang of things and it feels comfortable, you can switch gears and start combining similar tasks to make things go faster. It's like how you do compound movements in the gym, target specific areas first and then target multiple areas at once.
2. Say No to Distractions
Look for a quiet environment for work, especially one that's free from distractions when you intend to multitask. If you want to start practising multitasking, then your environment will play a huge role in your beginning steps towards it.
As you work, the kind of music playing matters too. If you can't stand silence, then try listening to relaxing instrumental tracks or classical music. These help you focus and get in the zone. Just like how music can be a distraction when you choose it wrong, it can boost your focus and help you de-clutter your mind when you're trying to multitask.
3. Take Breaks
We're human and our attention spans are short. To make the most of your multitasking management skills, realise that you have to learn to take breaks. For every 30 minutes you work, take a 5 or 10 minute break. Review the information you've worked on periodically with fresh eyes and take a longer break of 20 minutes after every 2 hours or so. This will boost your productivity and improve your mood too.
4. Watch What You Eat
If you eat a lot of junk and processed foods, you're going to feel terrible. How you feel will affect how you work long-term. If you're serious about mastering multitasking at work, you have to first start by mastering yourself. And the best way to do that is by cleaning up your diet. Include lots of fruits and vegetables, grass-fed organic meats, seafood, nuts/seeds, etc. into your diet. You can add super foods like green powders too for an added boost to your nutrition.
5. Train It Into a Habit
The best way to get used to multitasking is to just make it a habit. When you train your brain to get better and better at switching between tasks, it gets more efficient and plain good at it. This will take time and require discipline on your part. But the good news is that it'll just take 21 days for you to start feeling the benefits of multitasking since that's how long it takes to build up a habit. Ingraining the habit for life will take at least 4 to 6 months though, so just keep at it until it sinks in.
6. Don't Be Afraid to Ask for Help
If you feel you've taken up too much work, don't be afraid to ask for help. Delegating your tasks to a co-worker or someone you trust just means you're a responsible person and human. It's okay to take two steps back to move one step forward sometimes. After all, progress is progress. Once you're able to handle your current workloads and multitask on them, you can always take up more later to make up for it.
Multitasking is no magic and yes, it is a skill that can be developed. If you go slow, take the time, and put in a conscious effort and smart practice, you'll be soon reaping its benefits.
Also Read:
Tips to Manage Heavy Workload Effectively
Habits of Successful People You Should Follow
Easy Ways to Keep Yourself Self Motivated at Work Read more
Suggested for you

Eczema After Pregnancy – Causes and Tips to Handle It
Congratulations! After encountering nine months of body changes and various up and downs of hormonal levels, you now have a lively bundle of joy in your life. But for some of you, this happiness is still a far-fetched dream owing to the eczema attack post-delivery. Due to hormonal changes and skin changes during pregnancy, eczema can make a comeback at the time of pregnancy and after delivery. We will share some tips on how you can manage your eczema condition after your delivery and beyond it as well.
What Causes Eczema After Child Birth?
Pregnancy is the most beautiful time in a woman’s life, but it can also be a tough time for those who has already faced a bout of eczema earlier in their lives. The physical stress of having a baby and the hormonal changes associated with it can contribute to unexpected conditions like eczema to flare up.
1. Changes in Immune system
Pregnancy brings a lot of change in the body and the immune system. The immune system generally becomes weaker to accommodate the baby and not to reject it as a foreign object. After the delivery, your immune system will start recovering and can at times overreact leading to inflammation of the body and the skin causing the eczema condition.
2. Changes in the hormone
After your delivery, your body will start figuring out the correct balance of your hormones again. Hormonal eczema after pregnancy can cause your skin to get dry making them itchy and flaky.
3. Stress
Post-pregnancy stress is also one of the major reasons to get an eczema attack after delivery. Sleep deprivation can increase your anxiety levels which in turn can lead to eczema condition.
4. New Allergies
During and after pregnancy many of you can experience that you have developed new allergies. A quick allergy test can help you know the triggers to it so that you can avoid them and get relief from eczema.
How to Deal with Post Pregnancy Eczema?
Some of you experience eczema worst after delivery while others develop eczema after c-section. The most important thing to avoid or contain eczema is to know the possible causes of getting it after delivery.
1. Environmental Factors
Most of the time it is the environment that acts as a trigger to developing eczema. Pet dander, sensitivity to certain food, lotions or even detergent powders could cause your eczema to worsen.
2. Keep Your Skin Moisturised
It would help if you avoid using any harsh soaps on your body so that your skin does not dry out.
3. Apply Aloe Vera Gel
An application of aloe vera gel or calendula provides relief to the skin affected with eczema.
4. Black Currant Oil
Include black currant oil in your diet 500 mg twice daily. It is rich in gamma-linolenic acid that is known to promote healthy growth of hair, skin and nails.
5. Avoid Dairy Products
Try to avoid dairy and dairy products and products that have hydrogenated oils and trans-fatty acids.
6. Tepid Baths
To alleviate your symptoms you can use warm tepid baths, followed by an application of emollients and topical steroids.
7. Managing Stress
Practicing yoga also helps in reducing your stress after delivery thereby successfully combating eczema attacks.
Some of the experts advise breastfeeding mothers to avoid methotrexate and cyclosporin to treat eczema after delivery.
Can You Breastfeed with Eczema?
The most uncomfortable area where a woman might get eczema is the areola or nipples. It can be a usual case of eczema or can be a result of some food the baby is eating which the mother is intolerant to. Yes, you can surely continue to breastfeed your baby. With eczema, breastfeeding can only stop if it hurts the mother. Breastfeeding actually helps to prevent other issues like plugged milk ducts and mastitis.
Here are a few tips for breastfeeding when you have eczema:
Mothers are usually advised to apply an emollient and topical steroid on the affected areas in between the feeds.
Take utmost care to wash off the medicines thoroughly before nursing the baby.
Avoid wearing tight-fitting bras and wash off any moisture around your breasts with breast pads.
Can Having Eczema Affect The Baby?
In most of the cases, eczema is a condition that is hereditary, especially if you or your any of your family members have medical conditions like allergies or autoimmune disorders then your baby will also be more likely be affected with eczema.
Eczema sometimes heals on its own. Keep your skin moisturized and try to figure out your eczema triggers to be able to manage them successfully. Focus on getting enough rest and sleep to avoid any stress build-up.
Also Read:
How to Deal with Postpartum Hives?
Pimples after Pregnancy – Reasons, Prevention and Treatment
Ways to Take Care of Your Skin After Pregnancy
Read more
Suggested for you

8 Things That Your Baby Knows About You Right From The Beginning!
When your baby is hungry, when he wants a nap, what is irritating him – you know your baby inside out. But have you ever thought whether he knows you at all? Are you just some person who takes care of him every day or does he know things about you?
Here’s the good news – your baby knows quite a bit about you! His knowledge only goes up as he grows older, but even at the outset, there’s quite a bit of information he has about Mamma.
Check Out the Complete List of Things Your Baby knows About You. It’s Extremely Heartening
1. He knows Your Voice
He could hear you even when he was in the womb. Now, when you talk and sing to him, he instantly makes the connect
2. He Even knows Your Smell
We all have a distinctive smell – did you know that? Well, your baby does. He can not only identify your smell (as well as the smell of delicious milk) but he loves it as well.
3. He Can Recognize Your Face
This may seem a bit odd but yes, your baby can actually see what you look like. His eyesight is still hazy and short-ranged, but when you’re feeding him, for instance, and your faces are close to each other, bingo! He knows it’s Mamma – or at least some nice person who’s always there for him.
4. He knows You Won’t Let Him Go Hungry
Newborn babies require frequent feeding and get cranky if that doesn’t happen. But every time your baby gets hungry, you are there. He knows you will not let him go without his food. In fact, he can get so possessive about you that he won’t let anyone feed him!
5. He knows You Will Come Back – Always
This will take some time to develop, but usually around 6 months to 1 year of age, your baby learns this about you. Just because you have gone to the other room or the bathroom, it doesn’t mean you aren’t going to come back.
6. He Can Figure Out That You Love Seeing Him Happy
When he plays with his toys, grins, attempts to hold your hand, or makes funny sounds, you look happy. In fact, anything that delights him makes you happy too. This holds at least till toddlerhood when some antics may drive you up the wall!
7. He Understands When You are Feeling Upset
Your baby is there for you when you are blue. Even though he cannot talk or understand your problem, he can discriminate between different facial expressions. If he thinks you look sad, he will even smile and coo to make you happy.
8. He knows You Will Always Protect Him
That scary thunderstorm, sudden darkness or a weird noise in the room – there’s no fear as long as you’re here! Your baby knows that you will always protect him. This thought soothes and comforts him all day.
Isn’t this amazing? Your little angel not only loves and knows so much about you, his world of exploration is only just starting. You can look forward to making beautiful memories with him in the future – all the best! Read more
Dr Disha Patel has added a new answer
Expecting Mom due in 6 months
14 hours ago
Q. can I take medicine pcm n citrazene in pregnancy fir sore throats n fever

Dr Disha Patel
Ayurvedic Physician
9 hours ago
A. dear mom.
better to take tab pcm for time being n do take steam inhakation couple of tines a day, follpw good home renedies for cold, taje more rest .
Swati Kar Samanta has added a new answer
Mom of a 9 m old child
7 hours ago
Q. hi everyone good morning,
sorghum can I give to my 10 month baby is it safe or not please revert I waiting for your reply

Swati Kar Samanta
Mom of a 2 m old girl
6 hours ago
A. Yes but first give in very small quantity to judge the reaction of your baby.
Rashmi has added a new answer
Expecting Mom due this month
5 hours ago
Q. #asktheexperts is it okay that the baby is kicking less than usual?

Rashmi
Mom of a 9 yr 7 m old girl
5 hours ago
A. Yes it is the what part is that your child is kicking if you feel that there is a movement of your child whether it is a cake or slight movement also you know that your child is doing fine so there is no problem in that if the movement is less it’s completely alright
Dr Sameer awadhiya has added a new answer
Guardian of 0 children
4 hours ago
Q. #asktheexperts what to do if the baby’s nose is blovked

Dr Sameer awadhiya
Paediatrician
4 hours ago
A. Nasal blockage is very common, specially in small children because of the narrow nasal cavity. Any kind of saline drops like nasal clear will be helpful in dissolving the stuffy secretions, which can be taken out by vnasal aspirator gently also steam inhalation will be helpful also, try to avoid keeping the child directly under the fan.
Ankita Mehta has added a new answer
Expecting Mom due in 4 months
2 hours ago
Q. 22 week pregnant,baby konse month me or din me kitni baar move kartaa he ,pls bataye abhi sirf 2, 3 baar hi hota he

Ankita Mehta
Mom of a 8 yr 7 m old girl
19 mins ago
A. hi
yes it's enough
and the frequency and timing may vary as we all are different
but yes, the frequency of feeling baby movements will increase now
please go for regular check-up to your gynecologist
and follow his or her suggestions
Rashmi has added a new answer
Trying To Conceive
1 hour ago
Q. hi
need help and advice
my RT 18x16mm and LT 10x16mm ET 6.59
and did ovulation rest also showing fertility test C as if now , pls advice if we intercourse tomorrow then when will be my ovulation start.
Rashmi
Mom of a 9 yr 7 m old girl
1 hour ago
A. You can check with an ovulation kit if it is positive then you can certainly go ahead with the conception because ovulation kit is going to give you 100% clarity whether you are ovulating or not with that you can try practising if you can conceive the same time
Check out this new Memory

pooja Rathore
Mom of a 2 yr 10 m old girl
New Memory
#kidno1

Like
Comment
Share
0 Likes
0 Comment
Check out this new Memory

Anjanaba Vaghela
Mom of a 4 yr 7 m old boy
New Memory
#stylishbaby

Like
Comment
Share
0 Likes
0 Comment
Check out this new Memory

oshmi ropuk
Mom of a 3 m old girl
New Milestone
Love you

Like
Comment
Share
0 Likes
0 Comment
Check out this new Memory

Bandarisagarika
Guardian of a 3 yr 8 m old boy
New Memory
#kidno1

Like
Comment
Share
0 Likes
0 Comment
Tell us more about yourself get More Personalised
 Infant0 to 6 Months
 Baby6 Months to 2 Yrs
 Toddler2 to 4 yrs
 Kids4-6 yrs
 Big Kids6+ yrs
 Expecting
 Trying to Conceive

