

.svg)
.svg)
.png)

Enter Child Details

Add Profile Photo


Videos you might be interested in


Videos you might be interested in
Videos you might be interested in
Suggested for you

15 Iron Rich Foods for Babies and Toddler
The beneficial properties of iron for babies are many. From promoting adequate growth and development to keeping anaemia at bay, iron is an essential nutrient that ensures proper health and well-being. Most babies do not need any kind of iron supplements till they are at least four months of age. This is because all babies get plenty of iron from their mothers during the final trimester of pregnancy. If your baby is born prematurely, then there is a possibility that he may suffer from an iron deficiency. This can also happen if you were diabetic or had poor nutrition during pregnancy.
Importance of Iron for the Body
Iron is an essential nutrient needed for proper growth and development. It aids proper functioning of the body by helping the blood transport oxygen from the lungs to the rest of the body and the muscles to store and use oxygen. Essentially, iron is the main component of healthy blood, and a deficiency in iron can cause anaemia, which affects core functions in the child’s body.
Symptoms of an Iron Deficiency
You may notice the following symptoms if your child has an iron deficiency.
Pale skin
Poor appetite
Constant fatigue
Abnormal breathing
Delayed growth and development
Frequent illnesses
Iron Rich Foods You Can Include in Your Baby and Toddler’s Diet
There are two categories of iron-rich foods – heme and non-heme. Heme originates from haemoglobin and is usually found in animal products, especially poultry and meat. Heme-iron is absorbed by the body quicker than non-heme iron. There are plenty of non-vegetarian and vegetarian iron-rich foods for babies to try out. Here is a compilation of iron-rich food for babies and toddlers.
1. Meat and Poultry
These are great sources of heme iron, especially red meats and liver. Try to remove all the fatty parts of the meat before cooking, as they do not contain any iron. You should cook the meat well before feeding it to your baby. Else, it can be difficult for them to chew and digest easily.
2. Egg Yolks
Yet another of the good sources of iron for toddlers and infants alike, eggs are easily available and easy to cook and eat. Try to incorporate egg yolks into various recipes. This guarantees that your child gets a healthy dose of iron regularly without having to eat the same thing every day. Caramel custard or custard flan are some delicious options for desserts that include egg yolks.
3. Red and Brown Rice
Excellent sources of non-heme iron-rich foods for infants, these varieties of rice might not appeal to your child if simply cooked. Try to add some flavour to it by stirring in vegetables, eggs, or meat depending on your food habits.
4. Beans
Almost all varieties of beans are rich in iron. Lentils, kidney beans, chickpeas, and soybeans are just some examples. You can steam the beans and flavour them with some salt and mild spices before offering them to your child. You can also mix them with meat or rice.
5. Sweet Potatoes and Potatoes
In order to retain most of the iron in potatoes, be sure to cook them with the skin on. Baked and steamed potatoes or sweet potatoes are a favourite with most children. You can also slice them to resemble french fries, as this will also help your child grip them easily when self-feeding. Mashed potatoes are another favourite.
6. Seafood
There is no denying that seafood is a source of various nutrients essential to your child including iron. Tuna, clams, and shrimp are the best sources of iron. You can cook these in a variety of ways and feed them to your child on a regular basis. However, be aware that some children can be allergic to specific seafood, so introduce these to your child with care.
7. Peanut Butter
A favourite with a large number of kids, peanut butter, is packed with iron. Using it with whole bread will make it a healthy snack at all times. You can also try out peanut butter cookies for a special treat. Using enriched flour or oatmeal helps you increase the healthy-eating quotient.
8. Tofu
A great meat substitute for vegetarians, tofu contains a significant amount of iron. You can cut tofu into strips and sauté them before offering it to your child, alongside a dip. It can also be consumed by children who are lactose-intolerant.
9. Prune and Cranberry Juice
These are some of the few fruit juices with rich iron content. Their sweet taste is bound to appeal to children, but be sure not to give them more than one glass per day. These juices are also good for urinary tract health and prevent constipation. They contain no fat or cholesterol.
10. Dried Seeds
A great snack during travel or after play time, dried seeds are fun to munch on. Sunflower, pumpkin, and sesame are just some of the seeds that contain iron in significant amounts. You can also try to make a granola bar out of these or use them as garnishing in puddings and other sweet treats to make it interesting.
11. Cream of Wheat and Oatmeal
Oats have the highest iron content among cereals. Just one bowl of oatmeal can provide about 60% of your child’s daily iron requirements. A bowl of cream of wheat can meet all of your child’s daily iron need. However, being a non-heme iron, it might be difficult for the body to absorb all of the iron.
12. Dried Fruits
Dried dates, apricots, prunes, and raisins all contain a large amount of iron. They make for extremely healthy snacks to chew when your child is hungry or simply wants something to munch on. Encouraging your child to reach for dried fruits whenever they want a snack is one good habit you might want to continue into adulthood.
13. Green Leafy Veggies
You might find it difficult to get your children to finish up green veggies when served raw or steamed. Spinach, broccoli, collards and kale are rich in iron and many other essential nutrients. You could blend these into a paste and use them in gravies, soups or dips. Add some flavour with spices if required.
14. Tomatoes
If your child refuses to eat fresh tomatoes cut into nice little cubes, try drying it under the sun or inside an oven. Then you can make sauces and soups out of it. Spaghetti with tomato sauce and mildly-flavoured tomato soup are sure to be a hit with your child.
15. Organic Dark Chocolate
Children love chocolates, and it can be hard to keep them off it as they grow older. One way to satisfy their cravings is to find organic dark chocolate. These contain less sugar while being rich in iron.
Babies who are being breastfed or given infant formula fortified with iron do not require any iron supplements. Toddlers who eat a well-balanced diet, with enough iron sources included, also do not need any supplementation either. Poor iron content in children can lead to distracted focus and causes them to feel tired and weak. So, try to incorporate at least a couple of iron-rich food into your baby’s daily diet.
Also Read: Finger Foods for Babies
Read more
Suggested for you

18 Incredible Benefits of Oats You Were Unaware Of
Oats are said to be one of the healthiest food. it is specially included in the diet when people think about eating healthy or losing weight. However, oats are beneficial in more ways than just being a healthy food item that aids weight loss.
Nutritional Content Present in Oats
Nutritional value of 100 g of oats:
Calories (kcal)
389
Calories from fat
62
Total fat (g)
6.9
Saturated fat (g)
1.217
Polyunsaturated fat (g)
2.535
Monounsaturated fat (g)
2.178
Cholesterol (g)
0
Sodium (mg)
2
Potassium (mg)
429
Total carbohydrates (g)
66.27
Dietary fibre (g)
10.6
Protein (g)
16.89
Vitamin A
0%
Vitamin C
0%
Calcium
5%
Iron
26%
What Are the Different Types of Oats?
Listed below are the names of the different types of oats.
1. Oat Groats
It is the unadulterated version in which only the hull has been removed. It takes about an hour for it to cook.
2. Steel Cut Oats
Another name for pinhead oats or Irish oats, steel-cut oats are groats that have been cut into smaller pieces so that they get cooked faster.
3. Scottish Oatmeal
This type of oatmeal is ground by stone instead of cut into small pieces.
4. Oat Bran
It is very high in fibre, cooked as a cereal, and takes less time to cook.
5. Old Fashioned Oats
These are groats that have been steamed and pressed. They take about 4-5 minutes to get cooked.
6. Quick Oats
These are similar to the old fashioned oats, but they are steamed for a longer time and are pressed even more to make them thinner.
7. Instant Oatmeal
The oats are steamed more and pressed to make them even thinner than quick oats. Before packaging, salt, masala, vitamins, nutrients, and colours are added to the oat flakes.
8. Oat Flour
This is used in baking. In this type, everything is kept intact before grinding the whole grain to turn it into flour.
Amazing Benefits of Oats
We usually talk about the health benefits of oats, but have you heard about the benefits of oats for hair or for the skin? Read through and know more about this super grain.
1. Keeps the Heart Healthy
Oats contain dietary fibre and antioxidants which help in reducing the bad cholesterol that affects the heart. Enterolactone and plant lignin present in oats also help in keeping the heart healthy.
2. Promotes Good Bowel Movement
Oats prevent constipation, as they contain soluble and insoluble fibre that aid in the smooth movement of the bowel.
3. Keeps Blood Sugar in Control
Oats are a rich source of fibre and complex carbohydrates that slowly convert the whole food to simple sugars. On the other hand, the beta-glucan slows down the fall in blood sugar levels before eating and prevents a spike in the sugar levels after food.
4. Prevents and Cures Blood Pressure
It reduces your risk of acquiring the lifestyle disease and also helps in combating it.
5. Aids Weight Loss
People often talk about oat's benefits for weight loss. It is low in calories and very high on fibre, which makes you feel full for a longer time.
6. Increases Immunity
Beta-glucan, which is present in oatmeal, makes neutrophils more effective in eliminating bacteria and curing an infection.
7. Anti-Dandruff
The saponins in oats help in cleansing the scalp and getting rid of dandruff. The lipids and proteins in oats moisturise the scalp and prevent dandruff from coming back.
8. Cures Acid Reflux
Oatmeal has good absorbing properties, which allow it to absorb acid in the foods and neutralise acidity. It also helps in preventing acid secretion and does not allow acid reflux.
9. Good for Skin
Oats have great exfoliating and cleansing properties. Moreover, it also has anti-microbial properties that prevent acne or any kind of skin infection. Amino-acids present in oatmeal help in reducing age-spots, discolouration of the skin, etc.
10. Good Source of Magnesium
Magnesium relaxes the blood vessels and muscles. This helps in preventing strokes, heart attacks and body cramps.
11. Prevents Asthma in Children
Since asthma is an inflammatory disease and oats has anti-inflammatory properties, it is said that it can prevent the occurrence of asthma in children.
12. Contains Avenanthramides
This complex compound stops free radicals from damaging the good cholesterol, thus, preventing heart attacks and heart diseases.
13. Helps in Building Muscles
Including oats in your daily diet can give all the necessary nutrients that the body requires to build muscle.
14. Helps in Eliminating Toxins
The amino acids in oats help in producing lecithin in the liver, which, in turn, works well to get rid of all the toxins in the body.
15. Good for Athletes
Oats is a high energy-generating food which helps athletes remain energetic. Since it is also high in protein content, it helps in building muscles.
16. Maintains the pH Level of the Skin
Using oats in your skin will help in maintaining the pH level of the skin and keep it hydrated without having to use any beauty products from the market.
17. Very Little Gluten
People with celiac disease can take oatmeal in moderation, since it contains fairly low amount of gluten.
18. Provides Necessary Nutrients
The advantages of oats are wide and varied. It not only helps you lose weight, but also helps you get all the necessary vitamins and nutrients that are required for an overall healthy body.
Other Uses of Oats
Oats can be used in more ways than one.
You can blend some oats with water to make a smooth glass of oat milk. It is a great substitute for milk, especially for people on a vegan diet or allergic to dairy products.
It works as a great binder for vegetable patties.
Grind some oats to make flour, which can be used to bake cookies, bread, cakes and even homemade pasta.
Instead of regular cornflour to thicken soups and stews, a spoon or two of oatmeal can be added as a substitute.
To make your smoothie more filling, add some oats to it.
Oats are also used for making nutritious granola bars.
Oats can be used to coat tofu before frying to make it crispy.
Rolled oats can be used to make cookies without baking.
How to Properly Select and Store Oatmeal
Here are a few ways to select the right kind of oats and store them in order to ensure that it stays fresh for a longer time.
In order to choose the right type of oats, know what your preferences are.
If you, for medical reasons, want 'gluten-free' oats, buy a pack that clarifies so.
Select the type according to the dish you wish to prepare. For example, for traditional dishes like risotto or pulao, you may buy steel-cut or Irish oats. If you wish for something which will be quick to cook, you can buy a pack of instant oats.
To cure skin problems, buy colloidal oatmeal - powdered oats that dissolve in water.
It should be stored in airtight containers or jars, so that moisture or cockroaches do not get in.
Keep the airtight container with oats in a dark place. That way, you can store it for up to three months.
In case you want to keep it fresh for a longer period of time, refrigerate it.
In order to store oat bran, always refrigerate it.
Are There Any Side-effects of Eating Oats?
Oats are supposed to be the healthiest cereal. However, they too come with their share of side-effects.
If not chewed properly, eating oats may result in intestinal blockage. Instead of doing any good, it may have adverse effects like gas and bloating of the stomach.
Oats itself is gluten-free, but it is sometimes processed in factories where other non-gluten-free products are also processed. So people with celiac disease should avoid it or buy only those oats that are labelled 'gluten-free'.
Eating oats can aggravate intestinal diseases like Crohn’s disease, Irritable Bowel Syndrome, diverticulitis, ulcerative colitis, etc.
Oat bran should not be taken by an anaemic person, since it contains phytates which prevent the body from absorbing iron, calcium and other minerals.
Healthy Recipes That Can Be Prepared From Oats
Here are some oats recipes that may be of help if you are planning to include oats in your daily diet.
1. Oats Porridge
It is an easy and quick oats recipe which you can eat for dinner. It can also be given to babies.
Ingredients
Rolled oats (unflavoured) – 1/2 cup
Carrot (diced) – 2 tbsp
Potato (diced) – 2 tbsp
Green peas – 2-3 tbsp
French beans – 2 tbsp
Cumin seeds – 1/2 tsp.
Ghee – 1 tbsp
Salt – to taste
Black pepper powder (optional) – 1/2 tsp
Method
In a non-stick pan, dry roast the oats till you get a nice, toasty aroma.
Set it aside and in a pressure cooker, add ghee and cumin seeds.
Then add the vegetables and the roasted oats to it.
Stir it for a while; add 3 cups of water and salt.
Put the lid and wait for two whistles.
Allow the pressure to release; open the lid and add the black pepper powder.
2. Oats Kheer
This sweet dish is for people who have a sweet tooth.
Ingredients
Oats – 1/2 cup
Milk – 1/2 litre
Jaggery (grated) – As per taste
Cashew nuts (chopped) – 4-5
Almonds (chopped) – 2-3
Dates (chopped)– 3-4
Raisins – 5-6
Fruits – berries, banana, apple etc.
Cardamom - 2
Method
Dry roast the oats until you get a nice aroma.
In a utensil, add the milk and bring it to boil.
Then add the jaggery and let it melt and get dissolved in the milk.
Add the dry fruits and roasted oats to it.
Let the oats cook until the mixture becomes thick.
Let it cool down, add fruits and serve it chilled.
3. Oats Dosa
This is the usual dosa recipe, but with a healthy and nutritious twist, without any compromise in taste.
Ingredients
Quick oats – 1/2 cup
Rice flour – 2 tbsp
Wheat flour – 2 tbsp
Green chilli (finely chopped) – 1
Ginger (finely chopped) – 1 tsp
Cumin seeds – 1/4th tbsp
Onion (chopped) – 3-4 tbsp
Coriander leaves – 2-3 tbsp
Salt – to taste
Water – as is required
Method
Mix all the ingredients together to make a smooth batter (not too thick).
Heat a non-stick tawa; pour some batter and spread it out to make a dosa.
Cook it over medium flame. Once done, serve it with coconut chutney.
FAQs
Here are answers to a few frequently asked questions on oats.
1. Is It Safe to Consume Raw Oats?
Oat groats eaten dry are not safe and can adversely affect your health. Vegans or lactose-intolerant people can reap the benefits of oat milk by simply soaking it in water for a few hours and then blending it with some water.
2. Can People With Gluten Intolerance Eat Oatmeal?
Oats itself does not have gluten, but it can pose a problem if it comes in contact with anything that contains gluten (like whole wheat flour) while being processed in the factory. Packs with a 'gluten-free' label can be consumed by gluten-intolerant people. In fact, it has been observed that eating oats for dinner is a great way to lose weight. Even oatmeal for babies is considered to be extremely nutritious. However, it is imperative to test if the person or baby is allergic to oats before introducing it in the diet.
Now that you know the various benefits of oats, try and include it in your diet. It will be beneficial to you in several ways!
Also Read:
Benefits of Turmeric Milk for Overall Health
Incredible Benefits of Including Prunes in Your Diet
Amazing Benefits of Soyabean Oil You Should Consider Read more
Suggested for you

8 Simple Ways to Identify Whether Your Diamond Is Real or Fake at Home
Most of us have looked at the sparkling necklace of a relative or friend and wondered if it was made of real diamonds or plain stones. Some of us even have hand-me-down jewellery from our grandmothers, but we may not have the time to take it to a gemologist to get it verified. How do we tell if a white stone is a real diamond or simply sparkling glass? Sometimes the glittery and lustrous stones can turn out to be similar to cubic zirconia or moissanite, which look like diamonds. To tell a fake diamond from a real one, there are some home tests that you can put the stones through. We list down some of these tips for you to try out.
Easy Home Tests to Identify If Your Diamond is Real or Fake
It may be prudent to know how to identify a real diamond and tell it apart from other gemstones. Here are some tests that you can do at home:
1. Look at the Stone through a Loupe
A loupe is a type of magnifying glass used by jewellers. When looking at a stone through a loupe, here are some things to consider:
A real diamond will have imperfections because it is formed naturally whereas a fake stone will look perfect. But caution is to be shown here because there are lab-grown diamonds which may look perfect too.
A diamond has sharp edges while a regular stone would have rounded edges..
2. Rub Sandpaper against the Stone
Use a piece of sandpaper to rub the surface of the stone. Sandpaper, being abrasive, will create some scratch on the stone if it is moissanite or cubic zirconia. Whereas if it's a diamond, it will remain unaffected as it is one of the hardest materials known to man.
3. Water Test
If you have an unmounted stone, the water test works well for you. Fill 3/4th of a glass with water and drop the stone into it. A stone that sinks to the bottom is a diamond while one that floats on the surface of the water is fake. This is because diamonds have a very high density and hence sink immediately.
4. Fog Test
Hold the gem out in front of you and breathe warm air onto its surface the way you would do to clean a glass surface. If the layer of moisture fades immediately, then the stone is a diamond. This is because diamond conducts heat efficiently and so it disperses the heat immediately too. Any other stone will reflect a coat of moisture for much longer.
5. Reflectivity of the Stone
Hold your stone under the light and observe how the light is reflected. Diamond reflects light uniquely. The inside of the diamond will reflect pure white or grey light known as ‘brilliance’. The outside of the diamond will reflect coloured light in a beautiful way called ‘fire’. As opposed to this, ordinary stones reflect a rainbow coloured light from the inside and are not as brilliant as the diamond.
6. Refraction
Diamonds sparkle largely due to their ability to bend light and reflect it. When light hits a diamond on its angled surface, this light is bounced and refracted by the flat surface of the diamond. You can test the refraction of a stone by placing its flat side on a newspaper and looking through the pointed side, try reading the lettering. If the letters are visible even vaguely, the stone is a fake. High refraction of a diamond will ensure that light is scattered in different directions and not a straight line. It means that you cannot see through a diamond onto the other side. This test works only if you have a loose stone and not if it is in a setting.
7. Heat Test
Again, this test works if you have a loose stone. Hold it between forceps or tongs and heat it under direct fire for about 40 seconds. Immediately drop it into cold water. Gemstones cannot withstand the pressure of such a sudden change in temperature and will shatter immediately. A diamond is a very strong substance and is not affected much by the temperature change. It remains unscathed because of its ability to dissipate heat quickly.
8. Setting and Mount on Metal
If your stone is already mounted on metal, it is appropriate for you to check the setting and the metal thoroughly. If the setting reflects poor workmanship, then the stone is definitely not a diamond. Look at the etching on the mounting. If you notice markings like 18K, 22K, or PT, it indicates that the metal used is gold or platinum. Real diamonds will definitely be set in quality metal such as these. If the mount is gold-plated or silver, you can be assured that your stone isn’t a real diamond. If you also notice markings of CZ, it indicates that the stone is cubic zirconia and not a diamond.
FAQs
Here are some most-asked queries about diamonds:
1. Is It True That Real Diamonds Sparkle Rainbow Colours?
In truth, a diamond does not sparkle rainbow colours. A diamond, because of high refraction, bends and reflects light in all directions. Due to this, white light is reflected as pure white or light grey on the inside of a diamond. The rainbow colours will only be reflected on other surfaces that are outside the diamond. For example, if your diamond is set in gold, the rainbow sparkle is a reflection of the coloured light on the gold. It doesn’t come from the inside of the diamond.
2. Can a Real Diamond Cut Glass?
Diamonds can definitely scratch or cut the surface of glass with ease. This is because diamonds are known to be one of the strongest materials on Earth. They are about 40 times harder than glass and rate 10 on the ‘Mohs scale’ of hardness while glass rates a 6.
There are other methods like the UV light test which show that some diamonds give off a blue glow in UV light whereas other stones will have green, grey, or other coloured glows. A lot of the above-mentioned tests work better if you have loose stones to identify. With each case, there should be prudence and caution applied because you risk losing your fake stone with some of these tests. If you don’t mind destroying a fake stone, then the shatter test or the sandpaper ones are effective methods of confirming the identity of your stone.
An important thing to remember is that none of these tests is ‘set in stone’ and the best way for you to categorise your stone would be by taking it to an authorised jeweller. Professional jewellery businesses have advanced tools like thermal conductivity probes and accurate high profile weighing scales to determine the correct value of a stone. They also have a keen eye for spotting the differences between moissanite, white sapphire, topaz, cubic zirconia and a real diamond. If you are unsure, seek the expertise of a professional to value your gems.
Also Read:
How to Clean Gold and Silver Jewellery at Home?
Tips to Organise and Store Your Jewellery Properly
Should You Consider Gold As an Investment Option in India? Read more
Suggested for you
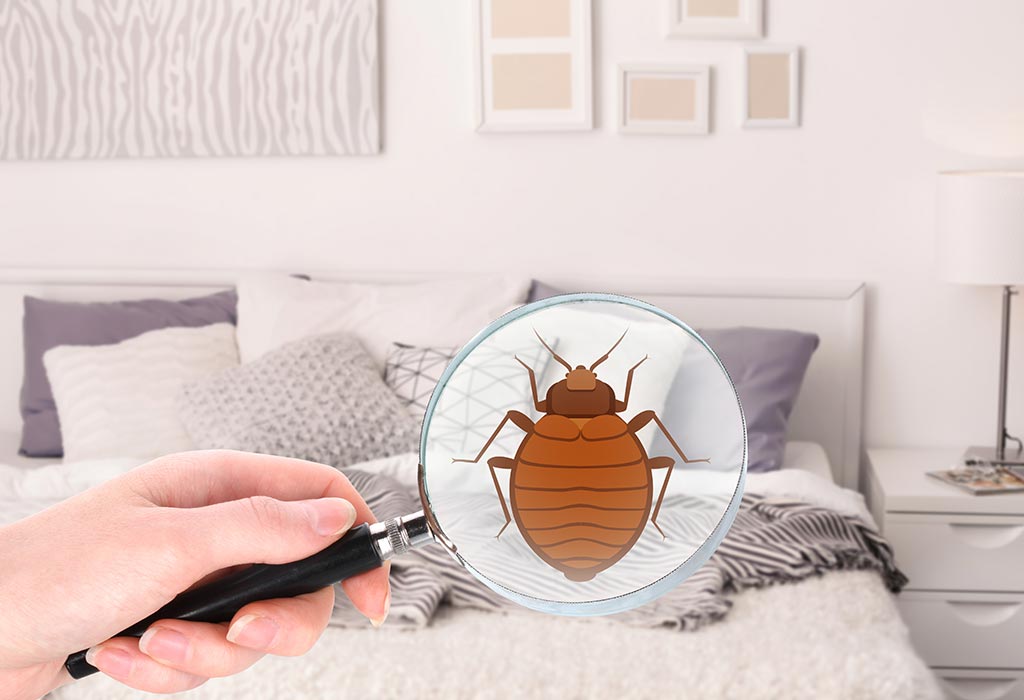
How to Get Rid of Bed Bugs at Home - Your Stepwise Guide
Bed bugs are troublesome to deal with. If you fail to eliminate even a single pregnant bed bug, your household runs the risk of getting infested with over 300 adult bed bugs and 1000 eggs in less than three months.
Bed bugs are common household pests that are oval in shape and brownish in colour. They are parasites that live on the blood of humans and animals.
Immature bed bugs are known as nymphs. Nyphms shed their skin five times before becoming mature. They need a complete meal of blood before each shedding. These nymphs require a little less than a month to develop fully and produce three generations of offsprings in a year, under favourable conditions.
So, where do these pesky pests come from? Bed bugs can enter your home (and life) through clothes, luggage, couch, beds, and mattresses. They have a flattened body and can fit into any available space are hard to detect. They do not have nests but live in groups. Bed bugs initially hide in mattresses, headframes, box springs and places from where they will have easy access to sleeping people, and feed on them. They later spread to other places.
Bed bugs bite while you are asleep. They pierce the skin and suck blood using their beak. They feed for up to 10 minutes and crawl back, unnoticed. Bed bug bites may or may not swell, after a complete meal. The bites are painless but soon starts itching.
Bed bug bites might look similar to mosquito bites and so, it is difficult to understand a bed bug infestation. You will need to identify the bed bugs first.
How to Remove Bed Bugs?
These small bloodsuckers can create havoc in your life if not eliminated completely. It is not difficult to remove bed bugs. A little bit of patience and knowing what needs to be done, can help in removing these tiny pests.
There are both non-chemical and chemical approaches that you can take, and that depends on the extent of the infestation.
Here is how to get rid of bed bugs permanently:
1. Identifying the Infested Areas
It is cheaper (and easier) to treat bed bugs when the infestation is small as compared to a large one. Smaller infestations are difficult to detect, but nevertheless, you will need to put in the effort to ensure the infestation does not become a large one.
You can do the inspection yourself or hire a professional for the same. Some professionals even hire dogs to track bed bugs using their smell.
As already mentioned, bed bugs can easily squeeze into seams of couch and mattresses and even folds of curtains. And, these are the places where you will need to start your inspection from.
Some of the other places that you are most likely to find them are
Inside the cracks of headboards and bed frames
Near-bed spring and mattress tags
Between couch pillows and cushions
In between furniture joints
Underneath wall decor accents, paintings, and posters
In baseboards
Use a magnifying glass and a torchlight to inspect these places thoroughly. These are some of the signs that you need to be on the lookout for:
Living bed bugs that are reddish-brown in colour and about 0.25 inch long.
Bed bug droppings are nothing dark spots measuring the same as a period.
Crushed bed bugs on the couch or bedsheet that leads to reddish stains.
Tiny, pale and yellow eggs and eggshells.
Yellowish skin that nymphs shed.
If you find a bed bug, keep it inside a sealed jar containing rubbed alcohol. A lot many bugs look similar to bed bugs. If you are not sure of what you have caught, you can call an entomologist or exterminator for identification.
2. Control the Infestation
Once you are sure that it is a bed bug infestation, you will have to contain it so that the infestation does not become a large one. Using vacuum is one of the best ways of trapping bed bugs. Run your vacuum over all the possible hiding places like your bed, carpets, dresses, and others.
Now seal the vacuum content in a plastic bag and dispose of properly. Do not forget to clean the vacuum thoroughly.
Next, seal all your infected clothes and linen in a plastic bag until you can wash them. While washing them, select the highest temperature setting for the dryer and washer. This will help in eliminating the bed bugs permanently.
If there is something that cannot be washed, keep it sealed in a plastic bag. Open the bag only when you are sure that all the bed bugs have been killed. For furniture that cannot be cleaned, throw it away. Tear the cushions and pillows and paint the word ‘bed bugs’ so that no one else takes those home.
3. Preparing for Bed Bug Treatment
Treating bed bugs is not easy, and a little bit of preparation will only increase your success rate.
Ensure that carpets, clothes, linen, drapes, and furniture have been cleaned thoroughly or discarded.
Next, you will need to get rid of all the bed bug hiding places. Are there books, newspapers, and magazines lying at the same place (like underneath the beds) for over a year? It is time to throw them away. Be careful not to move items from an infected room to a clean one.
Glue down loose wallpapers and seal all cracks and open areas. Block furniture and baseboard cracks. Tape up loose electrical outlets. Shift your beds and couch at least six inches away from the wall and furniture so that the bed bugs cannot climb back.
4. Killing the Bed Bugs
There are different by which you can kill these insects.
Killing Bed Bugs at Home
How to get rid of bed bugs from mattresses and clothes is a common question that people have in mind.
You always do not need chemicals to get rid of them. Intense cold or high heat is enough to kill them.
Wash linen and clothes in hot water for over 30 minutes. Put them in the dryer with the highest heat setting for 30 minutes to remove bed bugs permanently. You can use a steamer on mattresses or any other probable hiding place. You can also pack the infested items in a plastic bag and keep it inside a car on a hot day. Or you can keep the bag inside the freezer for a couple of days.
Now that you have managed to kill all the bed bugs, you will have to make your house bedbug-proof. Bed bug-proof covers are available for box springs and mattresses. Cover your mattresses with these and zip up completely. The existing ones will die, and new ones will not be able to enter.
If the infestation is large, you will have to use an insecticide.
Chemical and Non-chemical Treatment Options
Want to know the way to get rid of bed bugs fast? You will have to make use of insecticides. Some of the available options include pyrroles, pyrethroids and pyrethrins, bug bombs and many more. Most of these can be harmful to human health, if not used properly. Read the label before using any of these. Let's take a look at them in detail:
Pyrethroids and Pyrethrins: These are among the most common chemicals used to eliminate bed bugs. However, some bed bugs have grown resistant to these chemicals.
Neonicotinoids: These are nothing but artificial nicotine. These work by damaging the nervous system of bed bugs. This chemical works on bed bugs that are resistant to common insecticides.
Pyrroles: They work by disrupting the bed bugs at the cellular level.
Bug Bombs or Foggers: These are very effective in killing bed bugs but cannot get into crevices and cracks, and so might not be a great option. Read instructions carefully before using a fogger.
Desiccants: These destroy the outer shell of bed bugs and the bugs eventually die. The results are slow, but the good thing is that bed bugs cannot get resistant to these.
Plant oil-based bed bug killers are also available in the market.
You will have to do the treatments every 10 days for at least three times to ensure that all the bed bugs are gone.
5. Keep Monitoring
Even after the bed bugs are dead, you will have to keep on monitoring as bed bugs are hard to eliminate. Even a single living pregnant bed bug can give birth to hundreds of more. So, you will have to make sure that there is not a single bed bug left in your property.
Make sure to check the infested areas and all the hidden areas for any bed bug activity every 6-7 days.
You can consider using bed bug interceptors for this purpose. You will need to place these interceptors under each leg of your bed and couch. These work by catching the bugs before then you can climb onto the furniture. You will have to keep doing this at least for a year, as bed bugs can be pretty persistent.
6. Retreat As and When Needed
Bed bugs are really hardy. Just the moment you think that you have eliminated the last living bed bug from your property, you will see one crawling under your bed. You will have to retreat if required.
As far as treating the bed bugs is concerned, you will have to try different methods to see what is working for you. What worked during the initial treatment might not work now.
If nothing helps, you will have to hire the services of a professional exterminator.
7. Take the Help of Professionals
If the infestation is quite large, you will have to hire an exterminator. Also, if none of your methods are working, it is best to leave it to the pros.
Professional exterminators and pest control companies have access to chemicals that you do not have access to. Also, they are trained to use these chemicals without causing harm to the surrounding environment.
They make use of insecticides that do not only kill the bed bugs in contact but insecticides that stay inside furniture cracks and broken electrical outlets to prevent future infestation. In short, they give you long-term results.
Some pest control companies resort to whole room heat treatment. They make use of special equipment and devices to heat up the entire room with the temperature being in between 135 and 145-degree F. Such a temperature range is enough to kill every living bed bug in the room.
Before treating your property, a professional exterminator will tell you what all you need to do to prep for the treatment. Make sure you follow all the instructions to ensure that all the bed bugs are wiped out.
You will be asked to stay out of the treated room unless the insecticides dry. Professional treatment can take up to a few days, depending on the level of the infestation.
8. Preventing Bed Bugs
Once you have managed to eliminate the bed bugs, you will have to ensure that they do not come back. Reduce clutter and do not leave clothes, paper, and magazines on the floor.
Use a bedbug cover to protect your couch cushions and mattresses. Keep them zipped so that the bed bugs are not able to enter. Wash linen, carpet, and furniture often. Clean your furniture on a regular basis as well. Seal cracks and crevices on the floor, around electrical sockets, and baseboards so that the bed bugs stay away. Look for bed bugs while staying in hotels or travelling by public transport. If you suspect bed bug marks on your skin, wash your clothes and bags immediately using the highest heat setting in your washer or dryer.
If you are purchasing used furniture, make sure to inspect it thoroughly.
In most scenarios, it is easier to hire professionals as they take care of all the requirements and ensure that the bed bugs are gone. But then again, with these methods provided. You can do it yourself!
Also Read:
Home Remedies to Consider for Pest-Free Home
Effective Ways on How to Get Rid of Lizards from Home
Cleaning Mixtures That Are Hazardous to Use Read more
Suggested for you

Organic Hair Conditioners That You Can Easily Make at Home
If every morning combing your hair feels like a humungous task, then join the group. You probably spend half of your energy detangling and managing your hair with different products but still end up losing a ball of hair every morning. Hair troubles have reached sweeping proportions, and almost everyone is suffering from dry, dull and thin hair. For the majority of it, you can blame the chemical-laden products that we use, but the changing climatic and environmental factors are equally responsible.
Dry, frizzy and unmanageable hair calls for proper care which includes oiling, shampooing and conditioning your hair at regular intervals but that is not enough nowadays. Consider adding hair masks to your hair care routine for optimum benefit. With the advancing times, more and more people are opting for organic and paraben-free products and this article will help you go down the same path.
DIY Homemade Hair Mask Recipes
What if we tell you that there are a few ingredients in your kitchen cupboard that can act as great hair masks and you can have a fancy hair spa at home? With the help of these natural ingredients, you can concoct great hair masks that will keep your hair healthy and hydrated.
1. Honey and Olive Oil Hair Mask
If you want to deep condition your hair, this hair mask is the perfect solution for you. Honey has been treated as a beauty enhancer for centuries, and olive oil is known for its various healthy uses in a diet. This mask is a combination of these two ingredients and will leave your hair feeling silky and shiny. This mask works wonderfully because honey seals the moisture in your hair and olive oil nourishes them.
What You Need:
2 tbsp Honey
4 tbsp Olive Oil
Shower Cap
Process:
Thoroughly mix honey and olive oil in a bowl until you get a smooth mixture. Divide your hair into four parts and apply the mixture equally. Cover up your hair with a shower cap and leave the mask for about half an hour. Rinse the mask off with a mild paraben-free shampoo and apply your regular serum or conditioner. To see useful results, repeat this process twice a month.
2. Baking Soda Hair Mask
You can say goodbye to dry hair if you start using this hair mask, but, it is crucial that you use the correct amount of baking soda while making it as baking soda is a chemical too. Used in substantial amounts, baking soda will help maintain the proper pH levels in your hair, will retain moisture and will stop your scalp from flaking off dead skin.
What You Need:
1/4 cup Baking Soda
1/2 cup Conditioner
Plastic Bag
Hot Towel
Process:
Blend the baking soda and hair conditioner in a bowl until you get a well-combined mixture. Apply the mix from the roots to the tips of your hair. Cover your hair with a plastic bag and wrap a hot towel over it. Keep the mask for an hour and then rinse off the mixture with cold water. Repeat this process once a month to see the desired results.
3. Apple Cider Vinegar Hair Mask
Apple Cider Vinegar (ACV) has many other benefits apart from being an excellent dressing for your salads. After you’ve balanced out the pH levels in your hair, its time to give your hair an acidic rinse. Even though ACV is alkaline inside the body, it's acidic when you use it on your body. ACV removes the gunk and dirt from your hair and is also used as a natural cleansing agent.
What You Need:
2 tbsp. Apple Cider Vinegar
1 cup Water
Process:
This is a hair mask that you have to apply after washing your hair. Dilute the apple cider vinegar with one cup of water in a jug. Set the mixture aside and wash your hair with your regular sulphate-free shampoo. Condition your hair and pour the ACV mixture over your wet hair. Gently massage it on your scalp and keep it for a while. Wash off the concoction with a final cold water rinse.
4. Mayonnaise and Egg Hair Mask
I’m sure you are familiar with egg and mayo sandwiches, but the duo is capable of much more. This homemade conditioner is perfect for chemically treated hair. Mayonnaise has properties which are very similar to the store-bought masks. It contains oil that retains moisture in your hair and also prevents breakage. Even though mayonnaise contains a small amount of egg, adding more eggs to the mask, makes it more nutritious for your hair. Eggs are high in protein and help to thicken and strengthen hair. If you are someone, who takes a trip to your hair colouring expert every three months, then this mask is ideal for you. Chemically treated hair tends to have damaged cuticles and causing the colour to bleed and hence fade faster. This mask will repair your cuticles and retain the colour on your hair for a longer time.
What You Need:
2 Whole Eggs
5 tbsp. Mayonnaise
1 tsp. Olive Oil
Process:
Beat the eggs and mayonnaise in a bowl until the mixture is lump free. Add olive oil to the mix. Apply the mixture from the roots till the tips of your hair. Once you’ve thoroughly applied the mask, leave it for about 20 minutes. Rinse off the mask by shampooing your hair with a mild paraben-free shampoo and finish off with your regular conditioner. Do it once a week for smooth and shiny hair.
* Do not wash your hair with warm or hot water as it will cook the egg and make it difficult to rinse it out.
5. Avocado and Banana Hair Mask
These ingredients of a healthy fruit smoothie can do wonders for your hair. This hair mask is for people who suffer from hair fall and have brittle hair. Avocados contain vitamin A, B and essential oils which are great for your scalp. They also give volume, shine and moisturise your hair. Bananas can soothe and repair your damaged tresses. They also prevent your hair from getting frizzy. This mask is exactly what your beautiful mane needs.
What You Need:
1/2 Banana
1/2 Avocado
1 Egg
1 tbsp. of Honey
2 tbsps.of Olive Oil
Process:
Peel the avocado and cut it in half. Mash it into a smooth paste. Add half a banana and two tablespoons of olive oil; beat the mixture until all ingredients are well combined. Whisk the egg and honey into the avocado banana paste until it’s smooth and soft. Now start applying the mask to the upper half of your hair and work your way down to the bottom half. Apply thoroughly on the tips of your hair as they are more likely to be damaged. Leave it on for 15 minutes and then wash it off with cold water.
6. Lemon Hair Mask
When life gives you lemons, don’t just make lemonade, make this lemon conditioner as well and do your hair a favour! We all know that vitamin C is excellent for the skin but its beneficial for the hair as well. This conditioner is perfect for people who suffer from dandruff problems as it has anti-inflammatory properties which reduce irritation and also exfoliate dead cells. Lemon adds the ideal bounce to your oily and dull hair as it balances the scalp’s natural oil production. It also promotes hair growth, so now you can finally have hair like Rapunzel’s!
What You Need:
1/2 cup Lemon Juice
1 cup Water
Process:
While you do your shampoo routine, mix lemon juice and water and pour it over your hair before you give them their final rinse. Gently massage it into your scalp. Rinse it off and apply your regular serum.
Try one of these natural, handmade hair conditioners and restore the lustre that your tresses are worthy of. Trust us; you won’t be able to stop touching your silky soft locks all day!
Also Read:
How to Make Oil for Hair At Home
DIY Hair Shampoo Recipes for All Types of Hair
Do's and Don'ts for Healthy Hair Care Read more
Suggested for you

Real Mom Sanya Singh Lost 28 Kgs Post-Pregnancy! She Shares Her Breakfast To Dinner Diet Tips...
As the battle of women and weight continues, this victorious mommy shares her tips to tackle the evil monster that enters your closet at night and takes all your clothes in!
Every woman on the face of this earth puts on at least a little bit of weight during her pregnancy. Women are in fact advised to put on weight during their pregnancy, to eat all their favourite foods, and to eat healthy and nutritious food. The Indian culture believes that a woman who is well-fed will tend to be in a happier state of mind during her pregnancy, and this in turn will have a positive effect on her baby. So there is more than just nutrition to the tradition of preparing all of the favourite recipes of a pregnant woman and feeding them to her.
However, post-delivery, all that food gets stuck – in the form of love handles, fleshy arms, thunder thighs, and a post-pregnancy belly! Women struggle to lose weight and get back to their older, fitter self, and their beloved old clothes! We are sure every mommy has at least one pair of jeans in her wardrobe from her pre-pregnancy days... now, what if we told you, you could get back into those old pair of jeans from your college days?
28 kg Lighter and So Much Fitter! - Meet Mommy Sanya Deo Singh
If you are looking for a fitness inspiration to help you remain focussed and committed to your post-pregnancy weight loss regime, we bring to you the story of this real mommy who lost a whopping 28 kilos of weight post-delivery and is now fit as a fiddle!
When Sanya looked at herself with all that post-pregnancy weight, she knew she had to do something about it. "Like many other women I gained weight post pregnancy. Looking mature with baby fat didn’t feel right, I decided to lose weight."
However, one failed attempt with dieting turned out to be a great eye-opener for Sanya. “I started with dieting and soon realised that getting on a crash diet never helps. I decided to lose weight, but I also wanted to take it slow and make it a healthy weight loss journey.”
That's when she decided to be gradual, consulted a proper dietician, and embarked on her journey of weight loss post pregnancy.
Sanya's Daily Meal Plan For Weight Loss
Sanya initially began with the following diet plan.
1. Breakfast: Egg Whites + Brown Bread + Tea
The reason this is a healthy breakfast for weight loss is that it is high-protein. A diet that's high in protein and low in carbohydrates and calories is an effective way to lose weight quickly, without compromising on health. To mix things up, you can consume the egg whites and bread separately, or in the form of an Egg White Sandwich.
2. Lunch: Salad + Roti + Vegetable + Daal + Buttermilk
Sanya stuck to a basic Indian menu for lunch, making sure she controlled her portions. Two highlights of her 'weight-loss' lunch that are very useful for digestion and metabolism are salad and buttermilk. Chaas or Buttermilk With Herbs is lower in fat and calories compared to milk and keeps you feeling full for a long period of time. This means you will be less tempted to snack on unhealthy foods. Plus, it also regulates bowel movements which promotes weight loss.
3. Evening: Poha or Oats or Fruits
The good old poha is an excellent evening snack for its light yet filling nature. Since it is gluten-free and also prevents iron deficiency, it is an ideal snacking option. To get some variety, you can also opt for Chinese Poha or Poha Dhokla. Also, picking oats is another smart choice mainly for the fact that unlike other refined carbs, oats digest slowly. This means they have little impact on your blood sugar. Plus, oats are also very fibre rich which keeps your digestive tract healthy. Digestion problems are a leading reason we fail in our weight loss efforts! A quick bite like Oats Ginger Cookies can be very healthy and delicious without making you pile on weight.
Her decision to opt for whole fruits over packaged juice is also a smart choice for fitness - she gets the vitamins and minerals minus the excess sugar.
5. Late Evening: Soup or Milk
Hunger pangs in the late evening are also a leading reason we don't lose weight as most of us snack on unhealthy things! The best way to satiate hunger and also feel full till dinner is a liquid diet like soup or milk. Make sure you opt for freshly made soup such as Tomato Basil Soup. Canned or packaged soup can be bad for the skin and overall health. The tomato and basil combination is also an excellent source of Vitamin A and C which boosts the immune system and also relieves indigestion.
6. Dinner: Daal + Rice + Salad
Just like lunch, the highlight of this meal is that it is light, easy to digest, and fibre-rich. Eating a heavy dinner can spoil your weight loss plans as the food consumed so late at night takes a long time to digest and often settles in as fat. The salad is again the winner of Sanya's dinner menu. A Kachumber Salad can make you feel refreshed and satisfied at the cost of no calories, for cucumber is essentially just water and fibre.
As she also started exercising, and as it all started paying off, the nutrient requirements of her body altered. So, a few months down the line, Sanya modified her diet plan for weight loss to include the following items.
More eggs (omelettes, whole boiled egg, or sunny-side up)
Nuts
Chia seeds and flax seeds
Chicken (boiled or roasted)
Dalia (for dinner)
One might wonder if Sanya ever had cheat days. Of course she did! However, here is a learning lesson for all of us: Sanya cheated once in 10 days – that means 3 cheat meals a month (instead of 4, as most of us tend to cheat on our diet on a weekly basis). On her cheat days, Sanya gorged on Chinese food, chhole bhature, or chaat.
Your Husband Can Inspire You
Everyone, no matter how committed they are to a goal, needs some support to stay put on the path they have chosen. This inspiration can come from different people, but if you are a new mommy trying to lose weight post-delivery, then your husband becomes a big part of your weight loss journey. Sanya's husband too, proved to be her unflinching, rock-solid support system.
Talking about how her husband inspired her, Sanya said, “My inspiration was my husband, he was always there around me and lend his support all the time. He never lowered my morale by commenting on my weight. I can happily say his efforts inspired me.”
Sanya's Workout Schedule
As her focus was on healthy weight loss, Sanya began her weight loss journey gradually. She started with some exercises at home. These included -
Skipping rope
Stepping block
Abs and Sides exercises
Her workout also included cardio – she made sure she always made time for cardio somewhere in her daily routine. Finally when she had worked up a bit of stamina, she joined a gym. Later on, she also took up weight training. However, don't let this deter you - if you cannot find the time or inclination to join a gym, simply begin with the home exercises (listed above). The idea is to increase your metabolism. While gymming can certainly speed up results, continued home exercising over a period of time will also be effective.
The Road Ahead
Her tireless efforts, backed by her husband's solid encouragement, lead Sanya to lose 28 kilos post pregnancy. The results are quite stunning indeed! However, Sanya plans to remain on her new found path of clean eating and exercising – another lesson for all of us!
“At present, I am happy to be fit, and wish to remain the same as long as I can. I would want to continue eating healthy and exercise regularly. Time is a hindrance, but I try my level best to make a healthy lifestyle my priority.”
Fitness is indeed a lifestyle, not just a project or an activity you do. What matters is you remain committed to your chosen path, and do your best every single day. Of course there will be days when you will falter. But do not let one bad day or one bad week turn into one bad month. Good luck! Read more
Sarika gupta has added a new answer
Expecting Mom due in 5 months
17 hours ago
Q. Am craving to have a burger at McDonald’s. Am 15 week pregnant.
Is it safe to have

Sarika gupta
Mom of 2 children
5 hours ago
A. Hello there ma’am please do not worry about it too much and it is better to avoid this at this time and also if you want to eat burger then it is better to make it a home . Thanks and take care
Dr Ghouse has added a new answer
Expecting Mom due in 6 months
16 hours ago
Q. It's my 12th week of pregnancy but last night I noticed some bleeding. So, my doctor prescribed Duphaston for 2 weeks. Is there anything to worry about? Please guide me.

Dr Ghouse
Paediatrician
16 hours ago
A. at present take rest and use medicines as advised by the doctor. if there is no relief it is better you see your doctor for proper examination particularly physical examination if there is need for doing investigations to find out the problem and treatment ok
Dr Laxmi Chavan-Sawant has added a new answer
Expecting Mom due in 3 months
10 hours ago
Q. I am 7 month pregnant with second baby I have severe abscess pain in armpit and buttocks pls tell me remedy for this ...Dr recommend antibiotics and ultracet pain tablet I have taken some doses of it but worried about the foetal development..does it hurt my baby
Read more
Dr Laxmi Chavan-Sawant
Ayurvedic Gynaecologist
8 hours ago
A. You should have proper consultation with your treating doctor , as some examination or investigations may be needful, so that proper medications can be given And the treatment can be done very properly.
continue antibiotics regularly
Sai Prasanthi R L has added a new answer
Expecting Mom due this month
4 hours ago
Q. Hello dr meri beti 6 days ki hai or use feed karwane ke bad nose or muh se milk bhar aa raha hai to aesa kyu kr rahi hai….me kya Dr ko dikhau kya???

Sai Prasanthi R L
Mom of a 10 yr 2 m old boy
4 hours ago
A. Hello dear parent! Keep your baby’s heart in a little elevated position while you’re breastfeeding. Burp your baby after every feed. Keep Babyhug tummy roll on handy. Consult your doctor for further assistance
Rashmi has added a new answer
Guardian of 0 children
4 hours ago
Q. #asktheexperts how to reduce belly fat after pregnancy and skin was loose .two year passes but problem is persist.How can reduce it

Rashmi
Mom of a 9 yr 7 m old girl
4 hours ago
A. For weight loss diet is good in intermittent fasting a good and but if your body is loose or you feel you really do tighten up your body then gymming or yoga both the things are going to be very good both the things are going to be helpful in tightening up your body and muscles at the same time but it is time consuming we just have to have patience
Dr Sameer awadhiya has added a new answer
Guardian of 0 children
3 hours ago
Q. my baby is one month old and have cold symptoms. can I consume buttermilk?

Dr Sameer awadhiya
Paediatrician
2 hours ago
A. yes u can further you can contact with your doctor and you can get thhje the solution for this by discussing with him he will guide you for more details if required .
Its always better to take the guidance by the concernged person with the geniune advice ...
Check out this new Memory
arifa mujawar
Mom of a 5 m old girl
1 min ago
#cutestbaby

Like
Comment
Share
0 Likes
0 Comment
Check out this new Memory

Joyce Alvares
Mom of a 9 m old boy
7 mins ago
#babyofsummer24

Like
Comment
Share
0 Likes
0 Comment
Check out this new Memory

Yasmin Tadvi
Mom of a 2 yr 11 m old boy
10 mins ago
#cutestbaby

Like
Comment
Share
0 Likes
0 Comment
Check out this new Memory
Joyce Alvares
Mom of a 9 m old boy
10 mins ago
#cutestbaby

Like
Comment
Share
0 Likes
0 Comment
Check out this new Memory

Neelima ekka
Mom of a 8 m old boy
15 mins ago
#cutestbaby

Like
Comment
Share
0 Likes
0 Comment
Tell us more about yourself get More Personalised
 Infant0 to 6 Months
 Baby6 Months to 2 Yrs
 Toddler2 to 4 yrs
 Kids4-6 yrs
 Big Kids6+ yrs
 Expecting
 Trying to Conceive

