

.svg)
.svg)
.png)

Enter Child Details

Add Profile Photo


Videos you might be interested in


Videos you might be interested in
Videos you might be interested in
Suggested for you

Diastasis Recti (Abdominal Wall Separation) after Pregnancy
Motherhood, for most women, is the most cherished experience. However, it comes along with physical and hormonal changes that can become an inconvenience.
What is Diastasis Recti?
The term diastasis recti refer to the abdominal wall separation after the pregnancy. ‘Diastasis’ means separation and ‘recti’ means rectus abdominis or the ab muscles.
In simple terms, the protruding belly pooch or the bulge that remains apparent for some women, even after losing pregnancy weight can be diastasis recti.
What Causes Diastasis Recti?
There are two parallel bands of vertical muscles in the abdomen which are connected by tissues. These abdominal muscles are responsible for stabilizing the core and holding the internal organs together. During pregnancy, as the foetus grows, the uterus pushes the muscles in the abdomen to stretch on either side. This stretch causes the abdomen muscles to separate and this leads to the muscles losing their shape and create a gap in the middle of the abdomen.
It is a natural process during pregnancy for the muscles to separate. In due course of healing, it attains the previous form. If it does not, for a prolonged time, then you may have chances of having diastasis recti.
How To Know That You Have Diastasis Recti?
A common DIY technique is followed by women to identify the separations. The steps are -
Step 1: Lie down on the floor on your back with your knees folded and feet on the ground.
Step 2: Place your palms on your stomach on the two sides of the belly button. Now, very gently lift your head, not as much as you would do for your crunches, but just a slight lift.
Step 3: Move your fingers on the line of the belly button; you may feel that you are able to dig your fingers in what may appear as a gap in the belly.
Diastasis is commonly measured in terms of how many fingers deep the separation of the two muscles is felt. You can verify the same with your gynaecologist before arriving at a conclusion.
Other Complications Due To Diastasis Recti?
Mentioned are a few problems that are related to Diastasis Recti :
1. Umbilical Hernia
The likelihood to have a hernia, in the future, increases, if you suffer from abdominal separation for a long time. Hernia surgery may relapse if the diastasis is not treated properly.
2. Poor Posture
The ridge created in the abdomen results in a poor posture.
3. Lower Back Pain
Another associated complication is the lower back pain. The separation of the abdominal muscles leads to chronic back pain.
Do’s And Dont’s
Just like any other physical ailment, Diastasis Recti can be healed by following the right steps such as Kegel exercises. However, it can also be aggravated by issues like constipation.
Do’s:
Perform the exercises which gently work on your abdomen muscles. These suggestions are made for all women in the post-partum phase.
1. Kegel Exercises
Kegel exercises are essentially about increasing pelvic muscle strength.
Kegel can be practised anywhere, anytime. You need to imagine trying to stop the flow of urine without moving your body.
It strengthens the pelvic muscles and prepares the body for labour and natural birthing. Body is better prepared to relax and control the pelvic muscles.
2. Core Strengthening Exercises
It is a good idea to start core strengthening exercises before you get pregnant. Benefits of core strengthening exercises :
It brings a balance in the body by training the pelvis, lower back, abdomen and hips, which results in fewer aches and pains during the pregnancy.
Strong core adapts better to the changes in the body and it is easier for the abdomen to get back in shape after the delivery.
Results have also shown that it minimizes the risk of diastasis recti and even improves it.
3. Body Postures
A corollary to the previous point, it is very important to maintain a good body posture.
A good posture reduces the pain at the lower back, pelvis and neck.
Allows more space for your baby to grow well.
Most importantly, it minimizes the chances of developing a diastasis recti and allows the muscles to get back to its form after the pregnancy.
4. Breathing Exercises
Benefits of breathing increases manifold for women during pregnancy.
It provides the body and brain with the required oxygen supply for the foetus.
Reduces stress and keeps the body at ease, so that it the muscles remain taut and recover quickly.
Don’ts :
Here are some of the things you shouldn’t do:
1. Exercises Which Puts Pressure On The Abdomen
Avoid push-ups, sit-ups, crunches and planks, which puts a direct strain on the abdomen and pelvic muscles. Also, avoid yoga and swimming postures which put a strain on the body.
2. Lifting Heavy objects
Lifting heavy items can put undue strain on your body.
3. Constipation
Constipation can lead you to exert pressure on the abdomen causing the condition to get worse. Always have a fibre rich diet and plenty of water to prevent constipation. If you have constipation, avoid straining for too long and pass motion only when there is an urgency to do so.
Treatment For Diastasis Recti
Here are some suggested measures on how to cure diastasis recti:
1. Physical Therapy
Diastasis recti physical therapy involves a trained therapist who provides postural training. He/she will also suggest some low impact, moderate intensity exercises to stabilize your core without disturbing abdominal muscles.
2. At-Home Exercises-Tupler Technique Or Mutu System
These techniques have gained popularity in the recent past. Backed by research and proven techniques, these at-home treatment series helps in healing diastasis recti by 55 percent. The focus is on training the separated muscles to become stronger and within a passage of time come together.
3. Surgery
If the above mentioned corrective actions fail or the results are not satisfactory, the last option is to undergo surgery. Also, a prolonged diastasis may lead to an abdominal hernia. The surgery, abdominoplasty, surgically reduce the gap between the two muscles. It is important to keep this as a last resort and to speak with the specialist on the process and the possible repercussions of the surgery.
Can A Splint Or Binder Help?
Specially designed for pregnant women, these maternity belts or abdominal binders have traditionally been used in different cultures in the post-partum phase. It is a non-invasive intervention that supports the abdominal muscles and controls the pain. The restricted muscle movement provides a natural tummy tuck and the firmness enables a good posture. Please consult your gynaecologist before you start wearing the belt.
Splints may help in the early stages by providing abdomen support, however, wearing splint alone may not substitute for the treatment of diastasis. The abdomen muscles need to get back to a correct alignment which may get restricted with the external pressure of the splint.
Exercises For Diastasis Recti
Diastasis can be corrected with the help of exercise. Here are a few abdominal separation exercises that you could do:
1. Belly Breathing
Lie on the floor on your back. Keep your palms gently on your lower rib cage. Next, inhale deeply but gently and allow your chest and belly to rise and feel the pressure on the diaphragm. Exhale.
2. Standing Push-ups
Stand facing the wall. Let the distance from the wall be an arms’ length. Keep your feet wide. Now place your palms on the wall and inhale. While you exhale, push your belly to the spine. Lean in towards the wall when you inhale and push outwards when you exhale.
3. Lower Abdomen Exercise
Lie on your side. With the other palm, feel your abdomen muscles. Then, gently pull your lower abdomen muscles towards your pelvic bone. Breathe normally throughout. Relax in between two sets.
4. Bent Knee Fallout
Lie on your back and keep your knees bent and feet flat on the floor. Now inhale gently and lower one leg to the side while the other leg remains stationary. Repeat this with both legs.
How Often Should You Perform These Exercises?
You can start practising it from one week to three weeks after pregnancy. The breathing exercises can be done for 5 to 10-second hold. You can start with 2-3 iterations and increase as you get comfortable. It is recommended to consult your gynaecologist or a trained practitioner on your exercise patterns.
Is It Ever Too Late To Heal Your Diastasis?
No, it is not. Treating a diastasis recti post pregnancy is all about healing the connective tissue that brings together the abdominal walls back to its shape. Just remember that –
The process is gradual and slow, however, not impossible. With the correct exercises and techniques, it is possible to correct the diastasis.
Follow techniques which are scientifically backed and time-tested and if possible, under the guidance of a trained supervisor.
The time required to heal largely depends on your body constitution and the width of the separation.
Motherhood brings along a plethora of changes in a woman’s life. While is truly rewarding basking in the joy of being a new mother, it is also of utmost importance that women take care of themselves. A problem like diastasis recti is extremely common, yet, the most under-noticed and least talked about. It is time that women take charge of their self and take necessary actions. So, stay aware, stay healthy and stay happy!
Also Read: Pregnancy Massage: Benefits & Techniques Read more
Suggested for you

Suggested for you

How Safe is Foetal (Selective) Reduction?
Most people opt for fertility treatments when they are struggling to get pregnant. But where they are expecting one baby, cases arise when a pregnancy might include twins, triplets, or even more babies. Carrying them ahead healthily may not be always possible and undergoing a pregnancy reduction might be a decision you would have to make.
What is Multifetal Reduction?
A multifetal reduction is a surgical procedure. It is used to reduce the number of foetuses held by a pregnant woman so that the resultant number of foetuses can be carried forward and successfully delivered. It is also termed as selective pregnancy reduction in some cases.
Why Foetal Reduction is Done?
If getting pregnant is a difficult task in itself, keeping that pregnancy healthy and having an uncomplicated delivery is even more difficult. These become tough with every foetus that grows within the uterus. Risks of babies being stillborn or miscarriage increase rapidly when pregnant with multiples. Some babies may not develop correctly or have birth-related defects. Therefore, a foetal reduction helps keep these risks to a minimum level.
Benefits of Multifoetal Pregnancy Reduction
There is a strong reason why mothers carrying multiple foetuses think about undergoing a multifetal pregnancy reduction. The benefits that stem as a result of it are not just beneficial for the other children growing in the mother’s womb, but is also a good way to ensure a great future for the ones that continue ahead in life.
1. Reduced Child Cost
The expenses incurred in taking care of multiple children is not something that is possible for every family. With all children being at the same age, they can quickly shake your financial stability. MFPR can help you keep the costs in a range that works for you.
2. Reduced Mental Stress
While financial problems might be one variable of the equation, taking care of multiple children right after birth is a task difficult, for superheroes too. It can quickly get overwhelming for first-time mothers. Sticking to no more than a couple of babies can help you keep your own mental health and physical health in optimal condition to care for the children.
3. Reduced Pregnancy Problems
Every additional foetus that grows within your body does not only increase the size of your uterus and tummy, but stresses your body further in a bid to share resources. Each child taps into the body for resources and has a significant impact on other areas as well. These further increase chances of anaemia, preeclampsia, or diabetes to set in during pregnancy.
4. Reduced Pregnancy Risks
While most mothers can deal with pregnancy problems through the journey until delivery, most of the major risks usually emerge at that point itself. The chances of undergoing a premature delivery, a miscarriage or development of birth defects is extremely high when pregnant with multiple foetuses.
Risks Associated With MFPR
While multifetal pregnancy reduction has numerous benefits that are good for the mother and the children that will be given birth to, it is not free from foetal reduction risks that might manifest as a result of the procedure itself.
1. Emotional Toll
Some parents develop a very strong connection with their foetuses pretty early in life. Seeing them in ultrasounds and naming them right away can create a strong bond of parenthood with those. Therefore, undergoing an MFPR can set in a feeling of guilt or sadness of having rejected their own children. Extreme cases can cause depression to manifest within the mother too, which isn’t good for the remaining babies.
2. The Possibility of An Infection
The MFPR procedure requires external items to come in contact with the tummy or the uterus, in order to successfully reduce the number of foetuses held within. As minor as it might be, there is a minuscule probability of an external infection finding its way inside. The incidents are quite rare, but if an infection does take place, then it can put the remaining foetuses at a risk.
3. A Miscarriage of the Complete Pregnancy
Any disturbance to the existing condition of the foetus always opens up the risk factor of miscarriage. In most cases, if the number of the foetus are few, generally around 3 or 4, the chances of miscarriage are minimal, usually around 4% or so. However, as the number of existing foetuses starts increasing, reaching 6 or more, the risks associated with miscarriage are quite high. Therefore, a decision of proceeding ahead with MFPR might need to be taken intelligently.
Precautions to Take Before Multifetal Reduction Process
A pregnancy that consists of multiple foetuses usually occurs after undergoing a fertility treatment, involving drugs that put the body in the optimum state for pregnancy. Having made this effort, it might be difficult for you to come to terms with reducing the number of foetuses, as well as opening up to the risk of a miscarriage of the remaining ones as well. While most fertility clinics do provide this information beforehand, understanding the repercussions of the decision is extremely necessary.
Foetal Reduction Procedure
When opting for a multifetal pregnancy reduction procedure, the timing needs to be appropriate as well. The apt time for carrying out the procedure is within the first trimester. The foetuses are at the initial stage of their growth around this time and are usually located within separated pouches filled with amniotic fluid. They are yet to share the uterus together.
Doctors may make use of a probe to carry out an ultrasound. This technique helps to get a detailed understanding of the foetuses within the uterus, as compared to the normal ultrasound. The probe helps provide a correct positioning of the foetuses within the uterus. Using that as a map, a medical process is initiated to calmly reduce the foetuses individually. This makes use of a medicine that is intended to stop the heartbeat of that particular foetus. The correct foetus is determined, with the help of a needle that is inserted through the stomach or the vagina and the medicine is injected into the foetus’s pouch.
Another alternative is to remove the blood flow received by the foetus from the umbilical cord. Here, your doctor might use the radiofrequency ablation technique, that makes use of electric currents instead of medicine via the needle.
The number of foetuses to be reduced in a single session depends on your health, the total number of foetuses, and the doctor’s recommendation. Your doctor might give you a general anaesthesia throughout the procedure to keep you away from the process, even though it might be over in some minutes.
What to Expect After Selective Reduction
Once the procedure is completed, you would be asked to stay in the hospital for about 12-24 hours under observation. The remaining foetuses would be observed via ultrasound regularly. A small counselling session might be conducted to gauge your mental well-being.
FAQs
Here are a few questions that are generally on the mind of many women looking to undergo selective pregnancy reduction.
1. Is Foetal Reduction Procedure Painful?
Some doctors do give general anaesthesia during the procedure while others may use only local anaesthesia. In either case, the procedure does not cause much physical pain and is completed within a few minutes.
2. How Much Does Selective Reduction Cost?
The expenses for the procedure differ from hospital to hospital, depending on the number of foetuses and the complexity. At times, your fertility clinics might include the cost in their package as an optional one.
Reducing your existing foetuses is a tricky procedure for the body, but it also affects your emotions. Discuss with your partner before making a decision, and know it is for your best and the benefit of the remaining babies.
Also Read: Multiple Pregnancy - Getting Pregnant with Twins or Triplets Read more
Suggested for you
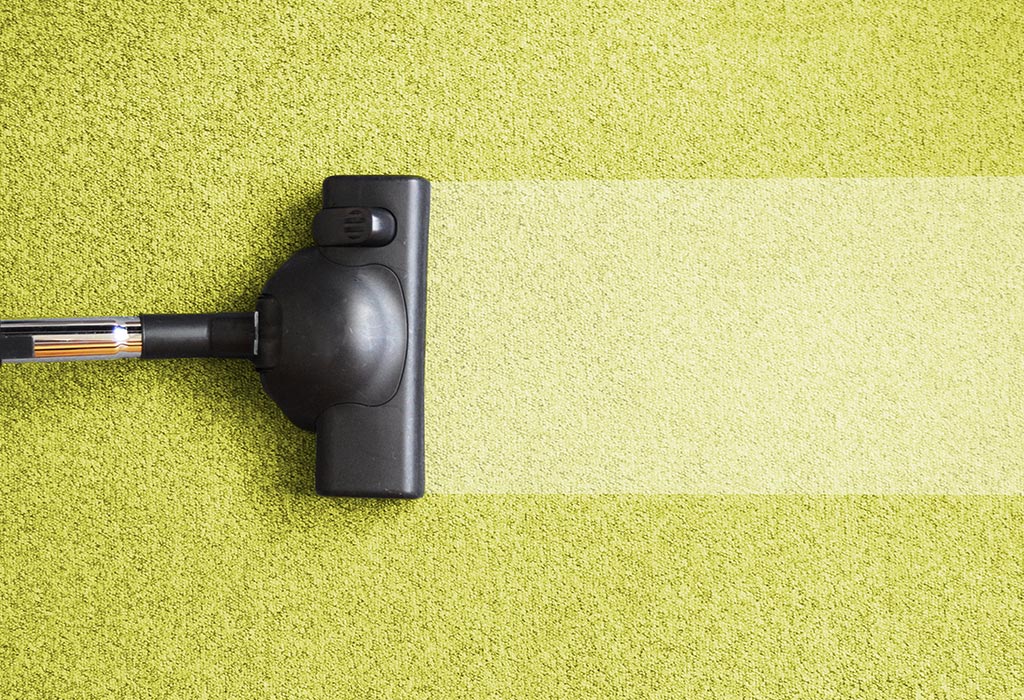
How to Clean Carpet at Home - Stress-free Ways to Remove Stains
A very popular flooring option is wall-to-wall carpet, but the foot traffic and spills might make it look a little dingy. Knowing how to keep your carpet clean will make it look very good and it will last longer. These carpet cleaning tips will make sure that your carpets don’t look dull.
3 Hassle-free Methods of Cleaning Your Carpets at Home
1. Vacuuming the Carpet
Prepare the room before you start vacuuming it. Pick up any paper, toys, and other objects that might create disturbances while vacuuming.
Check for little items like coins on the carpet.
Use the nozzle to clean the tough areas. The edges of the baseboards and carpets always collect dust which should be removed first.
Vacuum both vertically and horizontally. Vacuum the entire room forward and back and then left to right.
Carpet fibres are sort of twisted and when you go both directions, you can make sure that every part of the fibre is reached. This can be really helpful if you have pets because it will remove hair and dander.
2. Using a Carpet Cleaner
For cleaning carpet manually use a clean white cloth because coloured or patterned rags might transfer the colour to the carpet. Paper towels without patterns might also be a good solution.
First, with the white cloth be sure to blot fresh stains dry. Use an additional cloth to remove the stain that is left behind after you blot.
Do not use brushes or bristles as these might damage the carpet fibres and leave a frayed carpet.
Pick the perfect carpet cleaner. Though there are many 'all-purpose' cleaners available, read the label to see if it is good for your stain and the carpet type. Stains which are caused by bodily fluids will often need extra attention.
Test the product on a small part of the carpet. Try the product out in a discreet place following the directions on the bottle.
However, never test this on the stain. The purpose of this is to check the carpet’s colourfastness.
If the colour seems to be coming off or if the cleaner is leaving stains, try a different one.
Next, dab the affected area. Use just enough product to treat the stain because more products on carpets are not good.
Using fresh water and a clean cloth, rinse the carpet. Soak up the remaining soap by blotting the treated area.
Allow the area of the carpet to air dry completely.
3. Using a Carpet Shampoo
Prepare the room before you start cleaning it. If possible, try to remove all the furniture or place plastic under the legs of the furniture to avoid water damage. If you don’t have professional plastic, cut squares of wax paper or aluminium and slide under the feet.
Vacuum the carpet thoroughly and spot-treat major stains. This is because shampooer might set stains more deeply.
Rent or purchase a carpet shampooer. Ideally, to keep the water hot, the cleaner always has a built-in heating core. Read the description or consult with the salesperson before purchasing or renting a carpet shampooer.
After the carpet is cleaned, no one should walk on it until it is completely dry. Therefore, plan an exit strategy. Do not clean yourself into a corner.
According to the directions on the bottle, prepare the solution. Avoid adding excess soap as it might damage your carpets and the machine.
Remove your footwear because damp carpets attract dirt. Put plastic bags over your feet or wear socks. Going barefoot is not recommended since some detergents are harmful on immediate application.
Let the extractor pull as much water as possible. If the carpet is very damp or if it soaks through the pad it might cause mould and mildew.
Allow the carpet to completely dry by ventilating the room. Open the doors and windows for air circulation.
Additional Easy Tricks to Remove Stains on the Carpet
Here is how you could clean carpet stains by its types.
1. Oils (Grease, Makeup, Crayon)
Try to scrape off the stain as much as possible. Use a cloth or towel to put rubbing alcohol on the area and blot with a clean towel.
If the stain is deep, repeat the process a few more times.
2. Rust
Put lemon juice on the stain and sprinkle with some cream of tartar.
Rub the area in the solution for 15-30 minutes or until the rust is completely gone.
Blot the area with cloth or towel soaked in clean water.
Avoid scrubbing, so the rust stain doesn’t spread. Dry the area of the stain with a towel.
3. Organic (Berries, Blood, Fruit juice)
Pour 1-2 cap-fulls of hydrogen peroxide directly on the stained area. It is best to use the 3% solution found in drugstores.
Leave it on for 5 minutes and then dab the area with water soaked sponge or soft cloth.
Use a towel to dry the area.
4. Mud
Let the mud dry and then break it into small pieces and vacuum.
Mix some warm water with a few drops of liquid dish soap and put it on the soiled area.
Dab with a soft cloth or sponge. Use a towel to dry.
5. Pet urine
Mix 1 cup of warm water and 1 cup of white vinegar and put them in a spray bottle.
Spray on the area. Let it remain for around 5 minutes and then blot the area with a clean cloth.
Sprinkle baking soda on the stain for extra cleaning powder and then clean with some vinegar/water mixture.
6. Ketchup and Other Acidic Materials
Mix 1 cup of warm water and 1 tbsp of ammonia. Put this in a spray bottle.
Spritz the solution on the stain and blot the excess liquid out with a clean towel.
Repeat this until the stain is gone. As a backup, clean the stain with hydrogen peroxide.
Tips to Prevent Carpet Stains
Keep the substances that might make stains away from the carpet. Try to eat and drink in non-carpeted areas.
Remove footwear before walking on the carpet. You can avoid soiled carpets by doing this.
Train your pets properly. Make sure your pet does not have any accidents on the carpet.
Remove excess staining agents as soon as possible. The longer you leave the stain, the more difficult it will be to remove.
FAQs
1. How Often I Should Clean My Carpets?
In general, it is best to do it at least once a week. How regularly you do it depends on factors like the size of your carpet, because one of the main reasons to vacuum is to remove the dander and hair. If your carpet is visibly soiled with pet hair or dirt, it is better to vacuum more often.
2. How do I Dry a Soaked Carpet?
Air drying the carpet is the best option. If the stain is really large, run a fan or a carpet dryer to dry quickly.
3. How to Remove Wax Dropped From the Carpet?
Let the wax harden completely and then scrape off as much as you can. Vacuum it away. Over the remaining wax, place an absorbent paper like brown paper or un-dyed blotting paper and iron over the top on medium with an iron set. The iron will melt the wax which is then absorbed by the paper.
4. How to Clean up Hair From the Carpet?
Hair can be removed from the carpet by vacuuming it forward and back and then from left to right.
5. How to Remove Oil Stain From the Carpet?
Mix water with some white vinegar. Spray it on the stain and wait for 5 minutes. Rub it off with a soft and clean cloth until the stain is gone.
6. How to Remove Acrylic Paint off the Carpet?
You can mix some dish soap in warm water to remove this stain and then scrub it off using the rough side of the sponge.
It is best to deep clean your carpet at least once a year. Renting a steam cleaning machine is the best way to clean the carpet as it puts soapy, hot water on the carpet and then extracts it properly.
Also Read:
Tips to Clean Ceiling Fan Easily in Your Home
Ways to Clean Wooden Furniture At Home Easily
How to Clean Your Car’s Interior Read more
Suggested for you

How to Clean Your Phone Screen Safely in a Few Simple Steps
Smartphones are the need of the hour and most of us cannot do without our phones even for a few hours, let alone an entire day. This means we take our device everywhere with us, be it to a doctor’s clinic, our workplace, the grocery store and other such places; and sometimes, even to the bathroom. This means that it comes in contact with dirt, germs, and grime all the time. We may not realise it but our smartphone screen may sometimes become a harbour for various kinds of bacteria or viruses if it is not cleaned properly and regularly. We must take careful measures while cleaning our phone as mishandling while cleaning may sometimes damage the phone and affect its functioning.
How to Clean Your Smartphone Screen at Home
So you have smudges, fingerprints and other kinds of marks all over your phone. Well, here are some effective ways of cleaning your smartphone screen at home:
The first and foremost thing that you need to do is to find a soft cloth, preferably a microfibre cloth. This cloth is very soft and gentle on the screen and does not scratch the screen. Keep a bowl of raw rice or a few packs of silica gel handy. Fill a spray bottle with distilled water; you can mix some vinegar in it for a better cleaning effect. Add some cotton buds or cotton balls.
Before you begin cleaning your device, it is important that it is switched off.
Take the microfibre cloth and gently wipe the screen to get rid of the marks and smudges. Do not press too hard on your device; exert gentle pressure.
If there are some tough marks, you may spray some distilled water on the microfibre cloth and gently remove the stains. However, for tougher stains, a vinegar-and-water solution can be used.
You may remove the excess wetness by wiping with a clean microfibre cloth or leave your phone to dry on its own.
Refrain from switching on your phone until it dries off completely. Once it is nice and dry, switch on your device and it will be ready for use.
What to Avoid While Cleaning a Smartphone Screen
Cleaning a smartphone screen is not a tedious task; however, it is important that you take certain precautions and avoid making certain mistakes while cleaning to avoid any damage to your device. Here are some things that you should strictly avoid:
Do not use hard pressure or jerky movements while cleaning the screen of your mobile. Doing this may cause permanent scratches or marks on your mobile screen, and getting rid of or cleaning mobile screen scratches is something that is next to impossible.
Do not use excessive amounts of water to clean your phone. Lots of water will not make your phone cleaner. Instead, take some water and dampen the microfibre cloth with it and use the cloth to clean the screen. Do not spray any liquid directly on your phone screen as the excess moisture may enter your device and may damage it.
Refrain from using abrasive materials such as tissues, towels, etc., to clean the screen of your phone. Using such abrasive materials can cause small scratches to appear on your device, which may make the screen appear dull. There are specially designed types of cloth, such as microfibre cloth, available to clean delicate surfaces like a phone screen; you must use such materials for cleaning purposes.
Do not use harsh chemicals like alcohol-based cleaners, ammonia, etc., for cleaning your smartphone screen. Such liquids can cause permanent damage to your device. Though most of the time cleaning with a soft cloth does the trick, if at all any liquid is required, try using water instead of any other liquid.
Do not use hair dryers for drying up the phone; rather leave it to dry on its own. Exposing your phone to high temperatures may adversely affect the internal parts of the phone. Also, never put your phone inside a microwave oven to dry as this could cause serious consequences.
FAQs
Some common questions on how to clean a cell phone touch screen:
1. Can I Use Toothpaste to Clean My Phone Screen?
Yes, you can use toothpaste to clean your mobile screen. Take a very small amount of toothpaste on a microfibre cloth and gently rub the screen in circular motions. Wipe using a fresh cloth; however, if any toothpaste marks stay on the screen, wipe them off with a damp cloth.
2. Can I Use Lens Cleaner to Clean My Mobile's Screen?
Lens cleaner may not be an ideal option to clean the screen of your phone; however, you can dab some solution on a soft microfibre cloth and clean your phone with it. Make sure that you do not apply the cleaner directly on the phone.
3. How Do I Disinfect My Phone Screen?
You may disinfect your phone by using an antibacterial wipe or a non-alcohol-based hand sanitiser. Take a small amount of the gel on a soft cloth and gently clean the screen of your phone.
4. How Do I Get Oil Off My Smartphone Screen?
Dampen a microfibre cloth with the water-and-alcohol mix, and gently wipe off the oil from the screen. Do not rub vigorously as it may harm your phone screen.
We hope you will take note of all the above-mentioned tips and suggestions while cleaning your mobile screen. However, make sure you never use an excess amount of liquid while cleaning your phone. If any liquid enters your phone, do not switch it on and rush to your nearest service centre.
Also Read:
Tips for Cleaning Your Laptop Screen Safely
How to Clean a Microwave Safely and Correctly
How to Clean the Washing Machine Read more
Suggested for you

4 Brilliant Tips To Teach Your 8-Month-Old to Entertain Herself
Is your 8-month-old bundle of joy happy in your arms all day long? Does your baby fuss the moment you put her down? Are you wondering if she can keep herself entertained when you are away for a while? If you answered yes to all these questions, you need to teach your dear little one how she can entertain herself when you move away from her for some time, for example, when you want to deal with your daily chores.
Read on to Find a List of Tips to Help Your Baby Entertain Herself-
1. Provide Your Baby With Fun and Engaging Toys
When you place your baby on the floor, provide her plenty of colorful and interesting toys that will attract her attention and motivate her to play with them. Give your baby a squeaking duck toy that she can hold in her hand and press again and again to hear its fun squeaking sound.
2. Introduce Baby To Tactile or Touch and Feel Board Books
Introduce your 8-month-old to the world of tactile books to trigger her curiosity and help her entertain herself as she explores the book. Tactile or touch and feel board books have tactile elements on each page that give your little one pleasant and fascinating experiences. For instance, as your baby turns to a page in the board book that has an image of a sheep, she can feel the wool as she touches the sheep as wool has been pasted on it. Similarly, she can experience a fluffy chicken, hairy horse, furry bear, and many more fascinating animals that will help her self-entertain in your absence.
3. Give Baby Pots and Pans
If you are working or dining in your kitchen and putting baby down on the kitchen floor, you can provide her household items such as empty pots, pans, boxes, bowls, spoons, and other safe objects. Your 8-month-old will be busy exploring these kitchen items, banging empty bowls on the floor or on other surfaces, and hitting the pot with a spoon while you dine or work in the kitchen. Your baby will surely find playing with pots and pans entertaining! Make sure you don’t give her anything that can break or is unsafe.
4. Introduce a Baby Lovey
Another great way to help your little munchkin to self-entertain is by introducing a baby lovey. You can provide your baby a soft teddy bear, a doll, or any other soft yet safe object that your baby likes to have around. Soon, she will develop an attachment with the lovey and self-entertain herself by having and carrying it with her when you are not around. You will find your little one spending a great time with the teddy bear or any other lovey by touching its hair, hugging it, making sounds looking at it as if she is talking to it, etc.
Last but not the least, make sure you give your baby undivided attention many times a day. Activities such as tickling her tummy, stacking blocks to let her knock them over, or reading out a story from a colourful book ensure you give complete attention to your little one. If your give your little ball of energy sufficient 'mommy time', she will be will to play and entertain herself independently at other times. Read more
Dr Ghouse has added a new answer
Guardian of 0 children
7 hours ago
Q. ninth month mein kab tak delivery ho sakti hai

Dr Ghouse
Paediatrician
7 hours ago
A. anytime after full term ok. if there is no relief it is better you see your doctor for proper examination particularly physical examination if there is need for doing investigations to find out the problem and treatment ok
Rashmi has added a new answer
Guardian of 0 children
7 hours ago
Q. my last period date Dec 26 pregnancy test date January 31 check panen apom 37 days ipom enaku evlo weeks and days what ?..

Rashmi
Mom of a 9 yr 7 m old girl
6 hours ago
A. I don’t understand your language can you please post your question once again in English or Hindi whatever language you are more comfortable with because anybody on this only we can give you response on that
Dr Ghouse has added a new answer
Guardian of 0 children
7 hours ago
Q. which good formula milk or baby food for 4 months old baby
Dr Ghouse
Paediatrician
7 hours ago
A. no complementary foods below 4 months can use any branded formula milk. if there is no relief it is better you see your doctor for proper examination particularly physical examination if there is need for doing investigations to find out the problem and treatment ok
Dr Ghouse has added a new answer
Expecting Mom due this month
7 hours ago
Q. Iam 9month pregnant and having very painful condition due to constipation and gastric issues
Dr Ghouse
Paediatrician
7 hours ago
A. during pregnancy better not to take medicines for constipation take lot of water green leafy vegetables seasonal fruits you can try suppository if the problem is more o k o k
Dr Ghouse has added a new answer
Expecting Mom due in 7 months
4 hours ago
Q. hi Doc,
eating raw mango, chapathi or any heat producing foods cause miscarriage during first trimester?
Dr Ghouse
Paediatrician
4 hours ago
A. no relation ok c. if there is no relief it is better you see your doctor for proper examination particularly physical examination if there is need for doing investigations to find out the problem and treatment ok
Dr Vandan H Kumar has added a new answer
Expecting Mom due in 7 months
4 hours ago
Q. Hi Doc,
I'm getting cramps on my right side of lower stomach. is this normal or do I have to visit doc?

Dr Vandan H Kumar
Paediatrician
4 hours ago
A. without examination it is difficult to tell proper treatment as well as advice so you should visit the doctor5 for health assessment as well as examination.
whether any investigations is required or not will be told by the doctor5
Check out this new Memory

komal saraswat ojha
Mom of a 1 m old boy
New Milestone

Like
Comment
Share
0 Likes
0 Comment
Check out this new Memory

Neeraj
Father of a 7 m old boy
New Memory
#walloffame

Like
Comment
Share
0 Likes
0 Comment
Check out this new Memory

Anithasathish A Anithasathish
Mom of a 2 yr 6 m old girl
1 min ago
This is my first pick in my futher

Like
Comment
Share
0 Likes
0 Comment
Check out this new Memory
Anithasathish A Anithasathish
Mom of a 2 yr 6 m old girl
5 mins ago
#thephoto

Like
Comment
Share
0 Likes
0 Comment
Check out this new Memory
Anithasathish A Anithasathish
Mom of a 2 yr 6 m old girl
8 mins ago
#babyno.1

Like
Comment
Share
0 Likes
0 Comment
Tell us more about yourself get More Personalised
 Infant0 to 6 Months
 Baby6 Months to 2 Yrs
 Toddler2 to 4 yrs
 Kids4-6 yrs
 Big Kids6+ yrs
 Expecting
 Trying to Conceive

