

.svg)
.svg)
.png)

Enter Child Details

Add Profile Photo


Videos you might be interested in


Videos you might be interested in
Videos you might be interested in
Suggested for you
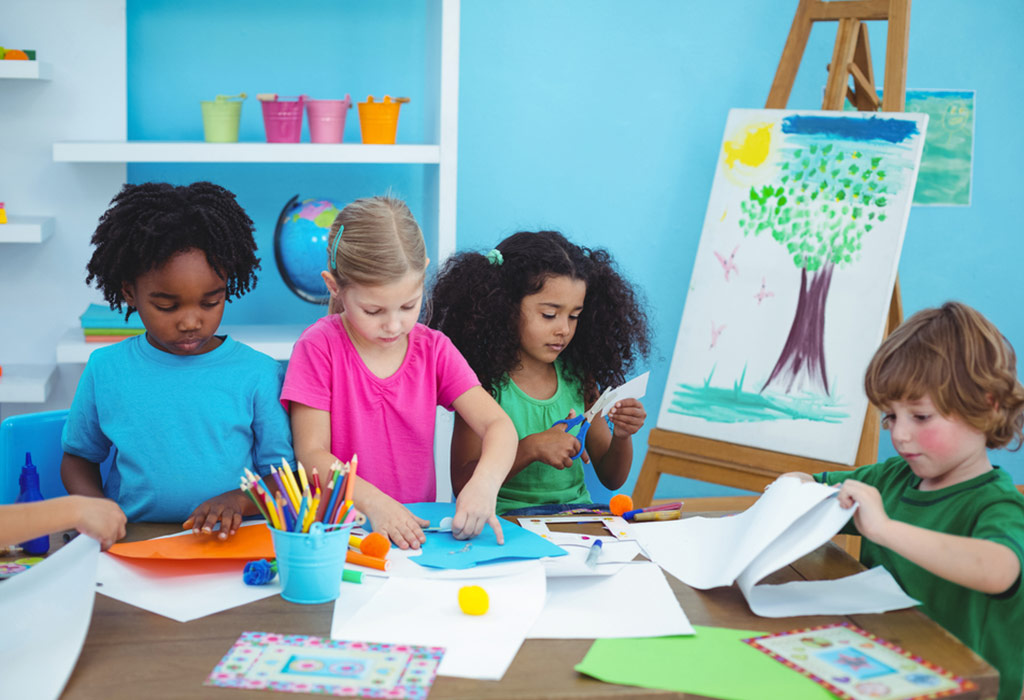
15 Best Creative Activities for Kids
As any mother would know, it is hard to keep your child occupied for long periods of time. Children usually have a notoriously small attention span, making it difficult for their caretakers or parents to breathe in peace. It is especially beneficial to have some activities lined up for your child if you crave some time to yourself and also want to help your child improve in the meantime.
Activities for children have to be chosen carefully, as a lot of their mental and intellectual growth depends on what they do during the formative years. An exercise that can work the brain while also intellectually stimulating the child can have a telling effect on their development. Therefore, it is imperative that parents choose the activities that their children do with great care.
Fun Creative Activities for Children
Here are some of the best creative activities for children:
1. Cut and Glue
Using scissors is an activity that all children take some time to learn and is an important motor skill too. This is one of the creative craft activities for kids which helps them build their creativity and also create memorable pieces of art.
What You Will Need:
A pair of scissors
Coloured paper with predetermined shapes
Glue
Drawing paper
How To Perform:
Encourage the child to cut through the predetermined shapes on the coloured paper.
You can start with simple shapes and make them complex once your child gets a hang of it.
Let him stick the cutouts on the drawing paper to create an artwork.
2. Sticker Fun
Stickers were some of the best aspects of all our childhoods, and they also have beneficial effects on the child. Stickers help build motor skills, as the child concentrates on peeling it off without damaging the paper body, and it also teaches them to be patient.
What You Will Need:
Stickers
Drawing Paper/ or a book
How To Perform:
Give a wad of stickers to your child, and encourage him to peel them off and stick them the way they like in a book or on a drawing paper.
This helps build their creativity, and the resulting artwork is sure to be one to keep for ages.
3. Raised Salt Painting
A tried and tested favourite among children, salt painting is ridiculously fun to do and also an activity that helps improves the child's creativity. Salt painting can bring out a real potential for art among children, no matter how disinterested they seem at first.
What You Will Need:
Epsom Salt
Food colour in varied colours
Glue
Drawing paper
Pencil
Paper plates
How To Perform:
On a paper plate, add a few drops of food colour on some Epsom salt and mix. Repeat this process for all the colours the child wants.
Let your child draw his favourite shapes and patterns on the drawing paper.
Help him apply glue on the designs and then pour the coloured salt over the glued areas.
Let it dry.
4. Drawing With Oil Pastel
Although it is not strictly an activity meant for children, oil pastel painting is highly stimulating and also fun to do. Encourage your child to draw various shapes on a canvas, and fill it in a variety of ways.
What You Will Need:
Oil pastels
Drawing paper
Baby oil
Cotton buds
How To Perform:
Let your kid draw his favourite things on a drawing paper with the oil pastels and fill in the colour. Encourage him to make as many shapes as he wants.
For a fine, painting-like art effect, give him some baby oil and help him smear it on the painting with a cotton bud.
The baby oil can make any art look vibrant and deserving of being hung on the refrigerator.
5. The Back-And-Forth Drawing Game
Creative games for kids, such as this one, require active participation from the parent, and can greatly help in bringing your child closer to you. This game involves drawing a common image alternatively, so children are forced to think on their feet and make stuff up as the game progresses. This stimulates creativity in your child, as the game becomes harder with each step.
What You Will Need:
Colour pencils/ crayons
Drawing paper
How To Perform:
Start by drawing an unassuming picture on a paper, and pass it onto your child.
The child is to add something of his own accord to the image.
Both of you then proceed to build on the drawings of the previous person.
6. Playdough Modelling
Playdough has been a mainstay in toy stores for ages. Not only is it cheap, but it is also a highly fun and creative item to play with. Creative art activities for preschoolers, like this one, are simple. Just provide some playdough to your child, and let his imagination take over. Soon, the child will be seen making shapes of increasing complexities. Playdough easily stimulates the brain and makes the child think hard to make different shapes.
What You Will Need:
Playdough
Poke-ins
Playdough mats
How To Perform:
Give your child some playdough and let him make shapes of his choice.
You may sit next to him and assist or have fun making your own shapes.
Encourage him to use poke-ins, and playdough mats to make textures on his shapes.
7. Marble Painting
Marble paintings are fun to do and great to look at, so your child is sure to not get bored with this activity any time soon.
What You Will Need:
Watercolour
Drawing paper
Some marbles
How To Perform:
Encourage your child to dip the marbles in the paint and draw shapes on the paper.
The child can roll the marbles to create interesting patterns or hold them in between his fingers and carefully draw his favourite shapes.
8. Water Balloon Painting
Water balloon painting is another great way to add new textures and techniques in your child's activities. With this activity, your child can learn how to play with textures.
What You Will Need:
Some water balloons.
Watercolour
Paper plates
Drawing paper/ canvas
How To Perform
How to Perform:
Start with getting your child to fill some water in the water balloons. You may help them tie the opening so that the water doesn't spill while he is painting.
You can have him fill different amounts of water to give him more sizes to experiment with.
Remove your child's favourite colours on different disposable paper plates.
Let your child dip the water balloons in the colour. He can dab the balloons or drag and roll them as he pleases on the drawing paper.
9. Elephant Toothpaste
Elephant toothpaste fits the bill perfectly as one of the best creative thinking activities for kids. Watch your child curiously play with jumbo-sized toothpaste-like substance, which is created out of harmless ingredients.
What You Will Need:
Safety goggles
Dry Yeast
A plastic bottle
Liquid soap, preferably dish soap
6% peroxide
Edible colour
Warm water
How To Perform:
Help your child put on the safety goggles.
Take some 6% peroxide in the bottle.
Add dish soap and colour.
Stir the bottle.
In another container, take some yeast and add warm water to it.
Add the yeast mix to the bottle with peroxide, dish soap and colour.
Step back with your child and watch the mixture lather up and flow out of the bottle in wonderful shapes and forms!
10. Shaving Cream Playdough
For a more interactive creative game for kids, you can choose to make dough out of shaving cream along with your child. Colour the dough in various colours, and watch your child thrive creatively.
What You Will Need:
1/2 cup of cornstarch
1/2 cup of shaving cream
Food colour
How To Perform:
Help your child mix and knead the cornstarch, shaving cream and edible colour together.
The dough would still look crumbly after a while but will be able to hold shapes.
Let your child then create desired shapes and patterns with this dough.
11. Making Masks
Making masks can help kids truly think out of the box and use their imagination in creative ways.
What You Will Need:
A construction plate
A pair of scissors
Glue
Watercolour/ crayons
A pencil
Two rubber bands
How To Perform:
Get your child to mark areas that need to be cut out on the construction plate (for your eyes, nose and mouth).
Help him cut the plate as per the markings.
Now, let your child colour the mask his way.
Poke two holes on opposite sides of the plate.
Tie a rubber band on each side, leaving a loop to put on the mask around the ears.
12. Finger Painting
Finger painting has traditionally been one of the messiest activities a child can do, but also one of the most creative.
What You Will Need:
Watercolour
Paint palette
Drawing paper or canvas
How To Perform:
Spread some newspaper on a table before your child starts painting.
Remove all the colours he wants and let him paint shapes and patterns of his choice with his fingers.
13. Playing School
Playing school at home may not seem appealing, but believe it or not, your child will turn out to love it soon enough.
Things You Will Need:
Some stationary
A roll-up blackboard/ whiteboard
Some chalk/ whiteboard markers
How To Perform
Let your child play the roles of whomever he likes; let him choose if he wants to be the teacher or the student, or the principal or the school nurse.
Make him alternate various roles until he is satisfied with the dialogue and the outcome.
14. Glowing Dough
Children seem to have an attraction towards anything that glows, and glowing playdough is no different. This activity is advisable for older children who can handle being around the stovetop and are exposed to some amount of cooking. Nonetheless, you need to be around them at all times to prevent any accidents.
What You Will Need:
4 to 5 cups of water
5 cups of flour
2 cups of table salt
2/3rd cup of vegetable oil
2 tablespoon of cream of tartar
Edible colour
Glow in the dark paint
Blacklight
How To Perform:
On a stovetop and on a medium flame, mix all the ingredients except the edible colour and the glow in the dark paint.
Let the mixture cook till it starts coming together like a gooey dough.
Get it off the stovetop and let it cool a bit.
While it is still a little warm, add the food colour and the glow in the dark paint.
Knead the dough properly.
You can store in a ziplock, and whenever your child wants to play, he can have some fun making shapes with the dough with some blacklight.
15. Toy Excavation
To make for a truly memorable evening for your child, excavating toys are a great idea. This can improve their motor and reasoning skills.
What You Will Need:
Some plastic toys
Utensils
Water
A dropper
Some saltwater
Brushes
How To Perform:
Take enough water in the utensils and drop the toys in them. You may choose to drop one toy in each utensil or all of them in one large utensil.
Keep the utensils in the freezer and let the water freeze.
Then, remove the utensils, loosen the ice and drop it in a tray.
Make your child excavate the toys carefully with the help of some saltwater, a dropper and some brushes.
These creative activities will help you keep your energetic toddler happily engaged for long. By trying out these creative activities, his motor skills, reasoning skills, and observational skills will develop. If your child shows interest in craft activities, you can also get him craft kits too. The activities in the craft kits can help your child nurture his talents.
If you’re looking for a box full of activities that can not just keep your little one busy but also provide hours of learning through fun and play, you might want to consider picking up an Intellikit.
These interesting activities can truly help your child have fun, learn something new, and also improve their cognitive and motor skills.
Also Read:
Fun Brain Games for Kids
Waste Material Craft Ideas for Kids Read more
Check out this new Memory

Hasna
Mom of a 1 yr 2 m old girl
11 mins ago
#walloffame

Like
Comment
Share
1 Likes
0 Comment
Suggested for you
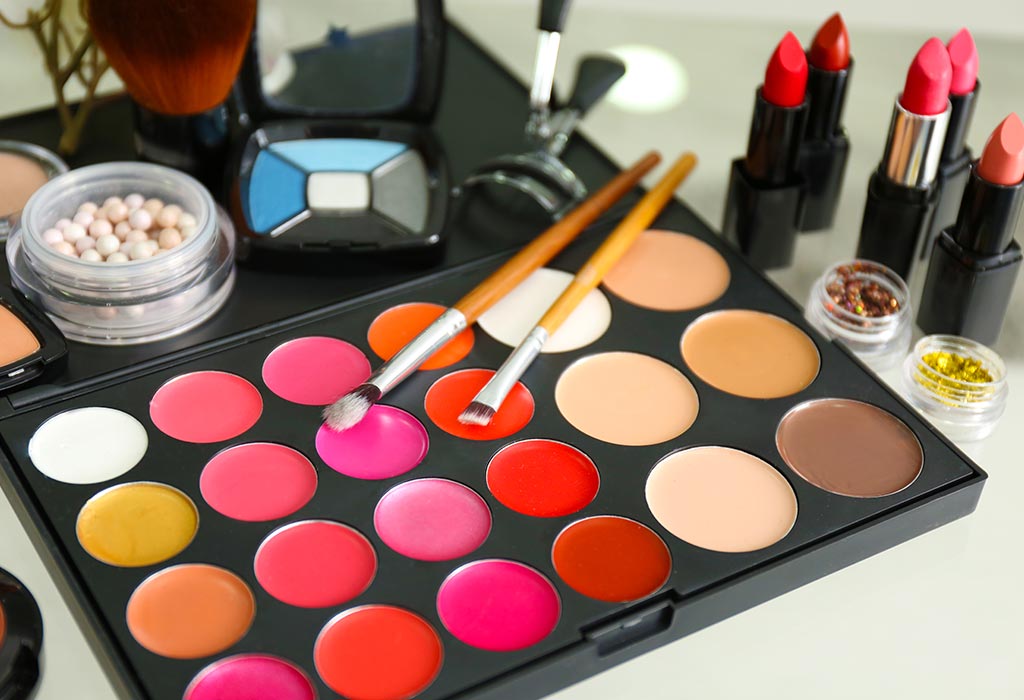
Makeup Bag Essentials - Makeup Products Every Woman’s Bag Should Have
1. Face Wash
A moisturizing face wash if you have dry skin or any other face wash which suits your skin type is best. Before starting your makeup make sure your face is clean and dirt-free.
2. Moisturizer
After washing your face, dry it with a soft towel and apply moisturizer. Let the moisturizer sit for a minute or two.
3. Primer
Now apply a good primer which hides your large pores and makes your makeup longlasting. Take a small amount and apply all over your face.
4. Foundation
Now dot the foundation all over your face and apply it with the help of a makeup sponge or a foundation brush.
5. BB Cream
If you don’t want to wear foundation, yet want something light on your face in place of it, a good baby cream is the best option.
6. Concealer
To hide all your blemishes and dark circles, apply a good concealer. And it is a must in your makeup bag.
7. Powder
To set your base, either use moisturiser or baby cream and concealer, apply a compact powder or a loose setting powder with the help of a sponge or powder brush.
8. Contour
You can have a contour in your bag which is a powder one shade darker than your skin tone. You can contour your face and nose using a contour brush.
9. Highlighter
To highlight the high points of your face, use a highlighter on the cheekbones, bridge of nose and cupids bow. This is also a must for your makeup bag if you want a glamorous party makeup.
10. Eyeshadow
To create different shadow looks, keep an eye shadow palette in your makeup kit. You can keep single eyeshadows or a palette or stick eyeshadow. You can have powder or cream or liquid eye shadows.
11. Eyebrow Pencil
To fill your eyebrows and give them a nice shape, always keep an eyebrow pencil in your makeup bag which suits your hair colour.
12. Mascara
To make your eyelashes long and voluminous, coat them with mascara. So keep a good mascara in your makeup bag.
13. Eye Liner
If you have an eyeliner in your makeup bag, you can create different styles of eyeliner looks like winged or cat eye or basic.
14. Kajal
Keep a good kajal in your makeup bag so that you can apply it to your eyes while doing makeup.
15. Lip Balm
Keep a lip balm in your makeup bag to moisturize your lips.
16. Lip Liner
Keep lip liner in your makeup bag to line your lips before applying lipstick.
17. Lipstick
A red lipstick made with some light shades and nude lipstick is a must in your makeup bag.
18. Lipgloss
If you want a glossy look on your lips, always keep a lip-gloss in your makeup bag.
19. Basic Makeup Brushes and Tools
Keep basic makeup brushes like foundation brush, powder brush, eyeshadow brush and a lip brush. You can have eyelashes curler, a sharpener and false lash glue if you use false lashes.
20. False Eyelashes and Lash Glue
This is completely optional but if you wear false lashes then you need to have false lashes and lash glue in your makeup bag.
21. Makeup Sponge
To apply foundation and powder keep a makeup sponge.
22. Makeup Fixing Spray
To make your makeup long-lasting, apply makeup fixing spray after completing the makeup. So always keep a fixing spray in your makeup bag.
23. Makeup-Removing Wipes
Keep makeup-removing wipes in your make bag so that you can remove your makeup anywhere easily.
24. Makeup Remover
Any makeup remover which you love to use is okay to keep in your makeup bag.
25. Cotton
Cotton balls or cotton pads are good to keep in your makeup bag so that you can remove your makeup.
26. Q tips or Cotton Buds
Keep Q tips or cotton buds in your makeup bag. They will help you correct minor makeup mistakes like if you have not done your eyeliner correctly or to remove smudged lipstick.
Disclaimer: The views, opinions and positions (including content in any form) expressed within this post are those of the author alone. The accuracy, completeness and validity of any statements made within this article are not guaranteed. We accept no liability for any errors, omissions or representations. The responsibility for intellectual property rights of this content rests with the author and any liability with regards to infringement of intellectual property rights remains with him/her.
Read more
Suggested for you
Suggested for you
Suggested for you
8 Home Remedies for Low Blood Pressure That Will Provide You Quick Relief
High blood pressure is a common problem, and we all are aware of it, but people seldom know that low blood pressure is also dangerous. Low pressure leads to decreased blood flow to the heart, brain, and vital organs, and results in dizziness, nausea, or loss of balance. If you have a problem of low blood pressure, you can make a few changes in your diet and keep your blood pressure levels in check.
How to Cure Low Blood Pressure Naturally at Home
Given below are some of the home remedies to control the problem of low blood pressure at home. With these natural remedies, you can elevate your blood pressure to normal levels. Read on to know how to use these home remedies to get quick relief.
1. Coffee
Coffee and other caffeinated tea can provide temporary relief from low blood pressure. If your blood pressure dips suddenly, a cup of coffee or caffeinated tea can help as it increases the blood pressure and boosts the heart rate. Although remember as mentioned earlier that this remedy is only temporary and works only for a short period of time.
What You Will Need
1 or 2 teaspoons of coffee powder
1 cup of water
Method
Heat a cup of water in a saucepan until it starts boiling.
Add one or two spoons of coffee powder depending on your preference.
Simmer it for 5 minutes.
Allow it to cool a little before drinking.
Drink two cups of coffee every day, preferably in the morning and evening.
2. Vitamins
If you don't consume foods rich in Vitamin B12, you might become anaemic, which can cause the problem of low blood pressure, which is why people suffering from anaemia and low blood pressure are suggested to eat foods rich in Vitamin B12.
What You Will Need
Foods rich in vitamins such as sweet potatoes, spinach, almonds, milk, egg, cheese and fish.
You can also take vitamin supplements.
Method
Include egg, fish, and spinach in your diet.
You can eat almonds and crackers with salted cheese.
Consume these foods regularly.
You can also take vitamin supplements under the guidance of a doctor.
3. Green Tea
Green tea, similar to coffee is a rich source of caffeine. The exact mechanism of how caffeine lowers blood pressure is not known, but it is thought to inhibit the function of the hormone responsible for keeping your arteries dilated. Constricting the arteries raises blood pressure.
What You Will Need
Loose green tea or green tea bags
1 cup of hot water
Half a teaspoon of honey
Method
Add one teaspoon of green tea to a cup of hot water.
Steep for 5 to 10 minutes and strain before drinking.
Alternatively, steep the tea bag in hot water for 5 to 10 minutes before drinking.
Add half a teaspoon of honey for taste.
Drink green tea 2 or 3 times a day.
4. Rosemary Oil
Rosemary oil is known for its antihypotensive nature and has been used to treat low blood pressure in natural medicines. The oil contains camphor which is a stimulant for both the respiratory and circulatory system.
What You Will Need
5 to 6 drops of rosemary oil
1 tablespoon of a carrier oil such as coconut or olive oil
Method
Mix the rosemary oil with the carrier oil thoroughly.
Apply the oil over the whole body and massage lightly.
You can also add rosemary oil to bath water and soak in it.
This can be done once a day to treat the problem of low blood pressure.
5. Salt Water
The high quantity of sodium in table salt makes it a great remedy for low blood pressure in times of need. High salt intake is closely associated with hypertension, therefore increasing your salt intake can stabilise your blood pressure when it is low. However, don't eat too much salt or drink salt water too often.
What You Will Need
½ teaspoon of salt
1 glass of water
Method
In a glass of water, add half a teaspoon of salt, and mix it well.
Drink the saline solution.
This remedy is best used when you experience a sudden drop in blood pressure. It should not be overused.
6. Almond Milk
Having almond milk can also increase your low blood pressure levels. Since it has no saturated fat or cholesterol and is rich in essential fats such as Omega-3 fatty acids, it makes a very good addition to a low blood pressure diet.
What You Will Need
5-6 almonds
Water
Method
Soak the almonds in a bowl of water at night.
Peel their skin the morning and crush them to make a paste.
Take them in a saucepan and add a little water and boil to make the milk.
Drink almond milk every day keep your blood pressure levels in control.
You can also mix almond milk in cereals or smoothies and enjoy.
7. Holy Basil (Tulsi)
Holy basil, also known as Tulsi in India, is popular for its therapeutic, anti-inflammatory, adaptogenic and cardioprotective properties. It is also a rich source of many essential nutrients such as magnesium, potassium, and vitamin C. Its therapeutic properties have long been used to treat low blood pressure.
What You Will Need
10 to 15 holy basil leaves, washed clean
1 teaspoon of bee-free plant-based honey
Method
Crush the holy basil leaves to extract some juice.
Mix the juice with a teaspoon of plant-based honey.
Consume this mixture every morning.
8. Liquorice
Liquorice root has been used in traditional medicine to raise blood pressure in people with hypotension. It has adaptogenic and anti-inflammatory properties as a result of which it is not recommended for people with high blood pressure.
What You Will Need
1 teaspoon of Liquorice tea powder
1 cup of water
½ teaspoon of honey
Method
Add the liquorice tea powder to a cup of water.
Bring the mix to a boil and allow it to simmer for 5 minutes.
Strain the tea and let it cool down a little.
Add half a teaspoon of honey for taste.
This concoction should be had 2 to 3 times a day.
What Foods Should You Eat and Avoid When You Have Low BP?
Following a healthy diet can go a long way in treating hypotension. Here is a list of low blood pressure natural foods that you can eat and avoid so that you can control the condition.
Foods to Eat
Red meat is known to be high in fat and is not meant for consumption by the people who have high blood pressure. But people who have low blood pressure, can eat it. However, the consumption of red meats must be maintained to moderate levels as they can be unhealthy in the long run.
Canned soups involving chicken and noodles are good foods to consume to raise blood pressure. A single serving can contain as much as 760mg of sodium, and the whole pack can contain as much as 1800mg of sodium.
Pickles, while being low in calories, are high in sodium content. Three medium-sized pickles a day can give the body as much as 2,355 mg of sodium which is much higher than the daily recommended amount.
Bacon is a favourite among most non-vegetarians. While being tasty, it is also high in fat and sodium content. Three slices of bacon can give as much as 270 mg or sodium and 4.5 g of fats. So eat bacon to raise your blood pressure.
Foods rich in Vitamin B12 such as animal liver and kidneys, fish, eggs, and dairy products are good for raising blood pressure.
Foods rich in Vitamin K such as leafy greens, Kale, beef liver, pork chops, chicken, etc. should be consumed if you have the problem of low blood pressure.
Eat foods rich in Folate (Folic acid) such as legumes, asparagus, eggs and leafy greens.
Foods to Avoid
Foods rich in carbohydrates such as refined flour (maida), white rice, cakes, candies, and sugary foods get digested quickly which can lead to low blood pressure. Hence, avoid eating these foods.
Drinking alcohol can dehydrate you, and dehydration can lead to low blood pressure. So, avoid drinking alcohol.
White bread and other types of foods made out of highly refined ingredients such as potatoes, white rice, flour, and sugar tend to pass rapidly through the stomach and into the intestine. This quick transit time can contribute to postprandial hypotension, that is post-meal low BP.
Dark chocolates are known to lower blood pressure and hence should be avoided.
Additional Tips to Prevent Low Blood Pressure
Keep these additional tips in mind to avoid hypotension and maintain a healthy and normal blood pressure:
Eat smaller meals throughout the day as it can help in dealing with your problem of low blood pressure. If you've three full meals a day, it would be better to break it up to five smaller meals spaced regularly during the day. It is also a good remedy for those who have diabetes.
Drink plenty of fluids throughout the day. Ideally, have anywhere between 2 to 3 litres of water a day. Additionally, you can also drink coconut water or natural juices with electrolytes to keep your body well hydrated. Also, drink water before meals. Having 300 to 500 ml of water 15 minutes before eating can cushion a steep fall in blood pressure. Staying hydrated and maintaining a good electrolytic balance in the body is one of the best remedies for low blood pressure during pregnancy.
People with postprandial hypotension should take it easy and try sitting or lying down for about an hour or more after eating. Since blood pressure usually drops 30 to 60 minutes after a meal, this is a good coping mechanism. When moving around is a must, it’s important to stay alert for the signs of low blood pressure.
Moderate exercises are not only good for the body in general, but a good way to increase low blood pressure to normal levels. Resistance training, when done moderately along with gentler warm up in the form of yoga or Tai chi, is a good way to stimulate blood pressure. It also improves metabolism, bone density and hormonal balance along with stabilising the blood pressure.
Compression stockings work very well for some people in dealing with the problem of low blood pressure. These stockings are designed to avoid blood from pooling in the legs as the superficial constriction pressure over the legs help maintain more blood in the upper body. People who suffer from dizziness while standing up due to low blood pressure will find this particularly effective as it maintains adequate blood flow to the brain and heart.
Take ample rest and avoid stress as it is one of the most overlooked but effective ways to stabilise blood pressure. Sleep helps heal the body from inflammation and wards off fatigue by giving the body enough time for rest and repair. This stabilises blood pressure not only through a reduction in inflammation but also through regulating emotional states that contribute to blood pressure variations.
Be more mindful of your movements and body positions as sudden changes can cause dizziness and fainting if you already have low blood pressure. Rise gently from a sitting or squatting position to standing. Also before getting out of the bed every morning, take a few deep breaths and slowly sit up before standing on your feet.
Taking warm shower is a remedy for milder cases of low blood pressure. The water needs to be luke warm, neither too hot nor too cold. For a more pronounced effect, you can try switching between hot and cold water in the shower to raise blood pressure.
Exercising in the outdoors when it is too hot, such as during summers should be avoided. The same goes for long hours spent in hot tubs, steam rooms and saunas. These can dehydrate the body and lower the blood pressure.
FAQs
1. What Should I Eat If My Blood Pressure Drops Suddenly?
If your blood pressure drops suddenly, consume salty foods or drinks high in salt to increase blood pressure immediately. An intravenous line with electrolytes can also be opted to stabilise blood pressure.
2. Are Bananas Good for Low Blood Pressure?
Bananas are loaded with potassium and foods that are rich in potassium are effective in curing the problem of low blood pressure. Potassium works by lessening the effect of sodium on the body. Higher consumption of potassium leads to greater loss of sodium through urine. The effect of this would be a relaxation of tension in the blood vessels leading to a drop in blood pressure. Hence, bananas are not good for low blood pressure, and the consumption of bananas should be minimised when you’re suffering from low blood pressure.
Following these remedies while taking the necessary precautions is a good way to raise your blood pressure from low to normal levels. The remedies mentioned above are also helpful when you experience a sudden drop in blood pressure. However, please make sure you talk to your doctor before making any dietary changes, especially if you have heart problems or are taking any prescription medication for blood pressure.
Also Read:
Useful Home Remedies for Acidity
Home Remedies for Dengue and Malaria
Effective Home Remedies for Cracked Heels Read more
Suggested for you
10 Fun Sensory Activities for Babies
Babies require constant attention, and keeping an eye on them at all times can get quite hard for mothers, especially when they have a number of chores to do throughout the day. Babies get bored quite often, and need something new for entertainment. Sensory activities are an amazing way to keep them occupied, while also helping them develop important life-skills.
Why are Sensory Activities Important for Babies?
Sensory play is the best way for your child to get get a boost in so many different skills. The advantage to this activity is that it encourages many scientific processes, as it involves solving problems using all five senses.
Stimulating these senses help to develop creativity, with enhanced social and linguistic skills. This leads to better brain development, as exposure to different senses create neural pathways that assist babies with further learning.
Sensory Play Activities for Babies
As a parent, one of the most essential things you do would be to help your kids learn new skills. Here are some fun sensory activities for babies under 12 months of age.
1. Coloured Bread Crumbs
This is a sensory play idea that is safe for babies.
[caption id="" align="aligncenter" width="1024"] Source: www.paganichef.it[/caption]
What You Will Need
Loaves of bread (preferably two)
Milk
Food colouring
Food processor
Method
Start by toasting your bread lightly. Make it a little firm, so that the bread does not become squishy because of the milk.
Take 1/6th amount of your bread in the food processor. You should separate it this way to get equal amounts of the different colours that are available.
Add 2-3 drops of food colouring to two tablespoons of milk,should be added. Follow the same steps for every colour.
This coloured milk should be added to the bread crumbs, and they must be blended.
You can either let it air-dry by keeping in an open bag, or you can lightly toast your breadcrumbs.
Repeat this for every colour after rinsing the food processor.
Finally, place the bread crumbs in a pan or a bin.
2. An Indoor Sandbox
You can set up this easy-to-make, edible indoor sandbox for your children. Your kids will find this sandbox very interesting.
[caption id="" align="aligncenter" width="1024"] Source: healthymamainfo.com[/caption]
What You Will Need
A tub
Anything from the pantry (you can try rice, oatmeal, broken pieces of biscuits)
Measuring Cups
A Spoon
Method
First, choose what ingredients you are going to use based on what your kids love.
If they are larger items like biscuits, break them down to small pieces.
Every time you add an ingredient to the tub, mix well.
You can then keep small scoops, sieves, cutlery, tubes, small pots, etc. so that your child can scoop, pour and transfer the items from one container to another and play with them.
This way, you will not have to worry about your kid eating them, as they are edible. Moreover, this will keep him occupied for some time.
3. Non-Toxic Bath Crayons
Kids are usually drawn to activities that involve water.
[caption id="" align="aligncenter" width="1024"] Source: www.onlinebabystore.com.au[/caption]
What You Will Need
Melted soup
Food Dye
Grape seed oil
Glass jar (required for storage)
Silicon Mold
Method
Start the process by melting the soap. You should melt it according to the size of your mould and then pour the melted soap halfway into the mould.
Add a small amount of grapeseed oil on top of the mould on every section. It is best to use grapeseed oil because it is good for children with dry skin.
The remaining parts can be filled with the leftover soap.
You can then add various colours to every section and give the colours a swirl using a toothpick.
After the colours are mixed well, leave the mould till the soap hardens. You can also store it in the fridge to speed up this process.
Since the colour is present throughout the soap, the tie-dye look will not affect the ability to colour anything.
You can then store all of these crayons in a large jar. Also note that if they are put in the tub, they will melt.
4. Taste Safe Moon Sand Recipe
A little sticky sand is moon sand, and this makes it easy to make various shapes.
[caption id="" align="aligncenter" width="1024"] Source: www.mommypotamus.com[/caption]
What You Will Need
Organic flour (2 cups)
Oil (1/4 cup)
Natural decorating colours
Matcha powder (1/4 cup for green moon sand)
Bowls
Plastic bin
Tiny toys
Scoopers
A motor tool set
Method
For each colour, you can take a bowl. Start by making four at once.
To each bowl, add some flour, and then some oil. Mix this mixture well with a fork.
Add some natural food colour to the flour and mix well with a fork. You can add about ¼ of the colour bottle, but this is up to you.
If you are using matcha powder instead of colour, then add that to the bowl and mix them well.
Mix the contents in the bowl well, until the flour has been well coloured. For a darker tone, you can add more colour.
After all of it is mixed well, put the contents in a large plastic bin. You can put the colours in patterns, but this will not last long, once your child starts playing with it.
5. Snow Globe
Make a snow globe of your child’s favourite tv show, movie, or nursery rhyme character.
[caption id="" align="aligncenter" width="1024"] Source: www.leapfrog.com[/caption]
What You Will Need
Glass jars
A figurine of your child’s favourite character
Clear glue (1/2 bottle)
Glitter
Snowflake foil confetti
Pipe cleaners
Warm water
Glue gun
Styrofoam ball
Method
Use the Styrofoam ball to raise the figurine. You can do this by cutting the ball in half and then glue it to half of the ball and the inner side of the lid.
Put glue on the feet on the figurine and glue it to the top of the ball. To withstand a lot of shaking, put glue around its feet after it is glued on the Styrofoam ball.
You can also create decorations for the background and glue them behind the figurine.
To make a clear mixture for the glitter to move slower, mix some clear glue in warm water and mix it well with a spoon for some time.
Take the foil confetti and glitter and add it to the glue-water mixture. Add as much as glitter you want.
After you are done adding the shiny things, add some more water to the jar till the jar is filled. You can then screw the lid back.
6. Natural Play Dough
This is not very easy to make, but your kids will have a lot of fun with it.
[caption id="" align="aligncenter" width="1024"] Source: kristenlindsay.com[/caption]
What You Will Need
Natural decorating colours
Organic flour (1 cup)
A cup of water
Organic cornstarch (1 cup)
Ziplock bags
Cream of tartar (1 tbsp)
2 tbsp salt
Method
Mix the cream of tartar, salt, and dry flour together in a bag. For each colour, you can make one bag of these ingredients. So, for 3 colours, you will need 3 separate bags.
Boil a cup of water over medium heat and add the food dye. You can start by adding the colour, little by little, until you have the desired colour density.
Transfer this mixture of liquid into the bag in which the dry mixture is held, and seal the bag. Set aside until it is cool.
For each colour, repeat the steps.
Remove the mixture after it cools. It might probably be sticky. Add one cup of cornstarch to the mixture and mix it.
Add the cornstarch slowly, until the dough does not feel sticky.
Flour can also be used, but the dough will be softer when cornstarch is used. Do this for each colour and let your kids play with it.
7. Edible Painting
This is another good idea you can try, and it is very easy to make.
[caption id="" align="aligncenter" width="1024"] Source: www.funathomewithkids.com[/caption]
What you will need
Yyoghurt
Food colouring
Water
Bowls and spoons
Method
Take some yoghurt in a bowl. If your baby is allergic to yoghurt, baby rice cereal is a good alternative.
Add lots of water to the bowl and mx them well until you get a smooth consistency.
You can then add some food colouring to the mixture. You can add as much colour as you want, according to the colour density.
For each colour, you will need to follow the same steps.
Once done, you can lay a mat down and let your kid have fun with it.
8. Water Bead Sensory Window Bag
This idea will need a window with lots of light coming in.
[caption id="" align="aligncenter" width="1024"] Source: everydaychaosandcalm.com[/caption]
What You Will Need
Sandwich bag
Clear water beads
White vinegar
Gel food dye
Water
Heavy duty tape
Window squeegee
Method
First, fill the container with some water, according to the number of colours you want. You can then add the food dye to each bowl.
Your water will have some clumps of colour in it, as gel dyes are oil-based. To fix this problem, you can add some white vinegar to the water. Add only a splash to avoid a strong vinegar smell.
You can then put the water beads into the coloured water. The beads will absorb the coloured water when they expand.
Now, you have to clean your window properly and fill the sandwich bag with these coloured water beads. Seal it after the air is pressed out.
Finally, you can use the squeegee to hold the beads out of the way when you tape the four sides.
9. Magnetic Discovery Bottles
Magnets can be really fun to play with, and your child will be over the moon when playing with it. It will only take you 10 minutes to create this fun idea.
[caption id="" align="aligncenter" width="1024"] Source: funlearningforkids.com[/caption]
What You Will Need
3 clear water bottles
Pipe cleaners
Paper clips
Magnetic chips (optional)
Small jingle bells
Hot glue gun (optional)
1-2 magnets wands and other types of magnets
Water (optional)
A large container (optional)
Method
You can start by cutting the pipe cleaners into small pieces. Place all of the pieces in a bottle. The other two jars can be filled with lots of paper clips and jingle bells.
You could also use magnetic chips if desired.
Since your kids are very young, hot glue the lids of each bottle so that they cannot open it. This will make sure that your kids do not put any of the contents into their mouths.
Slide a magnetic wand up and down the bottle, and it will attract the items in the bottle. You can give them other magnets like a horseshoe magnet and another bar magnets to make it more fun!
If you wish, you can add water into the bottle for a change. It is also fun when you combine the pipe cleaners, bells, and paper clips together in a single bottle. Also add some glitter for extra fun.
10. Sensory Book
This one is straightforward to make, and all you need are various supplies with varying textures. Your baby will fall in love with this. This is one of the best sensory simulation activities for infants.
[caption id="" align="aligncenter" width="1024"] Source: www.pathstoliteracy.org[/caption]
What You Will Need
CD sleeves
Reinforcement labels
1” album rings
Punching machine
Tape (double sided)
For varying textures you can use:
Silk fabric
Leather straps
Bumpy-snakeskin scrapbook paper
Crinkly plastic (you can remove them from CD sleeves)
Furry textured sheet
Foamy sheets
Scratchy or glittery sheet
Rough sheet (cardboard)
Method
Start the process by carefully removing the plastic from the CD sleeves. You may find this a bit hard because the paper might rip off easily.
After the plastic is properly removed, make a few holes, preferably three, on the side of all the sleeves. You can then put some reinforcement stickers above these holes.
After this, you can cut each of the different texture materials to any size you need, so that they fit into the sleeve. Then, put pieces of double-sided tape on the back of every material you slid into each CD sleeve. You can then take some clear packing tape and close the flap.
After you are done with all the CD sleeves, you can put all of them together with some album rings. In the front sleeve, print a label. You could also give a title of what each texture.
Your child will have loads of fun discovering the different textures.
If you’re still on the hunt for new and interesting ways to keep your baby occupied with activities that are fun, yet promote development, try out an activity box. Equipped with worksheets, DIY activities, storybooks, and much more, the Intellikit is the best activity box subscription for children, which develops all 8 forms of intelligence through fun learning. Choose the duration of your subscription and age of your child, and you’ll have a box delivered to your doorstep every month, packed with activities based on a unique theme. The first of its kind, Intellikit keeps your baby engaged and even gives you and your little one some bonding time. You can also buy a trial box to get a taste of what Intellikit is about, before you finalise a subscription.
Try out all these amazing ideas and don’t hesitate to make a mess! This is a wonderful way to bond with your child and make some fun memories. Read more
Dr Priyanka Kalra has added a new answer
Trying To Conceive
11 hours ago
Q. I am having pcod problem.
At which day should I take pregnancy test

Dr Priyanka Kalra
Obstetrician and Gynaecologist
9 hours ago
A. after 2 weeks. do ultrasound n necessary tests after consulting a specialist. without proper check up we can't advise or help you.. Avoid shirt cuts when it comes to health if mother n baby. ok.
Dr Laxmi Chavan-Sawant has added a new answer
Trying To Conceive
11 hours ago
Q. I am having pcod problem.
when should I take pregnancy test?

Dr Laxmi Chavan-Sawant
Ayurvedic Gynaecologist
10 hours ago
A. after missed your periods you can wait for one week more ,then you can do a urine pregnancy test to know about the pregnancy result and consult with your doctor according to the result for medication
Dr Laxmi Chavan-Sawant has added a new answer
Trying To Conceive
11 hours ago
Q. I am having pcod problem.
but having regular cycles below 35 days. some time it will extended upto 40 days.
so when should I take pregnancy test at home?
Dr Laxmi Chavan-Sawant
Ayurvedic Gynaecologist
10 hours ago
A. If you have missed your periods you can wait for one week more or else you can do a urine pregnancy test to know about the pregnancy result and consult with your doctor according to the result for medication.
The best treatment to have Regular periods is by having a healthy lifestyle with regular daily walking or jogging along with mild exercise and meditation whenever possible. as medications will only act till you are taking them
Dr Ghouse has added a new answer
Expecting Mom due this month
8 hours ago
Q. Done my first routine blood test ..it shows thyroid border line.its my 6 week running as per USG.
but prior to that my thyroid level was always normal I did check up every year and got it normal .this time it shows borderline high in 6 week pregnancy.
is it something to worry.plz guide
Read more
Dr Ghouse
Paediatrician
7 hours ago
A. it is better to follow your doctors advice for treating the thyroid deficiency. if there is no relief it is better you see your doctor for proper examination particularly physical examination if there is need for doing investigations to find out the problem and treatment ok
Rashmi has added a new answer
Guardian of 0 children
3 hours ago
Q. #asktheexperts
Best activity toys for 15 month old baby

Rashmi
Mom of a 9 yr 7 m old girl
3 hours ago
A. Toys which have light and also sounds so that is going to be a good option for you to use apart from the different kids have different interest some kids like to play with cars some like to play with something else so just have to try to figure out what your child likes to eat just check what your child is more inclined towards
Rashmi has added a new answer
Guardian of 0 children
3 hours ago
Q. how to gain weight 32weeks
Rashmi
Mom of a 9 yr 7 m old girl
3 hours ago
A. You need to have a lot of good proteins and that is what is going to be helpful have a balanced diet and good have good amount of proteins as well which is what is going to be beneficial and good weight gain for your child as well
Check out this new Memory

Anuja Marathe
Mom of a 7 m old girl
1 min ago
#babyphotochallenge

Like
Comment
Share
0 Likes
0 Comment
Check out this new Memory
Lahari
Mom of a 8 m old girl
14 mins ago

Like
Comment
Share
0 Likes
0 Comment
Check out this new Memory
Lahari
Mom of a 8 m old girl
18 mins ago

Like
Comment
Share
0 Likes
0 Comment
Check out this new Memory

Shreya
Guardian of a 11 m old girl
26 mins ago
#babyphotochallenge

Like
Comment
Share
0 Likes
0 Comment
Tell us more about yourself get More Personalised
 Infant0 to 6 Months
 Baby6 Months to 2 Yrs
 Toddler2 to 4 yrs
 Kids4-6 yrs
 Big Kids6+ yrs
 Expecting
 Trying to Conceive

