

.svg)
.svg)
.png)

Enter Child Details

Add Profile Photo


Videos you might be interested in


Videos you might be interested in
Videos you might be interested in
Suggested for you
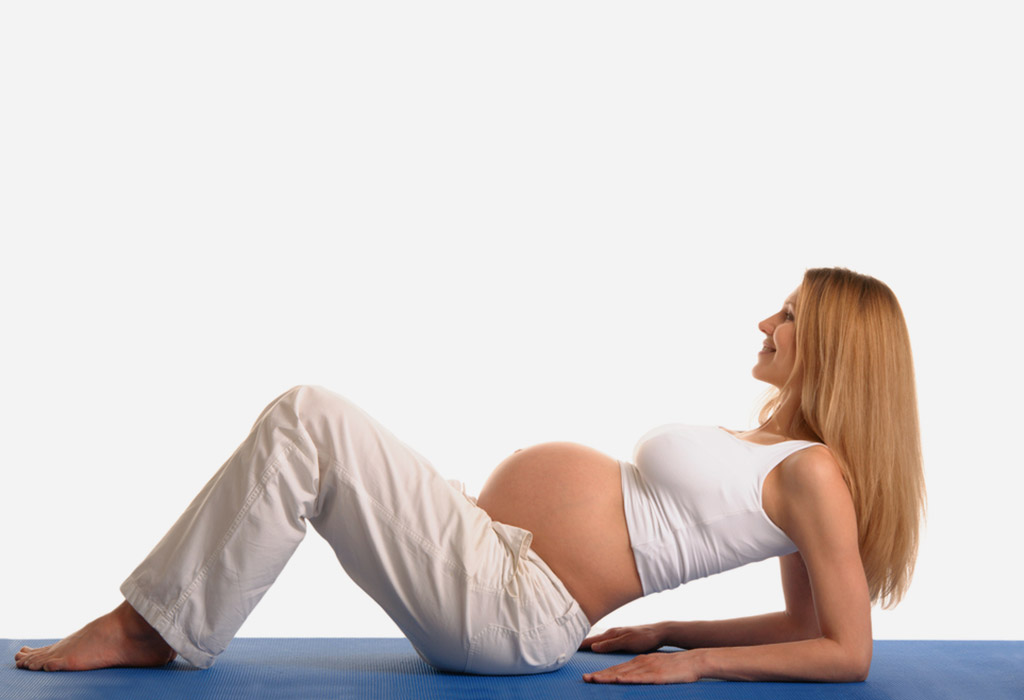
9 Effective & Safe Exercises for Easy Labour & Delivery
Exercises during pregnancy are good not only to keep you and your baby healthy but also to prepare the body for the rigours of labour. Regular exercising readies the muscles and ligaments in the pelvis to go through delivery with lesser effort. Prenatal exercises also help to position the baby optimally for childbirth.
Exercises to Induce Labour Naturally
Here are 9 exercises that will help induce labour and get your body ready for the baby:
1. Pelvic Tilts
Pelvic tilts are great for strengthening the pelvic muscles and prepping them for labour. It is one of the best exercises to help induce labour naturally and can be started early on during pregnancy. Begin by lying down on your back with your knees bent and your feet on the floor. Flatten your back against the floor and slowly lift and push the pelvis up. Hold it in this position for about 10 seconds and release slowly. Exercise twice a day for 10 minutes for pelvic strength.
A variation of the pelvic tilts is called the angry cat or the cat/cow stretch. It is to be done on all fours, facing the ground. It helps in easing back pain during pregnancy while strengthening the abdominal muscles.
2. Squatting
Squatting is one of the most natural movements of the body and is among the safest exercises that can be performed during pregnancy. It builds strength in various muscles in the thighs, the lower back and the abdomen while opening up the pelvis. Squats can be performed throughout a healthy pregnancy – doing them is thought to help orient the baby into position for delivery.
Stand with your feet slightly wider apart than your hips, and toes pointing forward. If you need support or stability, hold the back of a chair placed in front of you. Keeping your back straight, go down as though you’re about to sit on a chair. You can either do a full squat- go down all the way - or a half squat where your lower lack doesn’t go below your knees. Hold this position for 5 or 10 seconds, take a deep breath and exhale as you rise back up.
3. Exercise Ball
An exercise ball is a fun addition to your workout routine, and it can double as a chair if you’re a working mom. Sit at the centre of the ball with your feet flat on the ground, and knees bent. Use your feet to roll back and forth, or just bounce up and down gently on the exercise ball. Rolling on the ball and gentle bouncing are some good exercises to induce labour at 38 weeks as the bouncing motion can help position the baby for a natural birth. However, you should take extreme care with this exercise because balancing can be tough during the last few weeks of pregnancy, and there is a risk of falling if not done with help.
4. Kegel Exercises
Kegel exercises activate the pelvic floor muscles that support pelvic organs such as the bladder, urethra, vagina, uterus, small intestines, and rectum. Strengthening the pelvic floor muscles and gaining good control over them can help during the pushing stage of labour. It is said that by voluntarily relaxing them, you can ease the birthing process.
To find your pelvic floor muscles, tighten the muscles around your vagina and like you interrupt the flow of urine when you pee. However, do not try this while you're actually passing urine as that can prove to be harmful. If you can do this without constricting the muscles of your thighs, hips and buttocks, you’ve located the pelvic floor muscles. Once you learn how to isolate and control them, practice slow contractions. Contract the pelvic floor muscles tighter for a count of five seconds, hold for five seconds, and release to a count of five. Practice this 10 or 15 times a day.
5. Butterfly Pose
The butterfly pose is a simple exercise that opens up your pelvis and builds flexibility and strength in the surrounding muscles, including the back and thigh. The butterfly pose is easy and can be done from the moment you’re pregnant until the time you deliver.
Sit on the floor and put the soles of your feet together. Pulse your legs up and down like the wings of a butterfly and feel the muscles in your thigh stretch. Maintain a pace and range of motion that feels comfortable to you. A variant of butterflies involves sitting in the same position and gently pushing the knees down to the floor using your elbows and feeling the stretch in your inner thigh muscles.
6. Lunges
Lunges are effective in warming up the hips and opening them up to let the baby rotate and descend. They can be used to induce labour naturally. Stand with both the legs together and take one big step forward. Descend your lower back while pivoting on the front knee while you feel the muscles in your back and hind leg stretch. For added safety and balance, push up against a wall while you do it. Alternate the legs and repeat the exercise about 10 times with each leg.
7. Stair Climbing
Climbing stairs requires you to use all your lower back and leg muscles. The stretching and movement of the hips help orient the baby’s head down towards the birth canal. Stair climbing is a wonderful way of inducing labour naturally as it prepares the body for the physical exertion of labour. It also presses on the cervix, prompting it to dilate and open up the pelvic region.
8. Walking
It shouldn’t come as a surprise that walking has tons of benefits for your body during pregnancy - this low impact aerobic exercise is a perfect way to induce labour naturally. It is believed that walking helps the baby descend into the lower part of the uterus, and also stimulates the cervix to dilate and get ready for labour. Walking is also known to be helpful in stimulating uterine contractions in women who were advised bed rest during pregnancy.
9. Back Stretches
Back stretches are among the best exercises for labour pain reduction as they help relieve muscle tightness during labour. The following exercise stretches the muscles along the spine, shoulders and the back of your legs. It can also be tried whenever you feel a tension in the back.
Facing a wall, bend forward pivoting at the hips, so your upper body makes a 90-degree angle with your legs. The back should be flat and the legs straight or slightly bent. Now, place your hands on the wall at the shoulder level. Relax your head while you look down, keeping it at the level of your arms. Push your hands into the wall as you lean back from the hips until you feel a stretch in your back and the muscles in the back of your legs. Hold for 10 seconds, relax, and return your hips to a neutral position.
Precautions to Take When Doing Exercise to Induce Labour
Exercising to induce labour is good for both you and the baby. However, since it is a sensitive time, there are some simple precautions that will go a long way. Here are a few things to take care of when doing exercises to induce labour:
Drink plenty of water before, during and after your exercise. Be sure to keep hydrating yourself.
Make sure to wear a bra that supports your breasts completely and keeps you comfortable.
Keep yourself moving constantly. This does not mean that you don’t sit and take rest; it means that you should try avoiding laying on your back or sitting all the time, as it can cause your muscles to stiffen. Constantly moving your legs, arms, and the rest of your body every now and then will also help with your exercise.
Regular exercises throughout pregnancy help prepare your body for a natural birth. They are also a wonderful way to induce labour naturally while keeping you warmed up for the stresses of childbirth. So, don’t hesitate to keep yourself active and watch your birthing process go smoothly!
Resources and References: ACOG
Also Read:
Easy Ways to Induce Labour
Exercises to Avoid during Pregnancy Read more
Suggested for you

Is Baby Rolling Eyes Normal?
When something looks obnoxiously unpleasant or weird, we may sometimes roll our eyes to show our displeasure. But if your infant does that, you will be worried, no doubt! Of course, your little one won't roll his eyes to show his displeasure or anger. Then why does a baby roll his eyes? And is it normal for a baby to roll his eyes? Well, the answer is a big ‘No’! Most babies may roll their eyes while asleep but sometimes rolling of the eyes can be because of various other reasons also. Let us find out why babies roll their eyes and whether or not you should be concerned.
Why Do Babies Roll Their Eyes While Sleeping?
As a baby enters the world, his little body needs some time to adjust to the outside world and mature. Just like various other organs in his body, his eyes (or vision) is still in the development phase. This means that your baby’s vision and eye muscles will be weak. You need not concern yourself if your baby concern if your baby rolls his eyes while asleep because he will do less of it as he grows up. Instances of eye-rolling in infants is a part of normal development phenomenon. If you see you baby rolling eyes upwards, consider it as a normal developmental phenomenon. When your little one is sleepy, you may even notice him rolling his eyes back in the head. Hence, rolling eyes can be associated with the infant’s drowsy state or the transition from sleepy state to wakefulness. Sometimes, your little one may even roll his eyes while awake! But if your baby rolls his eyes too often, you should get him checked as it could be linked to some serious medical conditions such as seizures, head trauma, low blood sugar, or hypoglycaemia.
Consideration and Warnings
As a parent, you need to be prompt in understanding whether or not your newborn’s eye movement rolling or the symptoms that your baby may be exhibiting requires immediate medical assistance or not. Maintain a diary or log to monitor your baby’s eye movement. The log may also help you in establishing the reason that may be triggering your baby to roll his eyes or other factors that may be making your infant do so. It will also help you establish whether your baby rolls his eyes at a particular time of the day or not. If something appears dubious or fishy that concerns your baby’s health or condition, act promptly and contact your paediatrician.
If you feel that your newborn baby eyes rolling is accompanied with seizure-like symptoms, which may include stiffness of the limbs, incessant crying along with shaky body movements, you need to ensure your baby’s safety. Seizures in babies may lead to complicated medical conditions and seizures may occur if your baby may be running a high fever, epilepsy, severe infections etc. If your baby experiences seizure, make your baby lie on the floor preferably sideways, remove any tight clothing and take him to the doctor right away to know the cause of the seizure.
When to Consult a Doctor
If your baby is rolling his eyes due to the lack of muscle control, you may not notice other signs or symptoms along with it. But if he is rolling his eyes due to some underlying medical condition, it may be accompanied with other noticeable symptoms like convulsions, shivering, trembling, irregular breathing, change in skin colour, jerky body movements, uncontrolled crying, excessive irritability or other such symptoms.
If you are a first-time parent and your infant starts rolling his eyes, it may scare you, no doubt. But don't panic. It is a common problem in newborns and is generally associated with lack of weak muscle control in eyes but if you notice something abnormal, seek professional guidance. If anything abnormal may be detected, your baby's paediatrician may suggest that you refer a neurologist for further diagnosis and tests.
Also Read: Common Eye Problems in Babies Read more
Suggested for you
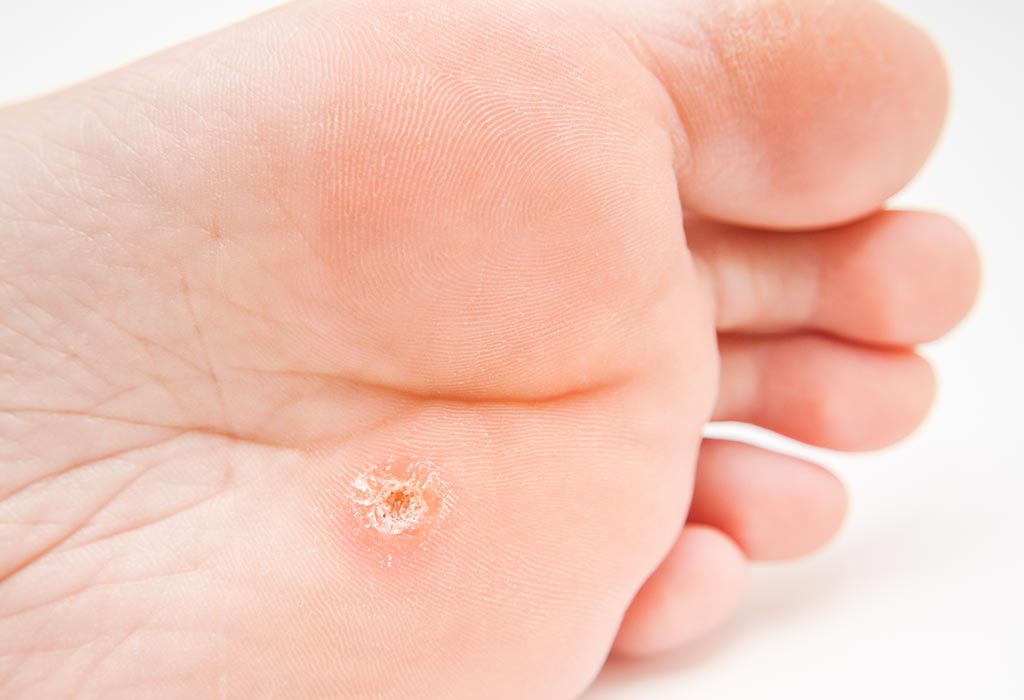
13 Effective & Simple Home Remedies for Corns & Calluses
A corn is a small area of the skin that thickens when the skin experiences regular and excessive pressure. It is usually round and very painful. It is soft to touch when exposed to moisture. Calluses are larger than corns and are usually formed in the soles since this part is under the pressure of the body weight when you walk.
What Causes Corns & Calluses?
Walking and running in ill-fitting shoes is one of the most common causes of corns on the feet.
Standing for a really long time wearing high heels or tight shoes can cause corns.
Walking without shoes, or wearing shoes without socks, or manual labour that puts pressure on the feet are other possible causes.
People with hammertoes or bunions, scars, or warts on the feet or damaged sweat glands are more likely to get corns.
People with diabetes and other conditions that result in poor blood flow are also at a higher risk of getting corns.
Natural Remedies for Corns & Calluses at Home
Check out these natural home remedies to get rid of the conditions.
1. Castor Oil
Castor oil softens the corns, and eventually, they disappear. You will see the results of using castor oil within a week.
What You Will Need
Castor oil
What to Do
Apply the oil on the corn.
Do this thrice a day.
Repeat the process every day until the corn completely disappears. However, do not apply the oil if the skin is broken.
2. Pumice Stone
Corn skin is dead skin. Therefore, it is best to try and remove the corn by rubbing the affected areas on the hand or foot with a pumice stone.
What You Will Need
Pumice stone
Warm water
What to Do
Soak the hand or feet that have calluses or corn in warm water for about 5-7 minutes.
Gently rub the areas with the pumice stone for about 2-3 minutes.
Do this every day so that the affected areas heal faster.
3. Apple Cider Vinegar
Apple cider vinegar softens the corns and calluses as it exfoliates the dead skin cells. It is also anti-bacterial in nature; therefore, using it on your feet will kill any bacteria that are lurking around the affected areas on the feet. This is one of the best natural remedies for corns.
What You Will Need
Warm water
Apple cider vinegar (1 tbsp)
Tea tree oil (1-2 drops)
Cotton ball
What to Do
Soak your feet in a warm water bath for a few minutes.
Apply apple cider vinegar on the corn using some cotton balls.
For about 5 minutes, keep the cotton balls firmly pressed against the affected area.
Keep it pressed until the vinegar dries.
Then, apply tea tree oil on the corn. Do not wash your feet.
Do this every day until the corn comes off in 2-3 days.
4. Garlic
Garlic is a home remedy for many conditions including corn removal at home. This is best used at nights.
What You Will Need
A garlic clove
Crepe bandage
What to Do
Cut the garlic clove in half.
For 1 minute, rub one half of the clove on the corn.
Place the other half on the corn and cover it using the crepe bandage. The next morning, wash the area.
Do this every night for a very few days.
5. Bread
The vinegar present in the bread softens the corns and calluses. This is one of the most effective home remedies for calluses.
What You Will Need
White vinegar
Gauze
A piece of bread
What to Do
Soak the bread in some vinegar.
Place it on the affected area.
Secure the area with the gauze. You could also try covering it with a plastic wrap.
Leave it overnight.
You will notice a difference the next morning.
Repeat the process for 1-2 nights to remove the corn completely.
6. Coconut Oil
Coconut oil is an amazing skin moisturiser. It will be easy to remove the corn with a pumice stone once the skin turns soft and supple.
What You Will Need
Coconut oil
What to Do
Apply the oil on the affected area.
Make sure you massage it properly on the skin.
Re-apply this thrice a day.
7. Papaya
Papaya is really popular for its healing properties. It can also slough the skin off - this is due to the enzyme papain that is present in papaya. This is a nice corn treatment at home.
What You Will Need
Papaya
What to Do
Apply a small piece of papaya on the corn.
Leave the papaya overnight.
If applying the piece of papaya is difficult, then dab fresh papaya juice on the corn.
Repeat the process every night until the corn falls off.
8. Turmeric
This is a very nice remedy to heal corns. The turmeric has healing and anti-microbial properties that will heal the corn in just a few days. This is a very effective natural remedy for corns.
What You Will Need
Turmeric powder (1 tbsp)
Honey (1-1 ½ tbsp)
What to Do
Make a thick paste of honey and turmeric paste.
Apply the paste on the corn.
Let the paste air dry.
Rinse the paste off.
Apply this twice a day. You will notice the corn reducing in size in about 2-3 days.
9. Lemon
Lemon’s acidic quality makes it an amazing home remedy to get rid of corns. It helps to alleviate discomfort, and you will notice it reducing in a few days.
What You Will Need
Lemon slices
Bandage
What to Do
Apply some lemon on the corn.
Secure this slice with a bandage.
Leave the bandage on overnight.
Continue using this remedy until you see no trace of the corn.
10. Pineapple
This fruit is a great way to treat corns at home. It will help to alleviate the pain and hasten healing. The pineapple has an enzyme called bromelain which helps dissolve the callus or corn.
What You Will Need
Pineapple
Bandage
What to Do
Take a piece of pineapple and place it on the corn.
Secure it with a bandage and leave it on overnight.
Doing this every night will help in reducing the corn, and it will disappear in a week or so.
11. Onion
Onion has many antioxidants that will enhance the healing process of the corns and calluses. It is also good at reducing scars on the skin. Onions will make sure that there are no marks left behind.
What You Will Need
Gauze
Onion slice
What to Do
Place the onion slice on the affected area.
Secure it with the help of the gauze.
Leave it on overnight and discard it the next morning.
When you do this every day, you will notice changes within a week.
12. Oatmeal Soak
Oatmeal is good at soothing the skin because of the excellent exfoliating agent that is present in them.
What You Will Need
Oatmeal (1/2 cup)
Water
What to Do
Boil the oatmeal in plain water for about 5 minutes.
Strain the water and apply the oatmeal on the corn.
Leave it on for 10-15 minutes before rinsing the oatmeal off.
Repeat the process twice a day. However, make sure that the oatmeal is not very hot or you might end up scalding the skin.
13. Salicylic Acid
The salicylic acid is good at breaking the bond between the skin cells that accumulate on the site of the corn and callus. By increasing the amount of moisture in the area, it slowly starts to dissolve the corn.
What You Will Need
Pumice stone
Salicylic acid gel/liquid
Warm water
What to Do
Soak the corn in warm water for 5 minutes.
Pat the area dry and rub a pumice stone to remove the dead layers of skin.
Apply a thin layer of the salicylic acid liquid and leave it on for 5 minutes.
Rinse it off with clean water.
Repeat this once or twice a day for about two weeks.
How to Prevent Corn and Calluses?
Get Proper Fitting Shoes: get shoes that are neither too tight nor too loose.
Trim Your Toenails: long toenails can force your toes to push up. This might cause corns since the pressure is created.
Use Corn Pads: corn pads will help you protect yourself against excess friction and pressure around the corn.
Keep Your Feet Clean: wash your feet properly with soap, water, and a scrub brush.
Keep the Feet Moisturised: to prevent dryness and friction, use foot cream regularly.
Wear Socks: try wearing socks that are thick with cushioned soles. This will prevent the calluses from getting worse.
FAQs
1. What are the Symptoms of Corns?
The symptoms of corn are:
Thick and rough skin
Dry and waxy skin
Hard raised bumps
Pain
Discomfort while walking or standing
2. What is the Difference Between a Corn and a Callus?
Calluses are larger when compared to corns and are present on the areas on the feet that bear the body’s weight. Corns have a hardened centre which is usually seen in calluses.
3. How Long Does it Take to Get Rid of a Corn?
Corns and calluses usually go away in 1-4 weeks after you stop wearing the shoes that are causing the problem and stop the activity that caused the callus.
4. When Should I See a Doctor?
If you are experiencing a lot of discomfort and pain because of the callus and corn, it is recommended to visit a doctor so that they can surgically remove it.
You can try these home remedies for foot corn and calluses if you or your loved one is suffering from these problems. These can be managed at home, and removal usually does not require surgery. However, it is best to consult a doctor first if you have diabetes or if your corns are very painful.
Also Read:
Simple Home Remedies for Cracked Heels
How to Get Relief from Heel Pain Naturally
Home Remedies for Shoe Bites Read more
Suggested for you
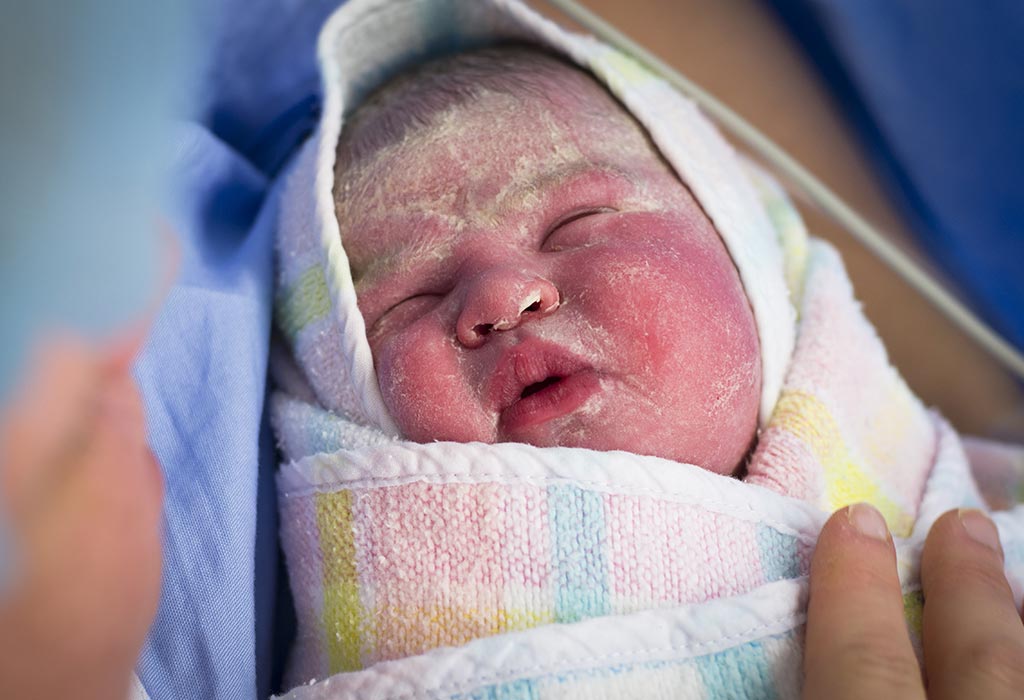
Vernix Caseosa - Must Know Things for Parents
If you are a pregnant mother or if you have just given birth to a little child, you might have come across this term “Vernix Caseosa”. Although many people are ignorant of the vernix, it is something that is extremely crucial for your baby and also it is also something that will help pregnant women during the delivery time.
Our human body is built in such a way that there are protections and mechanisms to help it cope with the various process such as foreign bodies that might harm us. Sometimes we are just alarmed at how our body functions. Even in newborn babies, there are many amazing things that are happening naturally that is keeping the little one safe. The vernix is one such thing. It is a thin white substance on the skin of the babies that protect the child. This is called vernix caseosa. The vernix is extremely useful to the baby even before the child is born and after as well.
What is Vernix Caseosa?
If this term is new to you, then it’s high time you learn about this miracle formation on a new baby’s skin. The vernix caseosa which is also called vernix is a natural formation on the baby skin that can be seen during childbirth. It’s said to keep the formation on the skin for a while before rubbing it away. Vernix caseosa is something that helps babies stay protected from bacteria and infections while it also keeps the baby’s skin soft and supple.
When Does Vernix Develop?
The Vernix Caseosa is something that you will notice on your little baby when she is just born. However, this formation has been on babies way before they are delivered. It is said that the vernix is formed over the baby’s skin during the third trimester of the mother’s pregnancy. This is evidently noticed during the time of delivery.
What Does it Contain?
The vernix is a thin layer over the baby’s skin that plays a crucial role to protect the little child’s body. The formation is mostly water content, and apart from the water content, there is fat contents as well as proteins. There are also substances that help with the immunity of the child.
What is the Colour of Vernix?
Vernix is mostly white in colour but at times the colour of the vernix changes. Vernic can appear to be yellowish brown, and at times it even gets a slight greenish tinge to it. The colour can change after the baby has pooped for the first time. By this time, you can wipe the vernix away from the skin.
Does it Wash Away Easily?
It is possible to wash the vernix from your baby’s skin. However, it is best not to wash it away, immediately. You can wait for a while and wipe it away from your baby's skin, instead of washing it away. The WHO has even said that the vernix caseosa after birth can be on the baby for as long as 24 hours. In fact, even weeks later, you might still find some layers lingering here and there. It might not completely come out when you wipe it for the first time.
Should You Delay a Newborn Baby’s First Bath?
The Vernix is something that keeps the baby skin soft and protected. Although many people take the baby for an immediate wash, it is best to delay the first bath for as much time as possible, and the vernix on your little baby will only protect him during the time.
What if Vernix Caseosa is Missing?
There are times when the delivery of the baby is overdue, and during this time vernix is hardly found on the baby. It can even be completely missing as well. This is because the vernix slowly dissolves over time, especially close to the birth time. The vernix actually gets diluted in the amniotic fluid.
Benefits of the Vernix Caseosa
The vernix caseosa has many amazing benefits for the mother and even for the little baby. Some of them are
1. Helps in Delivery
The vernix is quite slippery and helps the mother during delivery as due to its presence the baby slips out a lot easier.
2. Fights Germs
The vernix also helps in fighting bacteria and other germs that are quite harmful to the baby. This is also because the vernix has an antibacterial property and highly protects the child from any such dangers.
3. Acts as a Moisturizer
The vernix is a natural moisturizer that helps keep the child’s skin smooth and soft. Although the vernix of the baby skin looks unpleasant, it is actually keeping the baby skin in healthy condition. Without the vernix, the baby skin will be chapped and might even have wrinkles.
4. Keeps the Body Warm
In many cases, babies are kept in a warm place right after they are born because their bodies are still getting used to the temperature around them. The vernix is a natural layer that helps the baby stay warm.
5. Protection of the Skin
The vernix is a natural way to help the baby from the acids like the amniotic fluid in which the baby is developing during pregnancy. This also safeguards the little one from infections.
6. It is Special to Human Beings
The vernix is something that is unique to human beings. It has many amazing properties including antimicrobial and anti-inflammatory properties that protect the baby.
There are times when we are not aware of the things that happen when a little baby is born. The body will be finding ways to adapt to the new environment. At times we might be overwhelmed by how things are working out and how the human body is even built. During the time of pregnancy or right after it, it is important to remember that you have to allow the baby to go through the natural process. In fact, there are no scientific or medical ways that can replace the natural ways in which the baby copes with new life. In every way, it is the safest and best.
Also Read: Peeling Skin in Newborns Read more
Suggested for you

Diapers - Want to make your Babies and Kids LOVE them?
Dear Parents, in today's hi tech and advanced world we try to comfort our babies in all possible way we can. Being a parent we always want to give our babies best of all.
One of the comfort which we all give to our babies are Diapers. Diapers are life saving for parents because it keeps our baby safe from wetness and also helps in getting good sleep as their sleep do not get disturbed because of the wetness.
We as a parent know that Diapers are good thing for them. But we as a parent also know that most of the babies and kids hate diapers. Most of the babies and kids don't prefer diapers to wear and they create a havock when we try to make them wear it.
Here are few quick things which you can do, doing these things will help remove hatred about the diapers from your babies heart.
1) Always while making your babies wear diapers, keep a smile on your face, have a eye contact with your baby and keeping talking to them. This will keep them engaged in the conversation and you can make them wear the diapers without any hassel.
2) While removing diapers, make sure when you tear the diapers, the elastic of the diapers do not hurt your babies. This is very crucial, because since we change diapers, we become very casual and sometimes careless too while removing them. When you tear the diapers roughly it's elastic hurts a lot and this becomes one of the reasons why babies hate diapers. So be extra careful while doing this.
3) Sometimes the corners of the waist band of diapers are hard and stiff, always check if there is any hardness or stiffness on the diaper's waist band, if yes do make it soft by pressing that part with your hand. These stiff and hard parts of diapers waist band keeps on troubling your babies skin and also irritates your baby.
4) Having a time frame for Diaper free period on daily basis is very essential. Diaper free period is the time when you don't make your baby wear diapers. You can choose this time frame as per your comfort but this needs to be done without fail everyday. This process helps your babies skin and part which is covered by diapers to Breath and Relax.
5) Keep on checking and changing diapers at regular interval.
6) Getting exact and right size of diapers for your babies is very important. Size of the diaper is always determined by the weight of your child and not age.
7) Always use diapers which are cottony soft and plastic content are minimal.
Happy Diapering!!! Read more
Suggested for you

Dr Priyanka Kalra has added a new answer
Expecting Mom due this month
16 hours ago
Q. i am 39 week of pregnant and having AFI level of 8 is this normal?and is delivery possible for me?

Dr Priyanka Kalra
Obstetrician and Gynaecologist
9 hours ago
A. yes. better to show to specialist always as they get the correct diagnosis. try to avoid self and extra medication that will only complicate this and create more damage to the childdo ultrasound n necessary tests after consulting a specialist. without proper check up we can't advise or help you.. Avoid shirt cuts when it comes to health if mother n baby. ok.
Vandana Sharma has added a new answer
Guardian of 0 children
10 hours ago
Q. please tale me how much dengerous for may 7 days old baby and she was 2.9 kg.

Vandana Sharma
Nutritionist
9 hours ago
A. Hello mom the blood sugar level of baby is quite low , could say hypoglycemia as well .
Dr Ghouse has added a new answer
Guardian of 0 children
9 hours ago
Q. hlw hospital bag main baby nd mom ke liye kiya kiya le jana chahiye???

Dr Ghouse
Paediatrician
8 hours ago
A. hospital bag mein baby ke essentials Deni hogi aap YouTube per dekh sakte hain. if there is no relief it is better you see your doctor for proper examination particularly physical examination if there is need for doing investigations to find out the problem and treatment ok
Rashmi has added a new answer
Guardian of 0 children
8 hours ago
Q. my last period was on 29 February 2024 according to which I am 8 weeks 4 days pregnant but my usg scan shows 7 weeks 3 days

Rashmi
Mom of a 9 yr 7 m old girl
7 hours ago
A. For this purpose I’d like to tell you plus -1 or two weeks is completely normal to be seen during ultrasound till the time doctor does not say anything in order of you need to worry about the don’t worry like I said this can be commonly seen in one plus or 2+ weeks or minus weeks is fine
Ashima Malhotra has added a new answer
Expecting Mom due in 5 months
7 hours ago
Q. Am craving to have a burger at McDonald’s. Am 15 week pregnant.
Is it safe to have

Ashima Malhotra
Mom of a 10 m old boy
7 hours ago
A. avoid it
Dr Ghouse has added a new answer
Expecting Mom due in 6 months
7 hours ago
Q. It's my 12th week of pregnancy but last night I noticed some bleeding. So, my doctor prescribed Duphaston for 2 weeks. Is there anything to worry about? Please guide me.
Dr Ghouse
Paediatrician
6 hours ago
A. at present take rest and use medicines as advised by the doctor. if there is no relief it is better you see your doctor for proper examination particularly physical examination if there is need for doing investigations to find out the problem and treatment ok
Check out this new Memory

ruchi juneja
Mom of a 1 yr 1 m old girl
New Memory
#cutestbaby

Like
Comment
Share
0 Likes
0 Comment
Check out this new Memory

Hardik Soni
Father of a 1 yr 1 m old boy
New Memory
Take blessings hanumaan dada ji

Like
Comment
Share
0 Likes
0 Comment
Check out this new Memory
ruchi juneja
Mom of a 1 yr 1 m old girl
New Milestone

Like
Comment
Share
0 Likes
0 Comment
Check out this new Memory

umesh nagpal
Father of a 7 m old girl
New Memory
#cutestbaby

Like
Comment
Share
0 Likes
0 Comment
Check out this new Memory
ruchi juneja
Mom of a 1 yr 1 m old girl
1 min ago

Like
Comment
Share
0 Likes
0 Comment
Tell us more about yourself get More Personalised
 Infant0 to 6 Months
 Baby6 Months to 2 Yrs
 Toddler2 to 4 yrs
 Kids4-6 yrs
 Big Kids6+ yrs
 Expecting
 Trying to Conceive

