

.svg)
.svg)
.png)

Enter Child Details

Add Profile Photo


Videos you might be interested in


Videos you might be interested in
Videos you might be interested in
Suggested for you

How to Remove Hair From Private Parts During Pregnancy
Experts have found that there is a small decrease in infection rates in pregnant women when the hair on the perineum, which is usually removed in bikini waxes, is left in place, In fact, experts now recommend women to not shave off their pubic hair, especially after 36 weeks of pregnancy. However, this is mostly a personal choice, and as long as it is done safely, you can proceed with hair removal.
Why is Pubic Hair Removed Before Childbirth?
Pubic hair removal during pregnancy is helpful in caesarean deliveries, as shaving the hair helps in making suturing easier and also reduces the risk of infection. In case of a difficult delivery, a cut must be made at the opening of the vagina. This procedure is called an episiotomy, and shaving is recommended in this case, so as to rule out any chances of infections.
Hair removal can be done using normal hair removal methods like waxing, hair removal creams, electric shavers or normal shaving blades, as long as it is performed in a safe and hygienic manner.
Different Ways of Removing Pubic Hair
Pregnancy often brings on thicker hair growth in places most women would rather not have any, like armpits, bikini line, upper lip, belly etc. Fortunately, this is only temporary, and hair growth should go back to normal six months after delivery. In the meantime, here are some ways to remove pubic hair safely during your pregnancy:
Waxing and Sugaring
In this method, heated wax syrup is spread over the skin and pulled off to remove the hair. If waxing is your preferred method of hair removal, visit an expert for safety and do not try to do it yourself.
Hair Removal Creams
Use this method only if you have done it before, as there are chemical substances in the cream that can cause irritation if you have sensitive skin. While there is no real evidence that these creams cause harm to a developing foetus, it is still better to consult your doctor before using this method.
Electric Shavers
Electric shavers can be used throughout the pregnancy. They are one of the easier options when it comes to hair removal. Like with any of the other methods, care should be taken when using an electric shaver. Use only clean and sanitised blades.
Regular Shaving Blade
This method requires the use of a foaming agent and most women tend to do this in the shower. Many slip-ups can occur, especially when shaving your private area, so be careful or ask your partner or a friend to help.
Trimming Scissors
Trimming scissors do not completely remove the hair, but they do keep the hair short and make the area relatively neat and tidy. They do not pose much threat unless you cannot see what you are doing. It is recommended that you ask your partner to help you, when your baby bump gets too big to see past.
When Should You Shave During Pregnancy?
While shaving the way you normally would during the entire duration of the pregnancy is completely fine, make sure you use clean and sanitised blades and tools. Even better, go to a professional to get the hair removed. However, it is best not to shave or wax for a week before your due date, so as to avoid any infections that may be caused in any of the small cuts that could occur during hair removal.
Benefits of Shaving Pubic Hair During Pregnancy
Here are some benefits of shaving pubic hair during pregnancy:
Microbes tend to thrive in pubic hair, and if they get transferred to the baby, the baby risks getting an infection. Removing pubic hair makes it easier to stop this from happening, as keeping the area clean becomes easier.
If your gynaecologist sees the need to make any interventions during labour, he/ she will be able to have a better view if your private area is shaved or trimmed.
Trimming or shaving the hair reduces sweating and moisture retention in the private areas, thus, making it easier to keep clean.
There is excessive bleeding post-delivery and when the blood sticks to the pubic hair, it becomes difficult to wash it off. In this situation, it may be less painful and more convenient if the area is trimmed.
Risks Involved in Shaving Pubic Hair While Pregnant
On the flip side of the coin, here are some risks that you should keep in mind:
If sterilised tools are not utilised and hygienic conditions are not observed, it can lead to infections.
When shaved hair grows back, there is often an itching and sometimes prickly sensation that can cause a lot of discomfort around the healing sutures.
Ingrown hair is very painful when they turn into small bumps in the skin. These can form as a result of careless shaving and can cause additional discomfort and pain.
Your baby bump will soon block out your view, and you will need to resort to asking someone for help, be it your partner or an expert, if you want it to be done safely and without any mishaps. This is something that a lot of women are uncomfortable with.
What to Do if You Are Concerned About Shaving Pubic Hair Before Childbirth
Always consult your doctor if you are unsure about anything.
Speak to women you know who have already had children, and find out about their shaving/ non-shaving experience during labour.
It is always best to ask your partner for help or to go to a professional if you do decide to shave.
Follow all the hygiene advice given with whatever method you decide on.
Things to Remember
If you decide to remove your pubic hair, you can do it before getting to the hospital or ask a nurse to do it for you. Here are some things to remember in either case:
Before the Hospital:
Use shaving cream and clean tools. Feel your way through it and go slow, so as to avoid any cuts.
Lying down on your back in the bathtub could help you see what you are doing better.
Place a mirror on the floor or on the wall to help you see better.
At the Hospital:
Make sure that the nurse who is going to shave you uses a new razor pack. It is best to see them open the packet in front of you.
If you are in any pain, let the nurse know, as even small cuts can get infected.
You may feel some embarrassment by exposing your privates to a nurse. Note that nurses are professional and will behave accordingly. It is standard procedure for them and they can even provide valuable advice.
While there are different views and opinions about whether or not to remove pubic hair during pregnancy, it is seen that as long as all of the hair is not removed, especially from the perineum, there really is not much difference in the science of it all. It comes down to personal preference and the procedure that your hospital follows. As long as the circumstances of your labour are normal, and you do not have to undergo a C-Section or difficult delivery, it is likely your doctor will agree to you not removing the hair.in our conditions removing hair is recommended during any form of delivery.
While there are a few methods of hair removal that are safe to follow, the best way to remove pubic hair during pregnancy is to trim it as short as possible, rather than to remove it completely as this keeps the area clean, allows the doctor to have proper vision during labour, and does not come with the itchy sensation that accompanies hair growing back after shaving. No matter what you choose, always consult with your doctor first to ensure that all goes smoothly during childbirth.
Also Read: Baby Hair Removal Home Remedies Read more
Suggested for you
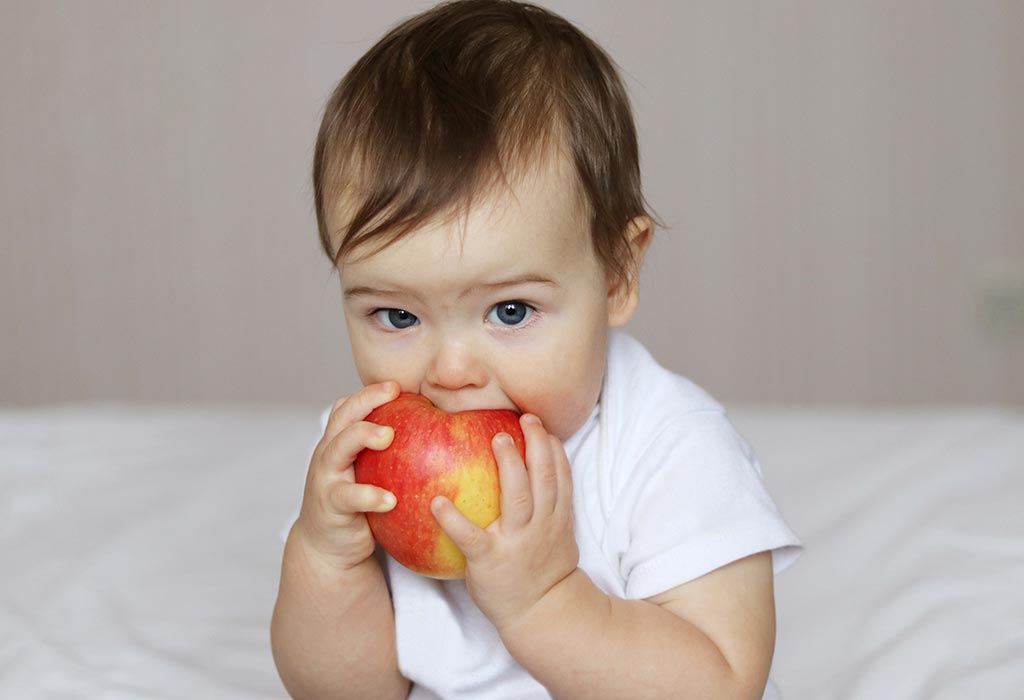
10 Simple Homemade Apple Recipes for Babies
Apples have been directly linked with maintaining a good healthy heart since they contain substances that reduce the amount of cholesterol in the body as well as provide various antioxidants to maintain the inner health as well. The structure of apple plays an important role as it is formed by a combination of fibres that are both soluble as well as insoluble. Both of them work towards stimulating bowel movement and keeping the intestine healthy at the same time. Furthermore, apples are great food for babies and using them in various ways can bring about tasty food items right in front of you.
10 Easy-to-Make Apple Recipes for Babies
To help your baby consume apples in a delicious manner, here are a few recipes:
1. Tasty Applesauce (For 5 Months and Above)
Out of various applesauce recipes for babies, this one is the easiest and quickest to make and introduce your child to apples.
Ingredients
Apples, peeled and cored
Unsweetened apple juice
Water
Cinnamon, grounded
Nutmeg powder
Vanilla essence
Method
Take the apples and chop them together. Place those pieces in a pan. Add some more water to it, creating a layer, and follow that up with the apple juice.
Heat the pan and let it start boiling. Lower the flame, place a lid and let it continue to cook for around 8-10 minutes until the apple pieces start getting soft. Don’t overcook to melt them completely.
Once they start getting tender, remove the flame and take the pan aside. Pick out the pieces and mash them together to a consistency that feels right for your baby.
For some added flavour, sprinkle a little bit of cinnamon and nutmeg powder. To give it an added style, add a tiny drop of vanilla essence.
Serve it nice and warm to your little one. If you want to serve it cold, add the flavours only when you are serving, while keeping the other portion frozen.
2. Apple Soup With Sweet Potato (For 6 Months and Above)
Combine the flavours of both these food items to create a delicious lip-smacking comforting soup.
Ingredients
Flour
Butter
Chicken broth
Applesauce
Sweet potatoes, cooked
Ginger, grounded
Cinnamon, grounded
Breastmilk or formula
Method
Take a pan and add some butter to it. Heat it and let the butter start melting. Add flour to the melted butter in the pan and stir it all together. Continue cooking it thoroughly until it starts getting a golden colour.
Now start pouring the chicken broth into the pan gradually. Remember to keep stirring while you do so. Follow that up with the applesauce, pieces of sweet potato, ground ginger and cinnamon all together.
Stir the entire mixture well and increase the flame to make it boil. Once boiling, lower the flame and let it simmer for another 5 minutes or so.
Once done, pour that mixture into a blender and run the blender for a few minutes until it starts getting the consistency of a puree. Pour this puree out of the blender back into the pan.
To this puree, add some milk and let it heat again until it gets nice and warm. Serve this warm soup to your child.
3. Apple and Grape Squash (For 6 Months and Above)
Put together this fantastic recipe to let your little one taste a wide variety of flavours.
Ingredients
Grape squash
One peeled and sliced sweet apple
Melted butter
Honey
Cinnamon
Nutmeg
Cloves, grounded
Method
Prepare the oven by heating it to about 180 degrees and keep it ready.
Cut the grapes into small pieces and place them aside.
Grease a baking tray and place the grapes in it with the skin side facing upwards.
Cover the tray and place this in the oven. Let it sit in for about 20 minutes or so.
While that goes on, take a bowl and add the pieces of apple to it. Follow it up by pouring some melted butter, honey, cinnamon, nutmeg and ginger altogether. Mix them well.
Take out the tray from the oven and flip the grapes. Pour the apple mixture over it, cover the tray and place it in the oven again for another 20 minutes.
If your baby is below the age of one, replace honey with sugar or any other sweetener.
4. Apple and Chicken Meal (For 7 Months and above)
As your child starts having solids, this meal will make him ecstatic and have more of it.
Ingredients
Chicken breasts, skinless and chopped
Apple, chopped
Sweet potato
Cinnamon powder
Chicken stock
Eggplant
Method
Take the sweet potato and peel it. Chop it into small pieces.
Take a pan and add the chicken stock to it. Heat it and let it start boiling.
Once boiling, add the chicken breasts to it and lower the flame. Let the preparation cook for about 10 minutes.
Follow it up by adding pieces of the apple and sweet potato. Stir it together and let it cook for another 10 minutes.
Once that is done, add the pieces of chopped eggplant to the pan and let it simmer on the flame for a few more minutes. Once the potato gets tender, remove the heat.
Run this mixture in the blender for a small time to make it a little consistent. Add cinnamon to it and serve it well.
5. Apple Shake (For 10 Months and Above)
One of the popular apple juice recipes for babies, this one adds the benefit of milk to make a great shake.
Ingredients
Apple
Water
Raisins
Almonds
Cinnamon
Milk
Method
Take the apple and place it inside a steamer or a pressure cooker. Let it steam the entire apple for nearly 10 minutes so that it is properly cooked.
Once it cools down, take it out and peel the apple properly. Remove any seeds that are present inside it.
In a bowl, add the apple pieces, along with milk. Mix it well. Peel the almonds and add them to the bowl, too. Mash the raisins into a puree and add it to the bowl along with a simple pinch of cinnamon powder. Avoid the powder if your baby doesn’t like it.
Add the entire mixture into a blender and run it multiple times to make it smooth. Make sure the almonds are crushed completely while blending.
If your baby is a year old or more, you can add honey to this to elevate the flavour.
6. Baked Apple Dish (For 6 Months and Above)
Turn the fruit into a great snack option for your child that has a different flavour with the same nutrition.
Ingredients
Various apples
Butter
Method
Cut the apples and remove its core. Do not remove the outer peel.
Take some butter on your finger and apply it to the inner part of the apple. If your baby loves cinnamon powder, feel free to apply a little bit of that as well.
Take a shallow tray with some water in it. Place these pieces in the tray.
Put the tray in an oven and set the temperature to 200 degrees. Let it bake for about half an hour or so until the pieces start getting soft. Keep a track of the water in the tray.
Once cooled down, take the tray out and remove the peels if you want them to. Feel free to cut the pieces further or mash them together for your little one.
7. Apple Salad Breakfast with Grains (For 10 Months and Above)
Let your little one have a nice filling breakfast now that he can start having solids properly.
Ingredients
Water
Salt
Yoghurt
Raisins
Peach
Apple
Wheat
Brown rice
Method
Take a pot and add water and salt to it. Place it on a flame and heat it until it starts boiling. Follow by adding the brown rice and wheat to the pot. Then, reduce the flame, cover the pot, and let it cook for about 8-10 minutes.
Once cooked, turn off the flame and let it cool for a few minutes.
Spread a baking sheet on a platform and spread these grains on it. This increases their fluffiness.
Chop the apples together and add them to a bowl. Peel the peach and cut it into small pieces. Add it to the bowl as well.
Put all the fruits into the grain mixture along with some raisins, mashed if needed.
Follow up this entire mixture by adding some yoghurt to it, making sure it covers everything properly. You may proceed to add some wheat germ if needed as well.
As an alternative, you can add the fruits to the pot as well, making an even more consistent recipe.
8. Apple Rice Pudding (For 10 Months and Above)
Some nice sweetness to go with the sweet and sour taste of the apple.
Ingredients
Brown rice
Water
Ginger
Cinnamon
Brown sugar
Raisins
Apples
Method
Take a good-sized pan and add together all the fruits, grains, spices and ingredients together to it.
Place the pan over a medium flame and let it sit for about half an hour or so. This should be time enough to soften the rice. Around this time, the mixture itself will get a little soupy and a nice aroma will start rising, too.
Add milk to this mixture and let it cook for another 8-10 minutes. Ensure to keep the mixture soupy and not get gravy-like. Keep stirring it throughout so that it doesn’t stick to the pan, and add milk and water if needed.
Once cooked, cool it down and serve it to the child.
9. Apple Banana Custard (For 8 Months and Above)
For your little one who has a sweet tooth, this recipe will be quite a delight for him.
Ingredients
Apple, peeled and cored
Banana, peeled and deseeded
Cinnamon powder
Breastmilk or formula
Method
Prepare the oven by heating it to around 180 degrees.
Steam the apples and combine all ingredients in the blender to make a smooth mixture.
Pour this in a baking dish and let it sit in the oven for around 15-20 minutes.
Stick a knife in the mixture to check for softness and take the tray out when right.
10. Apple Papaya Dish (For 10 Months And Above)
Combine different fruits for a great tasting experience.
Ingredients
Sweet apple
Peeled and chopped papaya
Method
Steam the apples after peeling and chopping them and blend them until they are mush.
Add the papaya to this and run it again until it turns into a consistent puree.
Making sure your baby can eat apples and develop a liking for them can open an avenue of various food items for your child. By opting for an apple stew recipe for your baby you can create a wide variety of recipes and let your baby enjoy the beautiful flavours.
Also Read: Homemade Custard Recipes for Babies Read more
Suggested for you

Your Baby This Week : 12 Month Week 2 Old
There is a good chance that your child will be fussy when you leave him alone. 12 to 18 months is the prime time for separation anxiety a psychological term that means your child can’t bear to be without you. You may be tempted to sneak away, but that is only going to lead to a meltdown! It is best to say good-bye with a quick kiss and head out the door and reassure your little one that you will be back soon. Your babys tears will subside soon after you’re out of sight. It’s hard not to feel guilty, but in the long run, you’ll be helping your child to become more independent.
Read more
Suggested for you

Postpartum Depression - Reasons, Symptoms and Treatment
Postpartum depression is only a medical term but all together it is a feeling of pain, grief, sadness and gloom followed by immense pain and finally leading you to depression. I have myself faced this problem for around 2 months post delivery. I found the following reasons that led me to postpartum depression:
What Leads to Postpartum Depression?
1. Lack of Attention/ Care to a New Mother
When I was pregnant I was the star, but after the birth of my baby, when I was weak and needed more care, I was told to be responsible and I was obviously taken less care as compared to my pregnancy days. I was scolded at times by my elders for not properly feeding my baby and other related issues.
2. Insecurities
I used to constantly get the feeling that I will be a failed mother in future. I was so sure about it, I was initially unable to hold my baby, could not breastfeed her properly and felt like a complete failure in this phase of my life.
3. Confined to Boundaries
I felt my normal life, the life I was leading where I was free to move had actually changed. I was not allowed to go out, I was supposed to be restricted to the home and that filled my heart with gloom and detached me from society.
4. Body Changes
I had a normal delivery and a smooth pregnancy, but post-delivery my body experienced a drastic change in terms of weakness. The hair fall was unimaginable.
5. Dependence on Others
I had very less knowledge in handling a baby, so the people around me, especially the elders, would impose their standard myths of breastfeeding and taking care of the baby on me. Like don't breastfeed after a head wash, don't feed while you are not well or you have a fever.
7. Lack of Awareness
I feel there is very less awareness related to this topic in India, I was unaware of this topic and I was scared to come out and discuss this issue as I thought that probably people will think I have gone mad.
Symptoms of Postpartum Depression
Constantly irritated and crying
I stopped trusting people around. I felt even my husband could not handle her and could not hold her properly.
Always breaking into verbal abuse and fights.
If my baby used to sleep, then also I would remain awake. I almost lost my sleep.
I used to feel that I should actually commit suicide as I am useless, failed mother and this was the final call for me to actually find out the reason for my condition and start working on it.
How to Fight Postpartum Depression
1. You Are the Answer
This problem is all in your head and only you yourself can come out of it. And the very favourable phrase that " This too shall pass" gave me a lot of mental strength and I finally believed that the situation will not remain the same, time will definitely change and everything will be fine.
2. Proper Diet Regime
Follow a strict diet regime, no skipping of meals.
3. Take Help of the Internet
I sought the help of the internet and all the sites would suggest me to practise yoga. But trust me I was unable to do so. Initially, it is very difficult to include yoga and meditation in your schedule. But I would watch funny videos, would buy something and basic internet activities that made me feel still attached to the world.
4. Start Believing in Yourself
It is good to listen to your elders but trust your paediatrician more. Don't let yourself get carried away with the myths. Be diligent and careful enough to make sure your baby receives an adequate amount of breast milk in the initial months of her life.
3. Dark Chocolate and Banana
Antidepressants. Try it, you will yourself feel so.
Today I feel I never had that depression in me but trust me, when I was undergoing that situation, it was the worst time I had seen in my entire life. You are not alone, this problem is very common in new mothers. The only concern is the lack of awareness in India. I feel there should be programmes where pregnant women must be educated regarding this alarming issue. Rehabilitation clubs for postpartum depression should be formulated and this taboo of seeing your doctor or telling someone, feeling ashamed to share your feelings and constantly thinking people will consider you demented should not be there and you should be free to discuss your problems with your loved ones or a counsellor. If still, the problem persists then you should not take a minute to visit your doctor and stick to their advice and prescriptions.
Disclaimer: The views, opinions and positions (including content in any form) expressed within this post are those of the author alone. The accuracy, completeness and validity of any statements made within this article are not guaranteed. We accept no liability for any errors, omissions or representations. The responsibility for intellectual property rights of this content rests with the author and any liability with regards to infringement of intellectual property rights remains with him/her. Read more
Suggested for you
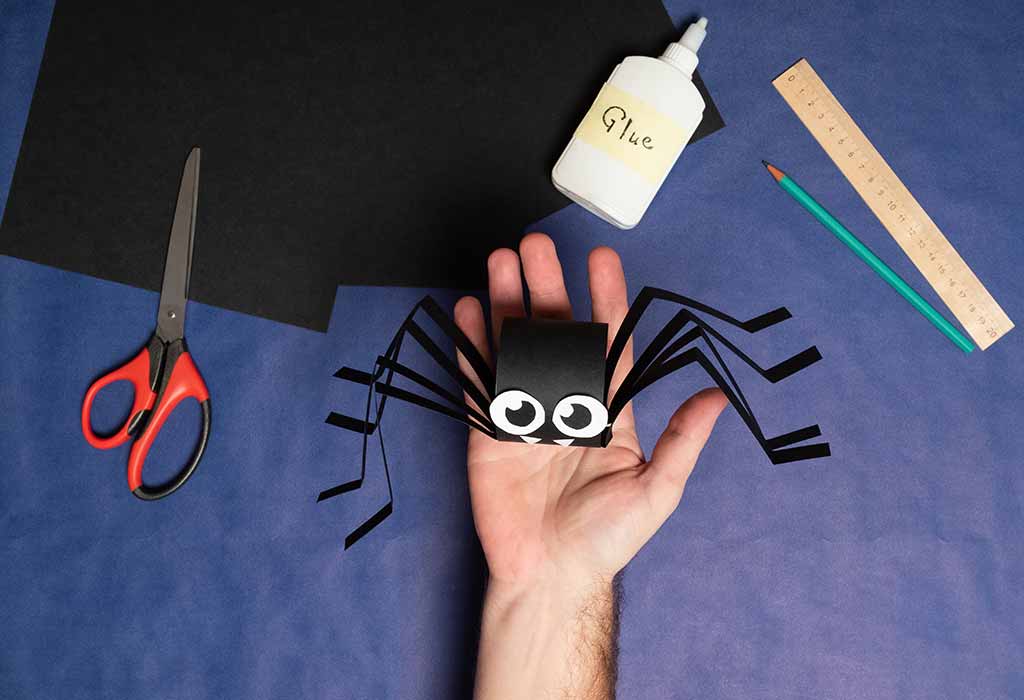
10 Best Spider Crafts That Kids Will Definitely Enjoy
Spiders were believed to be evil companions of witches in medieval times as they prefer to be in dark places. Thus, exciting and fun Halloween Spider Craft is a significant part of festive decoration during fall every year that helps to create a spooky ambiance in your space. From bouncing spiders that hang from the ceiling at parties to a giant spider web that can freak out your neighbors, there are myriad possibilities of a fun crafting session with a spider that you can explore with your little one.
Fun Spider Crafts for Kids
Spiders have been a subject of a generations-old classic children’s song, “The Itsy-Bitsy Spider,” and also a part of spine-chilling Halloween décor. From a cluster of huge, hairy, and creepy to cute, spider craft preschool can help kids create an entire rainbow’s worth of activities. While they are definitely spooky, they also remind us that patience is required for navigating life to reach the desired position. The spider is skilled in the art of illusion and entrapment.
Despite being cunning and carnivorous arachnids commonly seen in haunted houses, spiders play a critical role in maintaining the balance in the natural ecosystems. Spiders are even a symbol of happiness, creativity, and wealth in many cultures around the world. With more than 45,000 species of spiders that come in a stunning array of color combinations, they pave the way for a wide range of spider-themed art and spider web craft activities.
With so many varieties, your child can fully explore creativity as they engage in making the most realistic spiders for the Halloween decor. This activity would also allow kids to beat their boredom blues during a vacation break and feel proud to display them at home and school. Here are some spider craft preschool ideas to try using readily available and inexpensive materials around you.
1. Hand Printed Spider
This simple Spider handprint is a beautiful reminder of what wonders your little ones’ tiny hands can do. This is the perfect craft for a Halloween play date or a Spider-themed Party.
What You Will Need
White paper
Black Tempera paint
Glue
How to Do
Paint your child’s palm and four fingers with black paint. Leave out the thumb since spiders have only 8 legs.
Print onto the paper and use the other hand to repeat the process, making sure to overlap the palms.
Stick a couple of googly eyes with glue, and your spider art is ready.
2. Wine Cork Spider Craft
This little Spider Craft is pretty cute and can be made in under 5 minutes! Stamping with kids is so easy while using a DIY re-usable stamp pad.
What You Will Need
Wine Corks
Black Marker
Googly Eyes
White Paper
Glue
Shallow Painting Tray (Styrofoam food trays or paper plates can be recycled)
Black Washable Paint
How to Do
Dip one end of the wine cork into the black paint and press it hard onto the white paper. Repeat as many times as they want, making black circles that represent creepy, crawly spiders.
Once the paint dries, eight legs can be drawn onto the black circle and finished off by sticking googly eyes with glue.
You can use the black markers to make dotted lines from which the spider hangs.
3. Spider Paper Plate Craft
This Spider paper plate craft for children can be made using leftover paper plates after a birthday or Christmas party at home.
What You Will Need
Small Paper Plates (2 per spider)
Acrylic Paint
Scissors
Paint Brush
Glue
Stapler
Googly Eyes (8 per spider)
Bright and Sparkly Chenille Stems (4 per Spider)
How to Do
Paint the underside of two small paper plates with acrylic paint and set them aside to dry.
Cut four chenille stems in half to make eight spider legs. Line up your two painted paper plates with the paint facing out on both sides. Staple the plates at the top to join them.
Insert a spider leg between the two plates about one inch apart and staple the two plates together. Place four legs on each side, making a total of eight legs. Put additional staples around the paper plates to secure them in place. Alternatively, you can use a tape for each pipe cleaner spider leg to attach to one of the unpainted sides of the paper plates.
Apply a line of glue around the edges of the paper plate over the taped-down legs. Finally, place a second paper plate onto the glue with the painted side facing outwards.
Bend the chenille stems to make them look like the legs of the spider.
Add eight googly eyes on top.
4. Pom Pom Spider
This fabulously adorable pom-pom craft is sure to delight your kids by making a great addition to many Halloween costumes and Nursery Rhymes.
What You Will Need
Scissors
Googly Eyes
Pipe cleaners (in any color) - 2
Pom Pom (Large/Black)
PVA White glue
How to Do
Cut the pair of pipe cleaners in half to make four shorter pieces.
Trim any sharp points at the ends of the pipe cleaners.
Gather the four pipe cleaners to align them at the ends and make the spider’s eight legs. Bend down each leg around the same point. Place the spider legs on a table or flat surface to see if the whole craft can stand upright. Align each leg by straightening and bend them to make them all the same height as the other legs.
Tie them together in the middle with a short piece of pipe cleaner or string. Fan out the legs outwards.
Glue two or more googly eyes on the pom-pom. Cut out a mouth from felt, craft foam, or paper and stick it below the eyes.
Glue the pom-pom at the center of the pipe cleaner legs and let it dry completely before moving.
5. Paper Spider
This craft is most easy to recreate for a bugs and critters-themed party on Halloween.
What You Will Need
Black construction paper
Googly Eyes
Glue
Scissors
Crayons or colored pencils (optional)
How to Do
Draw and cut a large oval shape out of black construction paper for the spider’s body and a smaller circle for the head.
Cut out four thin strips from black construction paper, which should be about five times the width of the spider’s oval body.
Flip and stick the head on top of and four pairs of legs onto the underside of the oval body.
Fold each of the eight legs in the middle, making sure that the beginning of each leg is up towards the body. Place the spider on a flat surface.
Trim the ends of the legs so that all of them can touch the ground.
Glue the googly eyes or draw eyes with crayons or color pencils.
Tape a string at the back to hang it from the ceiling or window frame.
6. Egg Carton Spider
All you need is simple art supplies and an egg carton to make a spider that won’t crawl on you in your sleep.
What You Will Need
An egg carton
Black Paint
Paint Brush
Scissors
Pipe Cleaners-4
Sharp Pencil
Googly eyes
Glue
How to Do
Cut one cup out of a cardboard egg carton.
Use a sharp pencil to poke two holes in each side of the cup to thread the legs in.
Paint the cup black and let it dry.
Insert the four pipe cleaners through the holes to make eight legs.
Bend the pipe cleaners to make them look like legs. Trim them if necessary to make them the right length.
Stick the googly eyes.
7. Spider Web Craft
This craft encourages fine motor skills practice for younger kids and turns out cute spider webs.
What You Will Need
Paint
String or Wool
Paper
Marker
How to Do
Dip string in paint to cover the entire length. (Put paint on a paper plate).
Make random designs on paper by placing strings on the paper.
Repeat to form a web.
Dip your finger in paint and make a fingerprint on the paper on the web.
Leave it to dry.
Draw spider legs using markers near the fingerprint.
8. Yarn Spider
When autumn is in full swing, you can have a few creepy bugs crawling around your house or classroom.
What You Will Need
Styrofoam balls (various sizes)
Pipe cleaners
Hot glue gun
Yarn (multiple colors)
Googly eyes
How to Do
Wrap yarn around your Styrofoam ball and secure it with a bit of hot glue.
Take a chopstick and pierce two holes, one on each side of your yarn ball.
Insert pipe cleaners (cut into “legs”) with four legs per side.
Stick on the googly eyes.
9. Aluminum Foil Spider Craft
Instead of conventional or on predictable lines, break the monotony by using shiny aluminum foil for this craft.
What You Will Need
Aluminum Foil
Tape
Scissor
Wiggle Eyes
Cardstock Paper
How To Do
Crumble a piece of aluminum foil into a small ball.
Cut six to eight strips (~5 “x0.25”) from black cardstock paper.
Fold the black paper strips as shown below, making the legs of the spider.
Tape the paper strips and eyes to the foil ball.
10. Spider Pumpkins
Pumpkins are an essential part of seasonal Fall decorations. Cute little pumpkin spiders can be crafted by pre-schoolers in an instant and added to the classroom display.
What You Will Need
Black Paint and Paint Brush
Scissors
Glue
Mini Pumpkin
Googly Eyes
Black Construction Paper
How To Do
Paint the pumpkin black and leave it to dry.
Cut out eight legs from black construction paper (4.5x0.75 inches).
Fold back and forth eight legs.
Stick the googly eyes on the pumpkin’s front face.
Glue the legs around the pumpkin as feet for the spider.
Research suggests that craft activities can be a form of creative expression for kids rather than just a way to while away time. It can be a great stress buster that helps develop critical thinking, boosts counting and pattern recognition, supports team-building, and fosters mental growth. So, bond with your child with these spider craft ideas and help them learn new skills from the activity. By allowing them to choose colors and make the designs themselves, it will help enhance their cognitive and motor abilities and foster their imagination while giving you cute decor items.
Also Read:
Bird Crafts for Children
Pine Cone Crafts for Children
Caterpillar Crafts for Children Read more
Suggested for you
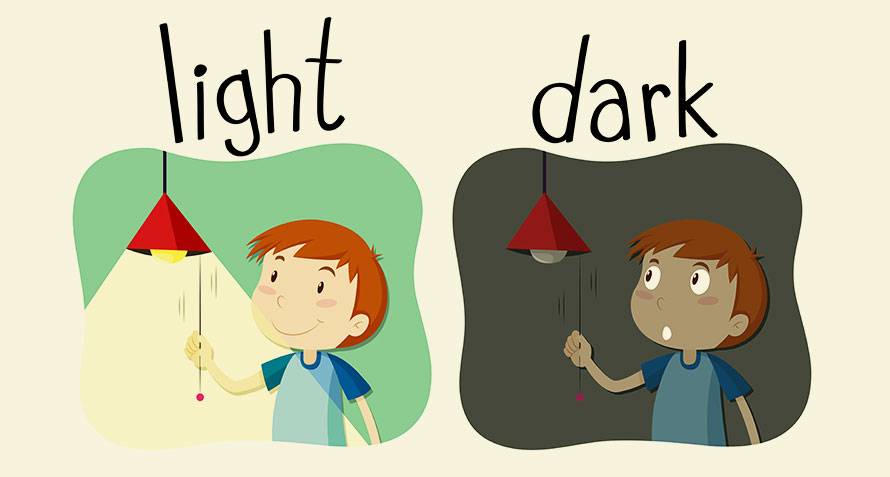
A Guide to Teach Preschoolers About Adjectives
As your preschooler begins to get more and more talkative by the day, it is imperative that you teach him about adjectives. Read this guide to know how you can accomplish this.
Now that your child is a preschooler, he will want to share his thoughts and experiences with you. It is only natural that he will have limited vocabulary at this stage in life. So how can you help your child express himself better? Simple. All you have to do is teach him how to use adjectives.
Simply put, adjectives describe nouns and pronouns, and are used by all of us in daily speech. Why, even your little one will be using some everyday – without even knowing about it. For instance, if your child dips his hand in his bath and exclaims, “Ooh! Hot water!” he just used the word hot as an adjective to describe the water. Follow this simple guide to teach your child about adjectives:
1. Show and Tell
Just like adults, kids prefer application to theory. So instead of just telling them what adjectives are, use them in your speech and then talk about them. Start with one concept at a time – trying to teach too much too soon will only confuse your child. Also, it's best to start with something your child is already familiar with - like shapes, seasons and colours.
2. Make a Game of it
In order to get your child interested in learning, you need to come up with some interesting games to keep him engaged. What does your child like? Food? Flowers? Colouring? Why not try using flash cards to get him to give the appropriate adjective(s)? Or if your child likes to draw and paint, you could give a word and tell him to draw or paint an adjective for it.
3. Practice, Practice
To ensure that your child remembers what you are teaching him, you need to revise regularly. Set aside some time at least two-three times a week just for revision. And once you are sure he has learned something, you can move on to a new list of adjectives. It is important for him to revise what he has already learned so that he doesn't forget it, especially because he is learning new concepts not just with you, but also at school and via self-learning.
Kids are natural storytellers, and teaching them how to use adjectives correctly will enhance their storytelling skills. Give it your best shot! Read more
Anu Sharma has added a new answer
Expecting Mom due in 2 months
6 hours ago
Q. can i use pain relief spray at time of pregancy

Anu Sharma
Mom of a 1 yr old boy
5 hours ago
A. yes
Anu Sharma has added a new answer
Guardian of 0 children
6 hours ago
Q. hi iam 13th week pregnant my mind is completely in pressure stress and I cried alott does this affect my baby or baby growth
Anu Sharma
Mom of a 1 yr old boy
5 hours ago
A. yes. mood swings are normal
Rashmi has added a new answer
Mom of a 1 yr 8 m old child
6 hours ago
Q. #asktheexperts 300 vochure

Rashmi
Mom of a 9 yr 8 m old girl
5 hours ago
A. If you have any question concerning the parenting platform then please feel free to post your question once I know what are you willing to ask with all the necessary details associated it will be easier for me to give you appropriate help and response onto your question
Rashmi has added a new answer
Mom of a 9 m old child
6 hours ago
Q. My daughter (9months old) is not at all willing to drink aptamil and breast milk I am getting only 100 ml per day now. I have tried adding jaggery powder in aptamil but still she is not at all willing to drink.I tried to feed her with aptamil midnight when she was in deep sleep but still she woke up and started crying. I am not able to find any solution for this.Its been 2 days that I have started trying aptamil.So I will continue to try for another week and if she still doesn't drink can you suggest what can be done
Read moreRashmi
Mom of a 9 yr 8 m old girl
5 hours ago
A. For yourself I would recommend you Shatavari powder three times in the day to increase your lactation other than that since your child is six months complete you can give Amul Taaza milk to your child that is easier for the childhood digest and flavour is also good even if you want you can add some dry fruit powder saffron or turmeric for flavour change that’s also a good option to try these alternative
Dr Sameer awadhiya has added a new answer
Mom of a 1 yr 5 m old child
3 hours ago
Q. after delivey back pain is normal???

Dr Sameer awadhiya
Paediatrician
1 hour ago
A. If there is back pain you have to maintain a proper posture take a healthy diet and also do some regular exercise specially back extension exercises to strengthen muscles also you can take calcium and iron supplements suggested by yohur doctor imf still you are having weakness and other symptoms it needs a proper assessment
Abhaya Rajput has added a new answer
Guardian of 0 children
3 hours ago
Q. Its been 7 days my 8 month old hasn’t pooped. He looks good not at all cranky. Eating normally. What to do?

Abhaya Rajput
Mom of a 14 yr 4 m old boy
23 mins ago
A. Hello there ma’am please do not worry about it too much. Sometimes baby does not poop for 7-10 days. Please massage baby stomach clockwise and anti-clockwise. You can also apply hing water on baby stomach. Also do some cycling leg exercises of the baby to relieve from constipation and gas. Please make the baby burp after every feed. Mother should chew saunf and ajwain after every meal.
Thanks and take care
Check out this new Memory
Aditya Singh sirohiya
Guardian of a 11 m old boy
3 mins ago

Like
Comment
Share
0 Likes
0 Comment
Check out this new Memory

Punam kumari
Mom of a 4 yr 1 m old girl
5 mins ago
#amazingbaby

Like
Comment
Share
0 Likes
0 Comment
Check out this new Memory
Punam kumari
Mom of a 4 yr 1 m old girl
7 mins ago
#amazingbaby

Like
Comment
Share
0 Likes
0 Comment
Check out this new Memory
Maryam Mallick
Guardian of a 2 m old boy
9 mins ago
#amazingbaby

Like
Comment
Share
0 Likes
0 Comment
Check out this new Memory

Vinita Kumari
Mom of a 7 m old girl
12 mins ago

Like
Comment
Share
0 Likes
0 Comment
Tell us more about yourself get More Personalised
 Infant0 to 6 Months
 Baby6 Months to 2 Yrs
 Toddler2 to 4 yrs
 Kids4-6 yrs
 Big Kids6+ yrs
 Expecting
 Trying to Conceive

