

.svg)
.svg)
.png)

Enter Child Details

Add Profile Photo


Videos you might be interested in


Videos you might be interested in
Videos you might be interested in
Suggested for you

Check out this new Memory

Neha Kashyap
Mom of a 1 yr old boy
11 mins ago
#stylishbaby
Like
Comment
Share
1 Likes
0 Comment
Check out this new Memory

Vishal Saha Chowdhury
Guardian of a 6 m old boy
14 mins ago
#grandphoto

Like
Comment
Share
1 Likes
0 Comment
Suggested for you
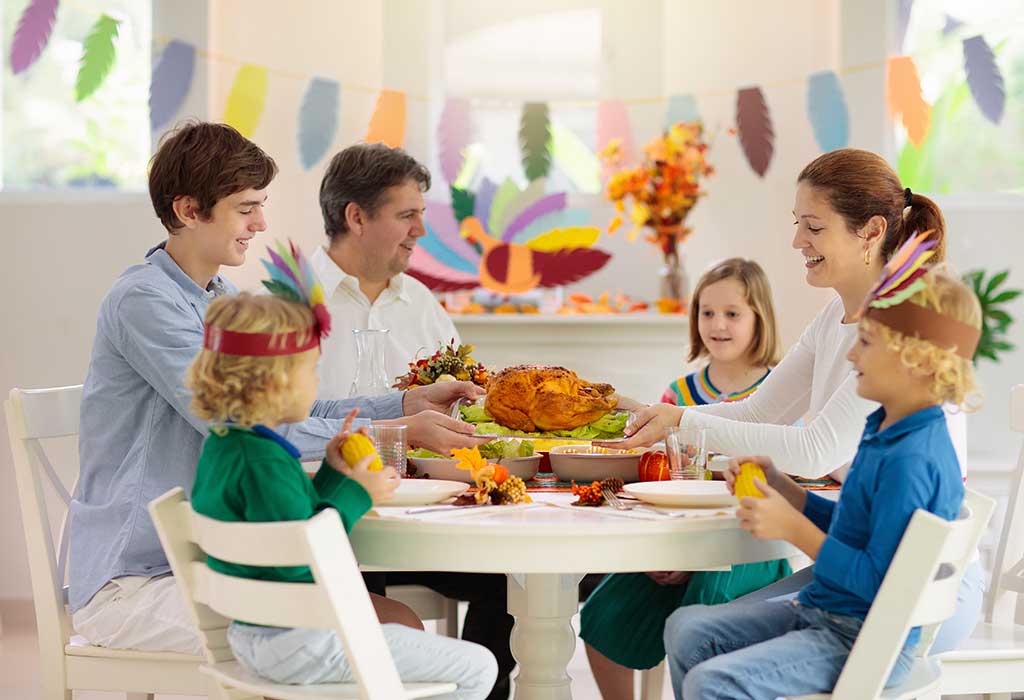
15 Fun and Easy Thanksgiving Craft Ideas for Kids
It’s time to be thankful! Thanksgiving is a holiday of celebrating and giving thanks for the blessings of the preceding year, and it is gaining a lot of popularity in different parts of the world. As more and more people celebrate this festival of gratitude and happiness worldwide, you must be wondering how can you educate your kids about this festival and involve them in the celebrations. Read on to find out how you can make this festival a lot of fun for your kids.
Interesting DIY Thanksgiving Art and Craft Ideas for Children
As you prepare to bring your family and friends together for this year’s Thanksgiving celebrations, keeping kids occupied can be a worry. Here is the perfect list of crafts that will keep your kids busy and double as beautiful Thanksgiving party decorations.
Thanksgiving Crafts for Toddlers (1-3 Years)
Keeping toddlers busy is a challenging task as they are still dependant on their parents to do a lot of things. The crafts given here will need adult supervision, but you can get them in the festive mood and teach them all about Thanksgiving.
Family Tree
This finger painted family tree will help you introduce your toddler to all the family members coming over for the Thanksgiving celebrations.
Materials required
White paper
Black or brown sketch pen
Red, orange, brown water colours
Procedure:
Take the white paper and draw the tree trunk, branches, and twigs using the black or brown sketch pen.
Get the water colours ready and dip you toddler’s finger in the different colours and press it on the twigs and branches, making the impression look like leaves.
Let the paint dry. Once it has dried, write the names of different family members against each leaf.
[caption id="attachment_261599" align="alignnone" width="320"] Source: Pinterest[/caption]
Painted Corn Husk Headband
The best way to use corn husk is by making Thanksgiving craft with it. This is a great Thanksgiving craft for toddlers of the age 2 or above as it requires some artistic paint strokes.
Materials Required
Dried corn husks
Paint
Glue
Headband
Procedure:
Stick the corn husks together in the shape of a semi-circle.
Once the glue has dried, let your toddler explore her artistic side by painting the corn husks in different colours.
When the paint dries, stick the corn husks on a hairband and let your toddler wear her beautiful creation.
[caption id="attachment_261571" align="alignnone" width="342"] Source: Pinterest[/caption]
Turkey Craft for Toddlers
Painted hand turkeys look super cute, and your toddler would love making them. So go ahead and indulge your little one using this Thanksgiving art for toddlers.
Materials required
A few cardstock papers
Paint
1 googly eye
Crayons
Procedure:
Dip your toddler’s palm in brown paint and dip each of her fingers in different colours.
Let your toddler stamp her hand on the cardstock paper and repeat this step for as many paintings as you want to make.
When the paint dries, stick a googly eye on the thumb’s impression and draw small details like the turkey’s feet, beak, and tongue with the crayons. Your painted turkey hand is ready.
[caption id="attachment_261577" align="alignnone" width="420"] Source: Pinterest[/caption]
Corn Cob Craft Painting
Every Thanksgiving celebration is incomplete without corn on the cob. But what about some corn on the cob painting? Here’s how you can make your toddler enjoy some corn cob craft painting.
Materials required
Corn on the cob
Paint
Paintbrush
White paper
Procedure
Remove the husk from the corn and paint the corn with different colours, painting a part of the corn with one colour.
Once that’s done, let your toddler roll the white paper, making a vibrant painting.
Let the paint dry, and then you can hang it up by attaching a piece of thread to it.
[caption id="attachment_261579" align="alignnone" width="407"] Source: Pinterest[/caption]
Pumpkin Handprint Card
In the world of instant messaging and emails, letters and cards are only sent out during festivals. So use this opportunity to involve your munchkin in the celebrations.
Materials required
Green, white, and orange papers
Orange and green paint
Scissors
Procedure:
Fold the green paper to make a card and keep it aside.
Cut out a circle from the orange and white papers, keeping the orange circle bigger than the white.
On the green card, first, stick the orange circle and then paste the white circle on the orange one.
Dip your toddler’s hand in the orange paint and stamp it on the white circle.
Dip one of your toddler’s fingers in green paint and press her finger on the leftover white paper.
Cut out the finger impression and stick it on top of the pumpkin, making it the pumpkin stem.
[caption id="attachment_261583" align="alignnone" width="297"] Source: Pinterest[/caption]
Thanksgiving Crafts for Preschoolers (3-4 Years)
Do you have a restless preschooler who has too much energy and not enough to do? Here is the solution to your problem, the following list of Thanksgiving crafts for preschoolers will use up all of their energy, and you won’t even have to leave the house.
Thanksgiving Paper Pumpkins
Let your preschooler tell you all she is thankful for with this simple Thanksgiving paper craft.
Materials required
Orange and green coloured paper
Scissors
Stapler
Procedure:
Cut out eight long strips of the orange paper and two strips of the green paper.
Make your child tell you all she is grateful for this year and write it down on the orange strips.
Staple the left ends of the orange strips together and then staple the other end together to make a pumpkin.
Roll up the green paper strips to make a pumpkin vine and staple them to the top of the pumpkin. Your gratitude pumpkin is ready!
[caption id="attachment_261588" align="alignnone" width="431"] Source: Pinterest[/caption]
Thanksgiving Pasta Necklace
Your kids will love making and wearing these festive necklaces, so get ready to find pasta all over your house.
Materials required
Dyed pieces of macaroni or penne pasta
A long piece of thread or yarn
Procedure:
Give the piece of thread and the pasta to your little one.
Knot one end of the thread and show her how to pass the pasta pieces through the thread.
She can use different colours to create a unique pattern and once she is done, knot the other end of the thread and tie it around her neck.
[caption id="attachment_261589" align="alignnone" width="412"] Source: Pinterest[/caption]
Turkey Craft for Preschooler
This fun turkey craft for kids will keep your preschooler engaged and make her use the new skills she is learning at this age.
Materials required
Brown foam
Googly eyes
Glue
Clothespins
Feathers
Procedure:
Cut out two circles (one bigger than the other) from the brown foam and stick the two circles together.
Stick the googly eyes and a small orange triangle (cut from a coloured paper) to make the turkey face.
Stick the feathers on the clothespins and make your little one use those fine motor skills to press the clothespins and place them around the brown foam.
[caption id="attachment_261590" align="alignnone" width="396"] Source: Pinterest[/caption]
Thanksgiving Leaf Garland
You can finally use those brown paper bags you have lying around the house. This beautiful leaf garland will keep your baby occupied, and it will also make for a pretty Thanksgiving decoration, so make sure you try it out!
Materials required
Brown paper bags
Ribbon
Glue
Scissors
Clothespins
Paint
Procedure
Draw big autumn leaves on the paper bags and let your child paint these leaves in different colours.
When the paint dries, cut out the leaves. On a long piece of ribbon stick some clothespins, and let it dry.
Stick the paper leaves on the clothespins, and you’re done! Hang this garland to add some festive cheer to your house.
[caption id="attachment_261591" align="alignnone" width="382"] Source: Pinterest[/caption]
Letter Feather Turkey
If your little one is learning the alphabet at school or you’ve taught her how to spell her name, this simple Thanksgiving craft will help your preschooler brush up her skills.
Materials required
A white paper plate
Orange and brown paper
Scissors
Glue
Brown crayon
Googly eyes
Procedure
Set your munchkin’s artistic side free and let her colour the paper plate using the brown crayon.
While she is busy colouring, cut the coloured sheets in the shape of turkey feathers and label each feather with one letter of your child’s name.
When you are done, hide the feathers in different parts of the room and make her look for them.
Once she finds all the letters ask her to arrange the feathers according to the spelling of her name and paste the feathers to the paper plate.
Add googly eyes and a beak to complete the turkey’s face.
[caption id="attachment_261592" align="alignnone" width="500"] Source: Pinterest[/caption]
Thanksgiving Crafts for Children (4-8 years)
If your kids are old enough to do some art and craft on their own, have them make these amazing Thanksgiving crafts. They can even take them to school and show them to all their friends.
Winter Gloves Turkey
These bright turkey gloves will not only keep your hands warm but also amuse your little one immensely.
Materials required
Brown or tan coloured glove
Green, yellow, red, and blue felt paper
Googly eyes
Glue
Scissors
Procedure
Cut the felt papers (two of each) in the shape of turkey feathers and stick the two parts together.
Stick the felt feathers on all the fingers of the glove. Stick the googly eye and a small beak on the thumb making the turkey’s face.
Make your kids wear these cute turkey gloves and have fun with them.
[caption id="attachment_261594" align="alignnone" width="439"] Source: Pinterest[/caption]
Felt Pumpkin Pie Coasters
The upcoming Thanksgiving celebrations will definitely require some coasters, so why not make some with your kids?
Materials required
White, orange, and tan felt paper
Glue
Scissors
Procedure
Cut the orange and tan felt paper in a conical shape resembling the shape of a piece of pie. Make sure the orange piece is smaller than the tan piece.
Cut the white felt paper in the shape of a cloud to resemble whipped cream.
Make your kids stick the orange felt on the tan felt and add the white felt on top of the orange felt. Arrange the pieces to make it look like a piece of pumpkin pie.
Viola! Your pumpkin pie coasters are ready to add to the Thanksgiving vibe.
[caption id="attachment_261600" align="alignnone" width="379"] Source: Pinterest[/caption]
Thanksgiving Turkey Bookmark
If you’re raising some bookworms, then your kids will love this paper turkey craft.
Materials required
Brown felt paper
Glue
Scissors
Popsicle stick
Procedure
Cut the felt paper in the shape of an autumn leaf, use the first leaf as a stencil to draw and cut out another one.
Stick the two pieces of felt together.
When it’s dry, stick the popsicle stick on the bottom of the leaf.
[caption id="attachment_261596" align="alignnone" width="366"] Source: Pinterest[/caption]
Turkey Craft for Children
This funny turkey headband will look super cute in your Thanksgiving pictures. So make one for every member of your family!
Materials required
Brown, yellow, orange, and green paper
Googly eyes
Brown headband
Scissors
Glue
Procedure
Cut out two circles (one smaller than the other) from the brown paper and stick them together in the figure of eight to make the turkey.
Cut out the feathers from the yellow, orange, and green paper.
Stick the turkey’s body on a brown headband and add the feathers behind the body.
Stick the googly eyes and a yellow beak to make the turkey’s face.
Make your kids wear these hilarious headbands and click many pictures!
[caption id="attachment_261597" align="alignnone" width="361"] Source: Pinterest[/caption]
Thankful Wind Spinners
Let your child’s gratitude flow and what better way to express it than put it on a wind spinner!
Materials required
White paper
Crayons
Sketch pens
Scissors
Procedure
Make your child draw a spiral on the white paper.
Around the spiral make her write the things she is thankful for.
Let your child colour the other side of the paper. When she is done, cut the spiral carefully.
Attach a piece of thread on top of the spiral and hang this wind spiral to celebrate the feeling of gratitude and the spirit of Thanksgiving.
[caption id="attachment_261598" align="alignnone" width="378"] Source: Pinterest[/caption]
These fun art and craft activities are sure to keep you and your kids busy this Thanksgiving season. Let us know which ones you tried to make with your kids and have a happy Thanksgiving! Read more
Suggested for you

10 Effective Home Remedies for Whitening Your Teeth at Home
There are many factors responsible for making your teeth lose its spark and shine. As we get older, our teeth naturally start to lose their white sparkle and become dull. Added to this, poor oral hygiene, plaque, and certain foods can stain our teeth or erode the enamel making it look yellow or light brown. But the good thing is that you don’t always have to spend a huge amount of money by visiting a dentist to get your teeth whitened. There are several natural home remedies that you can try to whiten your teeth. So check out these home remedies for teeth discolouration.
How to Whiten Your Teeth Naturally at Home
As you age, your teeth may start turning yellow.
Several factors cause the teeth to turn yellow, such as staining, thinning of the enamel, poor diet, using antibiotics, etc. To prevent this from happening further, certain lifestyle choices need to be incorporated. Limiting staining foods and sugar is necessary if you want to prevent your teeth from further damage. At the same time, eating nutritious foods and quitting smoking is also required.
To whiten the teeth that are already yellow, some of the issues that cause it must be tackled. Here are some methods to whiten your teeth naturally at home:
1. Baking Soda, Toothpaste, and Hydrogen Peroxide
The combination of baking soda, toothpaste, and hydrogen peroxide is an effective teeth whitening mix anyone can whip up at home. Baking soda acts as a mild scrub and hydrogen peroxide is a bleaching agent. A mix of the two can effectively remove stains and plaque on the teeth. To make them more effective, bind them with toothpaste. This will help them stay on the teeth for longer.
What You Will Need
Toothpaste, baking soda, hydrogen peroxide, and a toothbrush.
How to Do
Take two teaspoons each of toothpaste and baking soda in a bowl and add one teaspoon of Hydrogen peroxide to it. Mix them well.
Now spread the mixture on your teeth using a toothbrush.
Leave the mixture on your teeth for 5 to 10 minutes.
Later brush your teeth gently (with this mixture) and rinse your mouth.
Brush again with regular toothpaste or plain baking soda to get rid of the hydrogen peroxide.
2. Baking Soda and Hydrogen Peroxide
Hydrogen peroxide is a bleaching agent which is used in commercial whitening products; it can bleach the teeth and help you get rid of stains on your teeth and whiten them. Baking soda is a gentle abrasive that can scrub away stains.
What You Will Need
Baking soda, hydrogen peroxide, a soft toothbrush, and a small dish.
How to Do
Mix one teaspoon of baking soda with hydrogen peroxide in the small dish.
Apply the paste using a soft toothbrush on the teeth.
Brush gently in a circular motion for about 2 minutes.
Then rinse your mouth with water and brush with regular toothpaste.
3. Coconut Oil Pulling
Oil pulling is an ancient technique used to remove bacteria and plaque from the teeth naturally. Coconut oil has antibacterial properties that keep the teeth clean and oil pulling makes them whiter.
What You Will Need
Organic coconut oil, baking soda, and a toothbrush.
How to Do
Place one tablespoon of coconut oil in your mouth.
Swish and swirl it around for 5 to 20 minutes.
Rinse your mouth.
Dip a damp toothbrush in baking soda and brush your teeth with it.
Rinse again.
4. Apple Cider Vinegar
Apple cider vinegar has acetic acid that can help remove stains and break down plaque. It is also rich in probiotics, minerals, and enzymes which keep the mouth bacteria-free.
What You Will Need
Apple cider vinegar, a toothbrush, and baking soda.
How to Do
Take a mouth full of vinegar and swirl it around like mouthwash for 2 minutes. Then rinse your mouth.
Dip the toothbrush in the vinegar and brush your teeth with it.
Then rinse your mouth and brush your teeth with baking soda or regular toothpaste.
5. Lemon Juice and Baking Soda
Lemon juice is rich in citric acid which has a bleaching effect on the teeth. When combined with a mild abrasive such as baking soda, the mixture can treat your stains.
What You Will Need
Lemon juice, baking soda, and a soft toothbrush.
How to Do
Mix one teaspoon of lemon juice with baking soda to make a thin paste.
With a soft toothbrush apply the paste on your teeth.
Gently brush in circular strokes for about 2 minutes.
Rinse thoroughly with water.
Later, brush your teeth with normal toothpaste.
6. Strawberry and Baking Soda Paste
Strawberries contain malic acid which is an effective stain remover. It is used in many commercial teeth whitening products. It is a mild abrasive which in combination with malic acid can effectively help you get rid of yellow teeth.
What You Will Need
Strawberries, baking soda, mortar, and pestle.
How to Do
Crush a large strawberry in a mortar and pestle.
Add half a teaspoon of baking soda to it.
Crush and blend the mixture until it is smooth.
Apply the mixture on your teeth and let it stay for about 5 minutes.
Later rinse your mouth and brush your teeth with regular toothpaste.
7. Turmeric Powder Paste
Turmeric can help remove surface stains on the teeth and plaque and make your teeth whiter. It also has anti-inflammatory and antimicrobial properties that are important for healthy teeth.
What You Will Need
Organic turmeric powder, a toothbrush, and water.
How to Do
Make a thin paste of turmeric powder with water in a small dish.
Use a clean brush to apply the paste on the teeth.
Brush gently for 2 minutes.
Rinse with water and then brush teeth with a regular paste.
8. Activated Charcoal
Activated charcoal has properties which allow it to absorb many types of chemical substances including the plaque accumulated on the teeth. A few treatments with activated charcoal can whiten your teeth.
What You Will Need
Activated charcoal powder, one toothbrush for applying the charcoal, and one for brushing afterwards.
How to Do
Dip the clean, wet toothbrush into the charcoal powder.
Apply the charcoal to your teeth in gentle circular strokes and cover your teeth with it.
Let the powder sit in the mouth for 2 minutes; do not swallow the powder.
Spit the powder out and rinse the mouth multiple times and brush off what is left with a clean toothbrush.
9. Homemade Whitening Toothpaste with Essential Oils
The combination of baking soda and coconut oil is a powerful plaque removing mixture. They also have antibacterial and anti-inflammatory properties.
What You Will Need
Baking soda, organic coconut oil, peppermint oil, spearmint essential oil, and cinnamon bark oil.
How to Do
Mix equal parts of baking soda and organic coconut oil.
Add a few drops of peppermint oil and cinnamon bark oil or spearmint essential oil depending on how you like it.
Mash the mixture to get a consistent paste.
Brush your teeth twice a day with this paste for a few days.
10. Lemon or Orange Peel and Salt Scrub
The inside or white-part of a citrus peel contains a substance called d-limonene. It is commonly used in commercially available teeth whitening products. Salt being a natural abrasive can help in the scrubbing process.
What You Will Need
Orange or lemon peel and sea salt.
How to Do
Sprinkle a little sea salt on the inside of the fruit peel.
Gently rub the salt side of the peel over your teeth for 2 minutes.
Rinse thoroughly and brush your teeth with regular toothpaste.
FAQs
Here is a common question about teeth discolouration.
1. Are Yellow Teeth Hereditary?
Yes, the colour of your teeth, similar to the colour of your eyes or hair, is genetically determined; however, their shades, tones, and hues are distinct. Since the enamel is translucent, the hues of the teeth are largely determined by the dentine’s colour. There are other factors which contribute to the natural appearance of the teeth such as the thickness of the enamel surrounding the dentin, opalescence, and opaqueness.
When you try these home remedies properly, they can help you treat teeth discolouration caused by stains and plaque. However, don't try these home remedies too frequently.
Also Read:
How to Deal with Teeth Sensitivity at Home
How to Treat Loose Motions (Diarrhoea) Naturally
Home Remedies to Remove Blackheads Read more
Suggested for you

Suggested for you
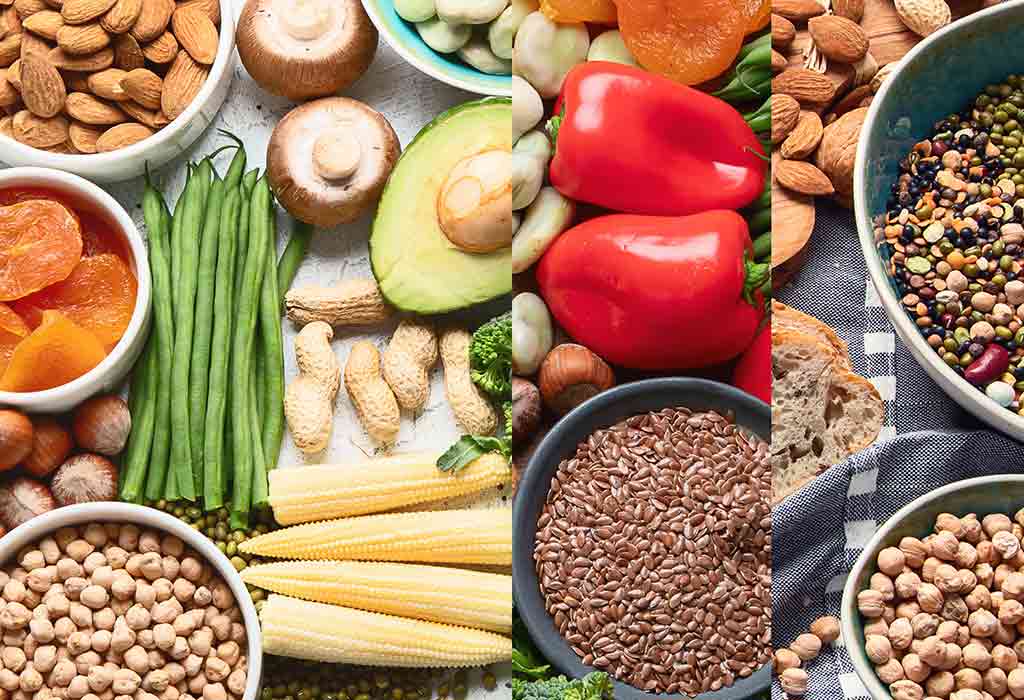
The Best Weight Loss Foods to Add to Your Diet
Certain foods can help you shed body weight because they help you feel full longer and help curb cravings. Today, we have a list of such foods that you can inculcate in your daily diet.
9 Foods to Help You Lose Weight
1. Beans
Inexpensive, filling, and versatile, beans are a great source of protein. Beans are also high in fiber and slow to digest. That means you feel full longer, which will stop you from eating more.
2. Soup
Start a meal with a cup of soup, and you may end up eating less. It doesn’t matter if the soup is chunky or pureed, as long as it's broth-based. You want to keep the soup to 100 to 150 calories a serving, which means you got to skip the dollops of cream and butter.
3. Dark Chocolate
Want to enjoy chocolate between meals? Pick a square or two of dark over the milky version. In one study, chocolate lovers who were given dark chocolate ate 15% less pizza a few hours later than those who had eaten milk chocolate.
4. Pureed Vegetables
You can add more veggies to your diet, enjoy your "cheat" foods, and cut back on the calories all at the same time. When Penn State researchers added pureed cauliflower and zucchini to mac and cheese, people seemed to like the dish just as much. But they ate 200 to 350 fewer calories. Those healthy vegetables added low-cal bulk to a portion of tasty comfort food.
5. Eggs and Sausage
A protein-rich breakfast may help you resist snack attacks throughout the day.
In a study of a group of obese young women, those who started the day with 35 grams of protein -- that’s probably way more than you’re eating -- felt fuller right away. The women ate a 350-calorie breakfast that included eggs and a beef sausage patty. The effect of the high-protein breakfast seemed to last into the evening when the women munched less on fatty, sugary goods than the women who had cereal for breakfast.
6. Nuts
Take a small handful of almonds, peanuts, walnuts, or pecans for a great snack on the run. Research shows that when people munch on nuts, they automatically eat less later.
7. Apples
Skip the apple juice and the applesauce and opt for a crunchy apple instead. Whole fruit blunts appetite in a way that fruit juices and sauces don’t. One reason being that raw fruit has more fiber. Plus, chewing sends signals to your brain that you’ve eaten something substantial.
8. Yogurt
Whether you prefer Greek or traditional, yogurt can be good for your waistline. A Harvard study followed more than 120,000 people for a decade or longer. Yogurt, of all the foods that were tracked, was most closely linked to weight loss. That doesn't prove that yogurt caused weight loss, but it stood out among other foods.
9. Grapefruit
Yes, grapefruit really can help you shed pounds, especially if you are at risk for diabetes.
All in all, having a healthy balanced meal is key to weight loss and a healthy lifestyle!
Disclaimer: The views, opinions and positions (including content in any form) expressed within this post are those of the author alone. The accuracy, completeness and validity of any statements made within this article are not guaranteed. We accept no liability for any errors, omissions or representations. The responsibility for intellectual property rights of this content rests with the author and any liability with regards to infringement of intellectual property rights remains with him/her.
Read more
Suggested for you

shilpi Bhandari has added a new answer
Guardian of 0 children
11 hours ago
Q. Hello
What is better normal or csec?

shilpi Bhandari
Mom of 2 children
10 hours ago
A. hello dear this is not about which is better this is all about your body and the condition of the baby no doubt the normal procedure is the painful but side effect are not there but after C6 you have to be little more careful and you have to take more precaution but again I am saying that this is not about the better one this is about the condition of your pregnancy
Santu has added a new answer
Expecting Mom due this month
8 hours ago
Q. #asktheexpert
1) till how many days after delivery baby needs to keep on uterus temperatures/warm temperature?
2) Can baby & mother both take bath after 24 hours of delivery?
Santu
Mom of 2 children
8 hours ago
A. It depends on moms and babys health I feel and suggest It's better to check with your doctor and follow their advise. That would be one of the best and safest option for your baby as of now. Take care.
shilpi Bhandari has added a new answer
Guardian of 0 children
7 hours ago
Q. dual marker test is for what purpose??
shilpi Bhandari
Mom of 2 children
7 hours ago
A. The double marker test helps determine whether the unborn baby has any risk of developing neurological abnormalities or mental disorders
Dr Sameer awadhiya has added a new answer
Mom of a 7 m old child
2 hours ago
Q. #asktheexperts
How to cure constipation in Babies

Dr Sameer awadhiya
Paediatrician
2 hours ago
A. Constipation in Babies less than 1 year is very common and more in formula fed babies and also when initially the semi solid food has been started after 6 months .
you can give bonnisan drops and some enzyme preparations in proper dose suggested by doctor angyd cow's milk should be avoided before 1 year of age . Medications are required but it shobuld be given only in medical supervision .
Rashmi has added a new answer
Trying To Conceive
2 hours ago
Q. Hello, I'm a hypothyroidism patients consumes 25mg tab,
can I take apple cider vinegar?

Rashmi
Mom of a 9 yr 8 m old girl
2 hours ago
A. I don’t think so ACv is going to be a problem but it would be better that you check with your doctor because Apple cider vinegar has couple of side-effects also also which a lot of people are not aware about so do not take it without your doctors advice and consent
Anitha S has added a new answer
Guardian of 0 children
1 hour ago
Q. #asktheexperts can i go for long trips with my 7 months old baby

Anitha S
Mom of a 7 m old boy
1 hour ago
A. if you want you may go by taking all the necessary things for baby but see through that your baby doesn't feel any discomfort
Check out this new Memory

Husna Ban
Mom of a 6 yr 11 m old girl and 1 yr old girl
New Memory
#stylishbaby

Like
Comment
Share
0 Likes
0 Comment
Check out this new Memory
Neha Kashyap
Mom of a 3 yr 9 m old boy
6 mins ago
Aditya deepu my cutest 😍

Like
Comment
Share
0 Likes
0 Comment
Check out this new Memory

Sukant choukikar
Guardian of a 3 m old girl
8 mins ago

Like
Comment
Share
0 Likes
0 Comment
Tell us more about yourself get More Personalised
 Infant0 to 6 Months
 Baby6 Months to 2 Yrs
 Toddler2 to 4 yrs
 Kids4-6 yrs
 Big Kids6+ yrs
 Expecting
 Trying to Conceive

